Deploy another Openshift cluster
To deploy multicluster applications, you will need another OpenShift cluster deployed.
In this LAB, Amazon Web Services (AWS) Public Cloud Provider is being used. You will need to add the AWS credentials into Red Hat Advanced Cluster Management, and deploy a second OpenShift cluster after adding the credentials.
Using Red Hat Advanced Cluster Management and having two OpenShift clusters installed, you will have all the necessary requirements to acomplish the tasks in this LAB.
Setup credentials
In order to create a new OpenShift cluster on AWS, you will need to set-up the AWS credentials into Red Hat Advanced Cluster Management first. This credentials will allow Red Hat Advanced Cluster Management to install the OpenShift cluster on AWS.
You can setup the AWS credentials using the Red Hat Advanced Cluster Management web interface, or using the command line interface (CLI).
To setup the credentials, you will need the following information:
-
Name of AWS credentials
-
Namespace where the credentials will be saved
-
AWS Access Key ID
-
AWS Secret Key
-
Base domain
-
A Global Pull Secret. If you don’t have one, you can get it from https://console.redhat.com/openshift/install/pull-secret
-
A SSH public and private key. If you don’t have one, you can generate it with the following command:
ssh-keygenSetup credentials via web interface
To setup the AWS credentials using the web interface, you need to enter to the Red Hat Advanced Cluster Management route first. You can find it in the open-cluster-management namespace.
After entering into Red Hat Advanced Cluster Management web interface, you need to enter into the "Credentials" section.
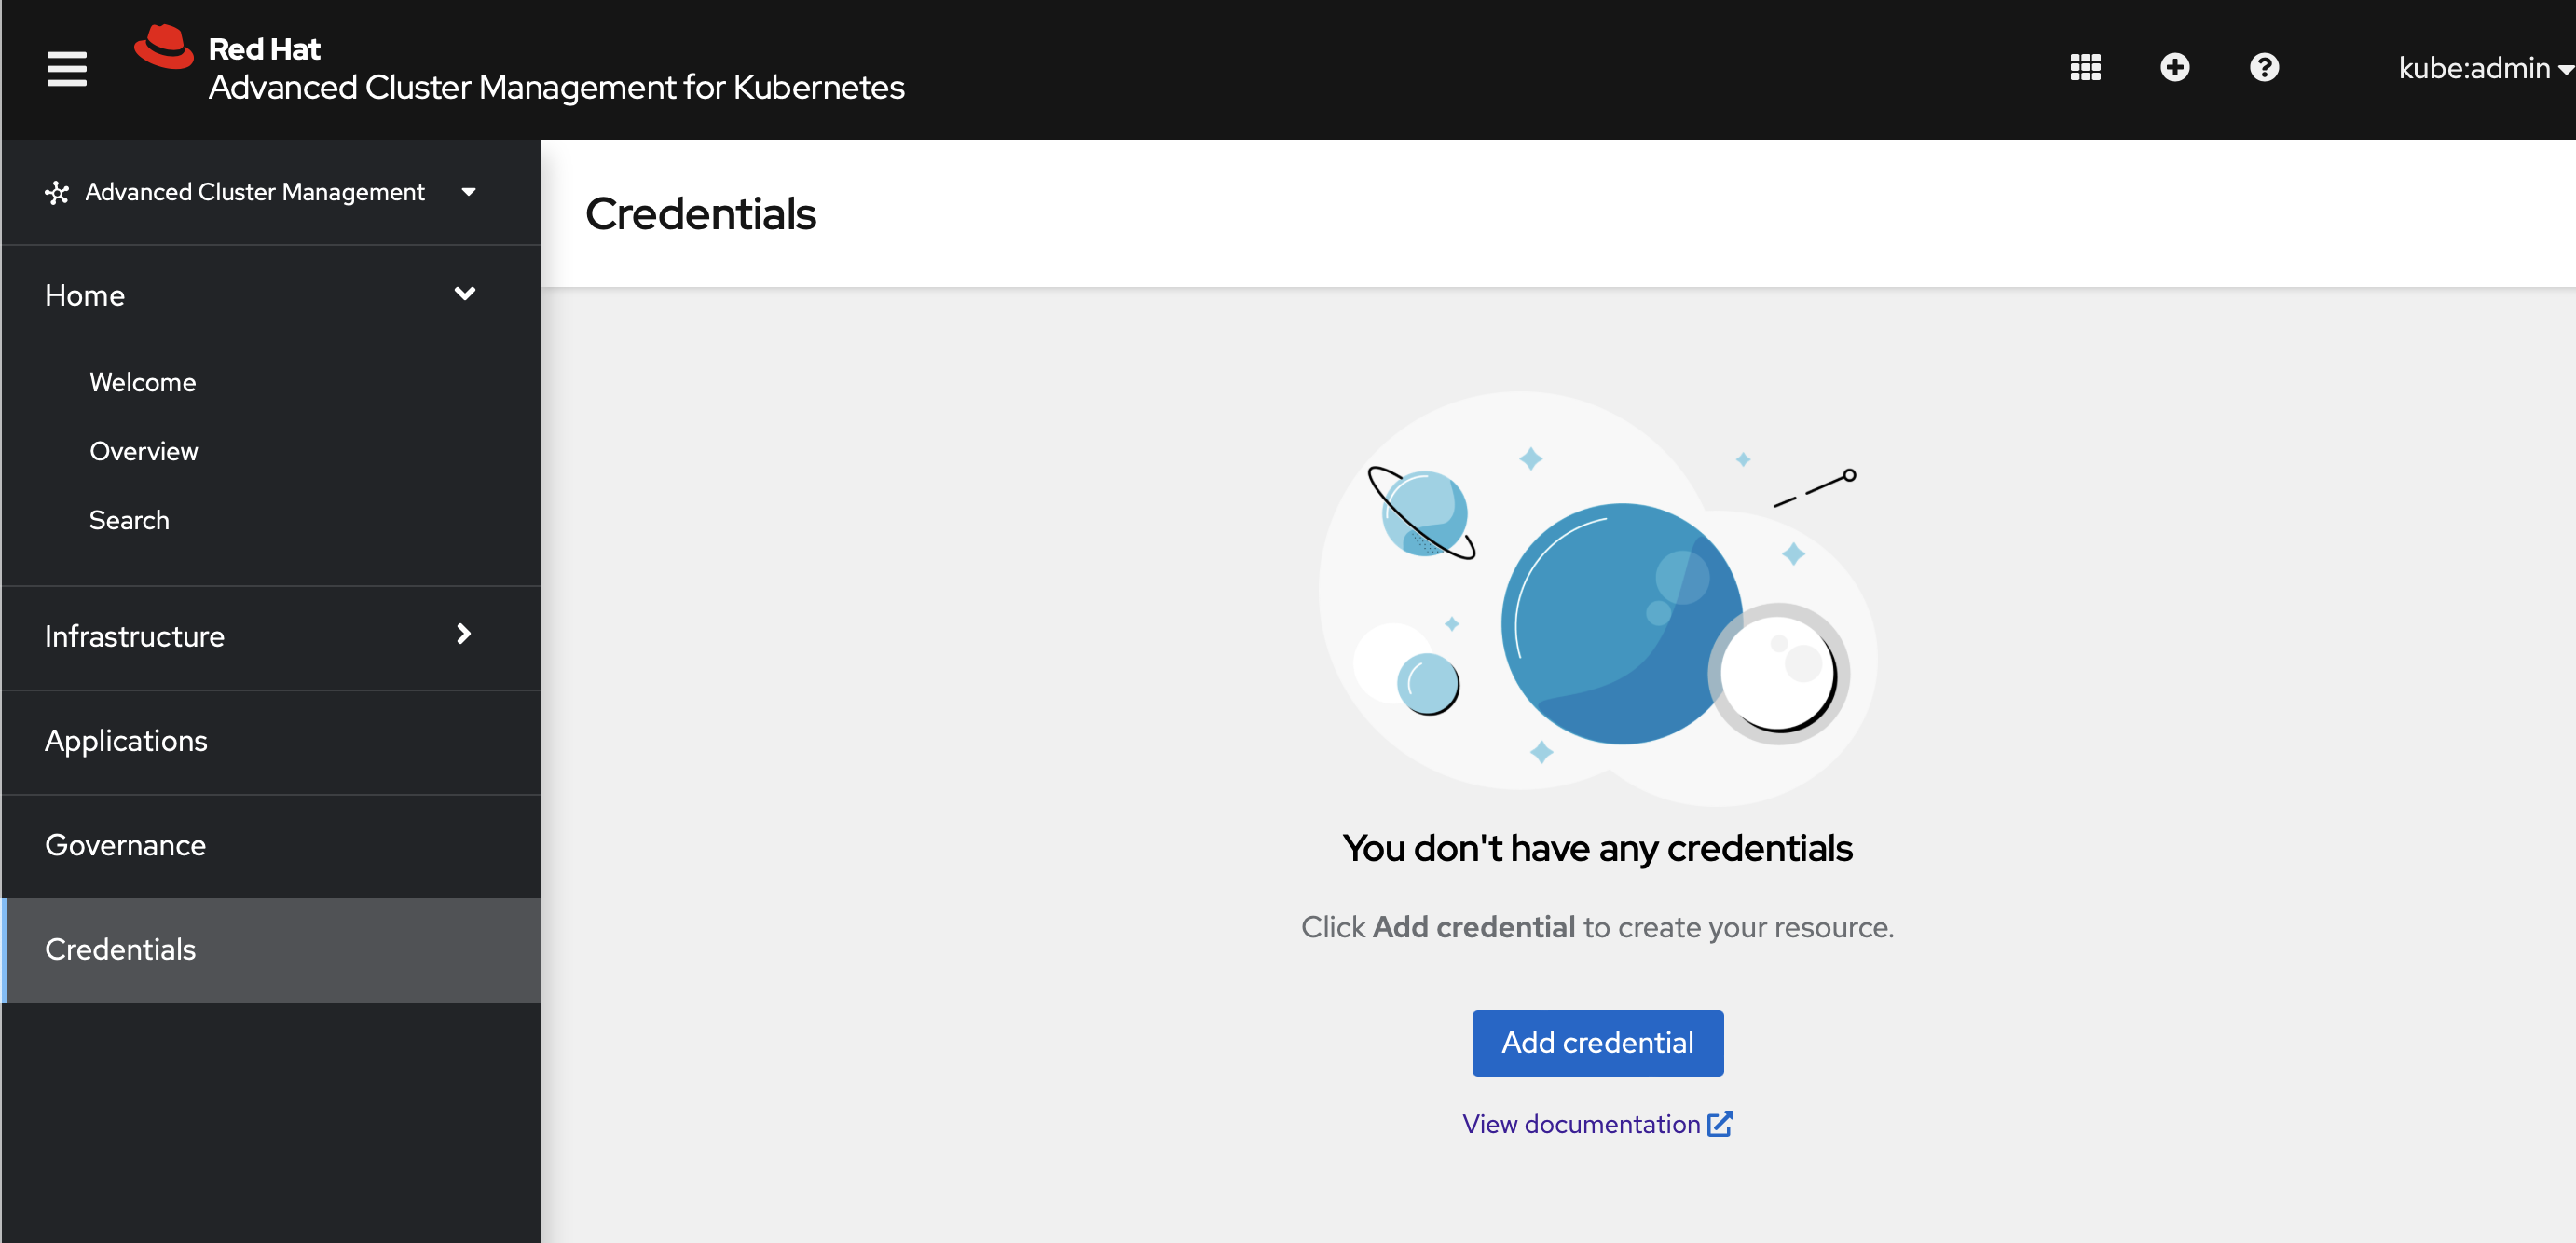
To create the new credentials, you should click into "Add credential" button.
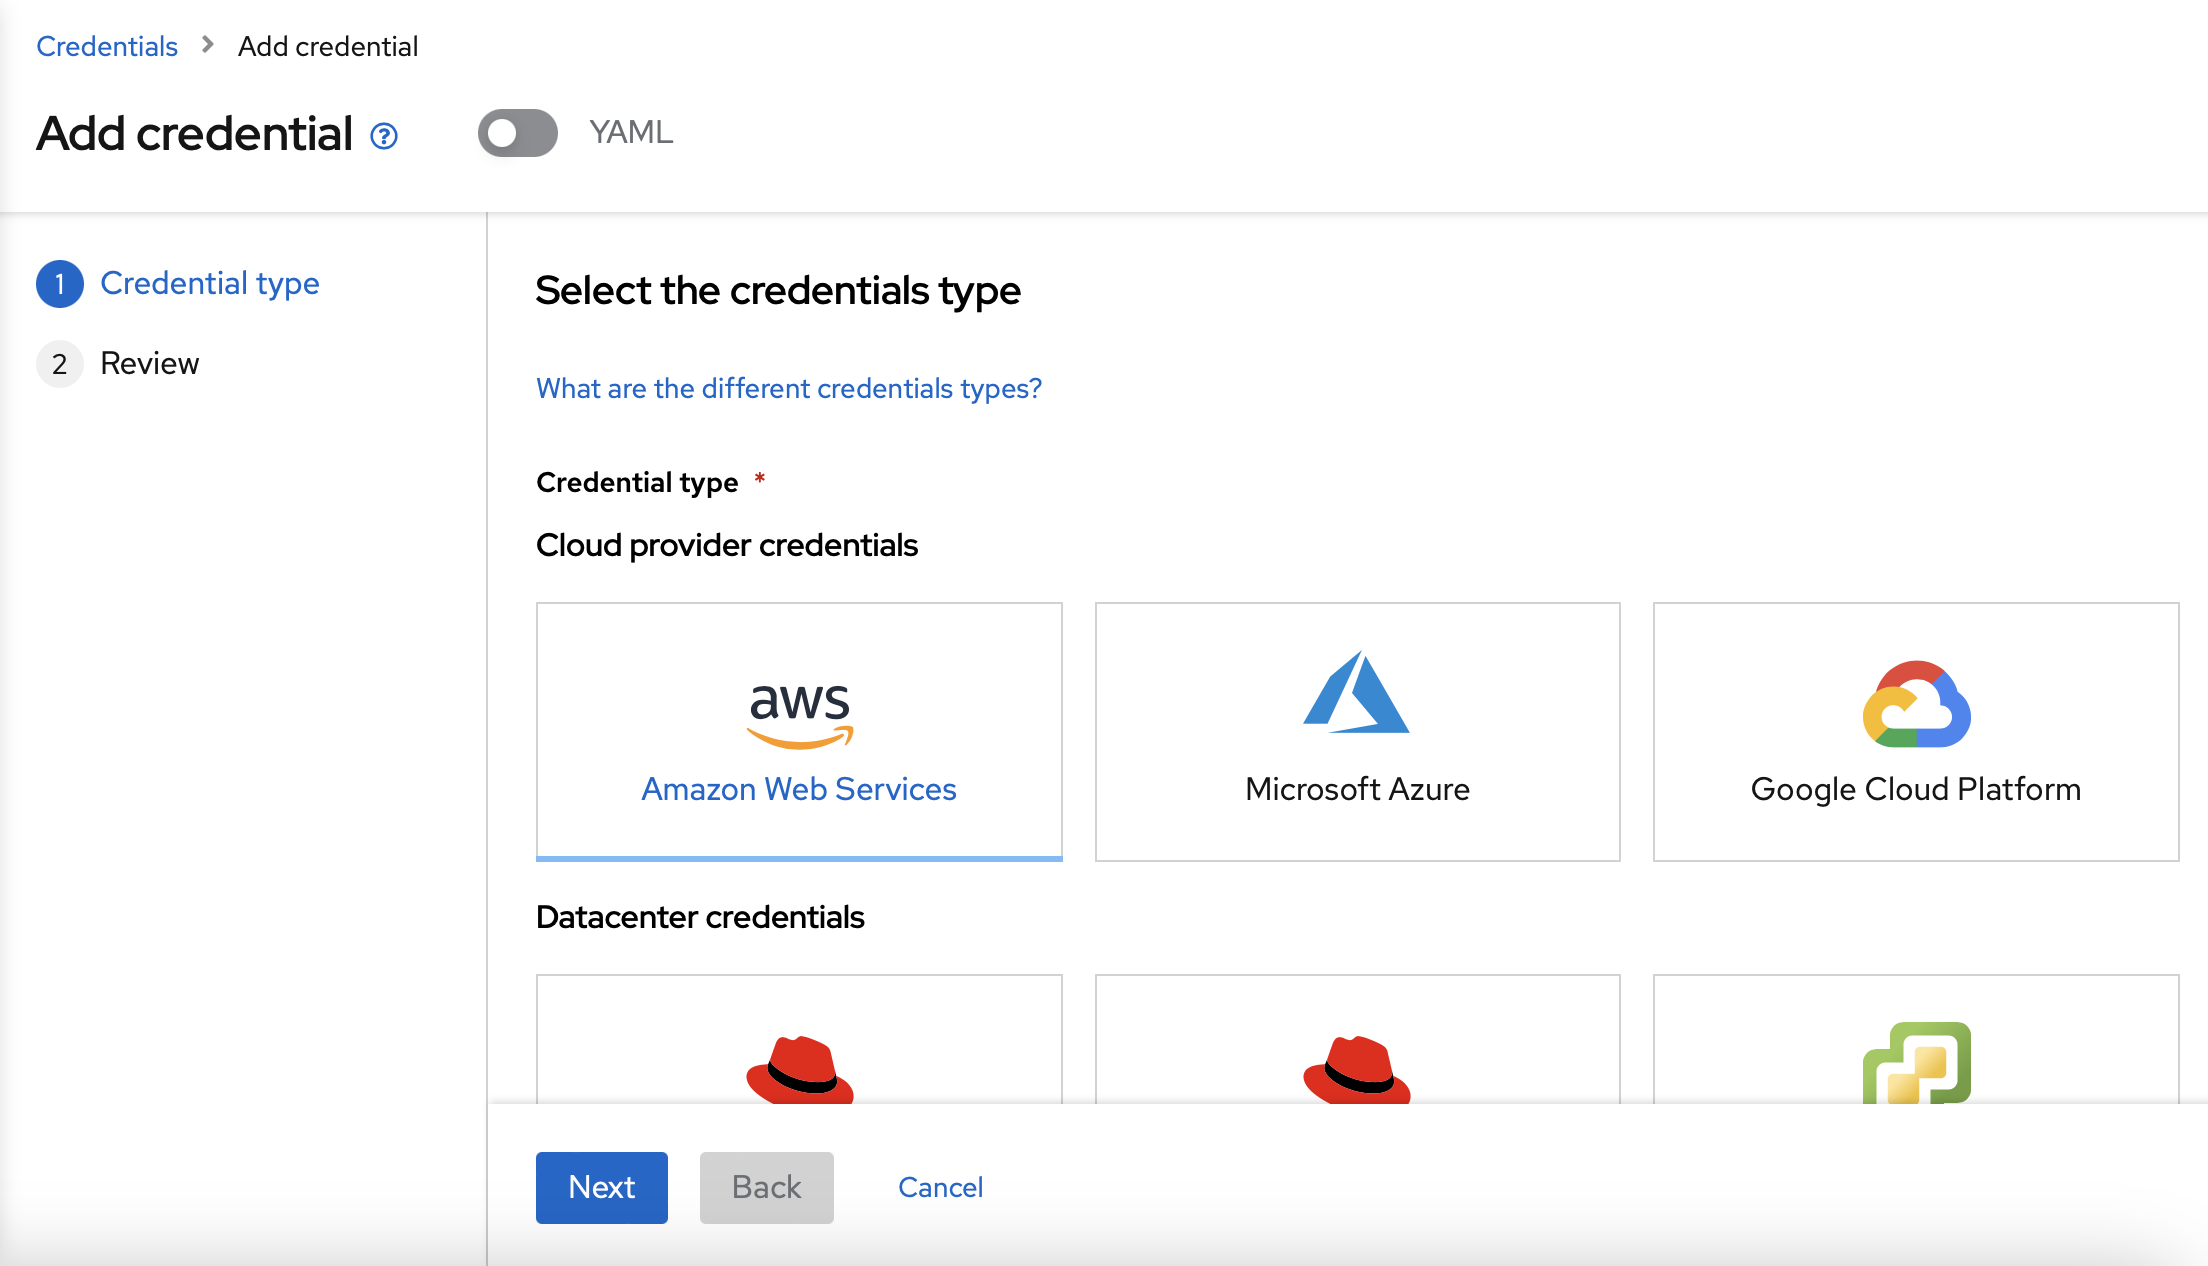
As the second OpenShift cluster will be installed in AWS, you should click into "Amazon Web Services".
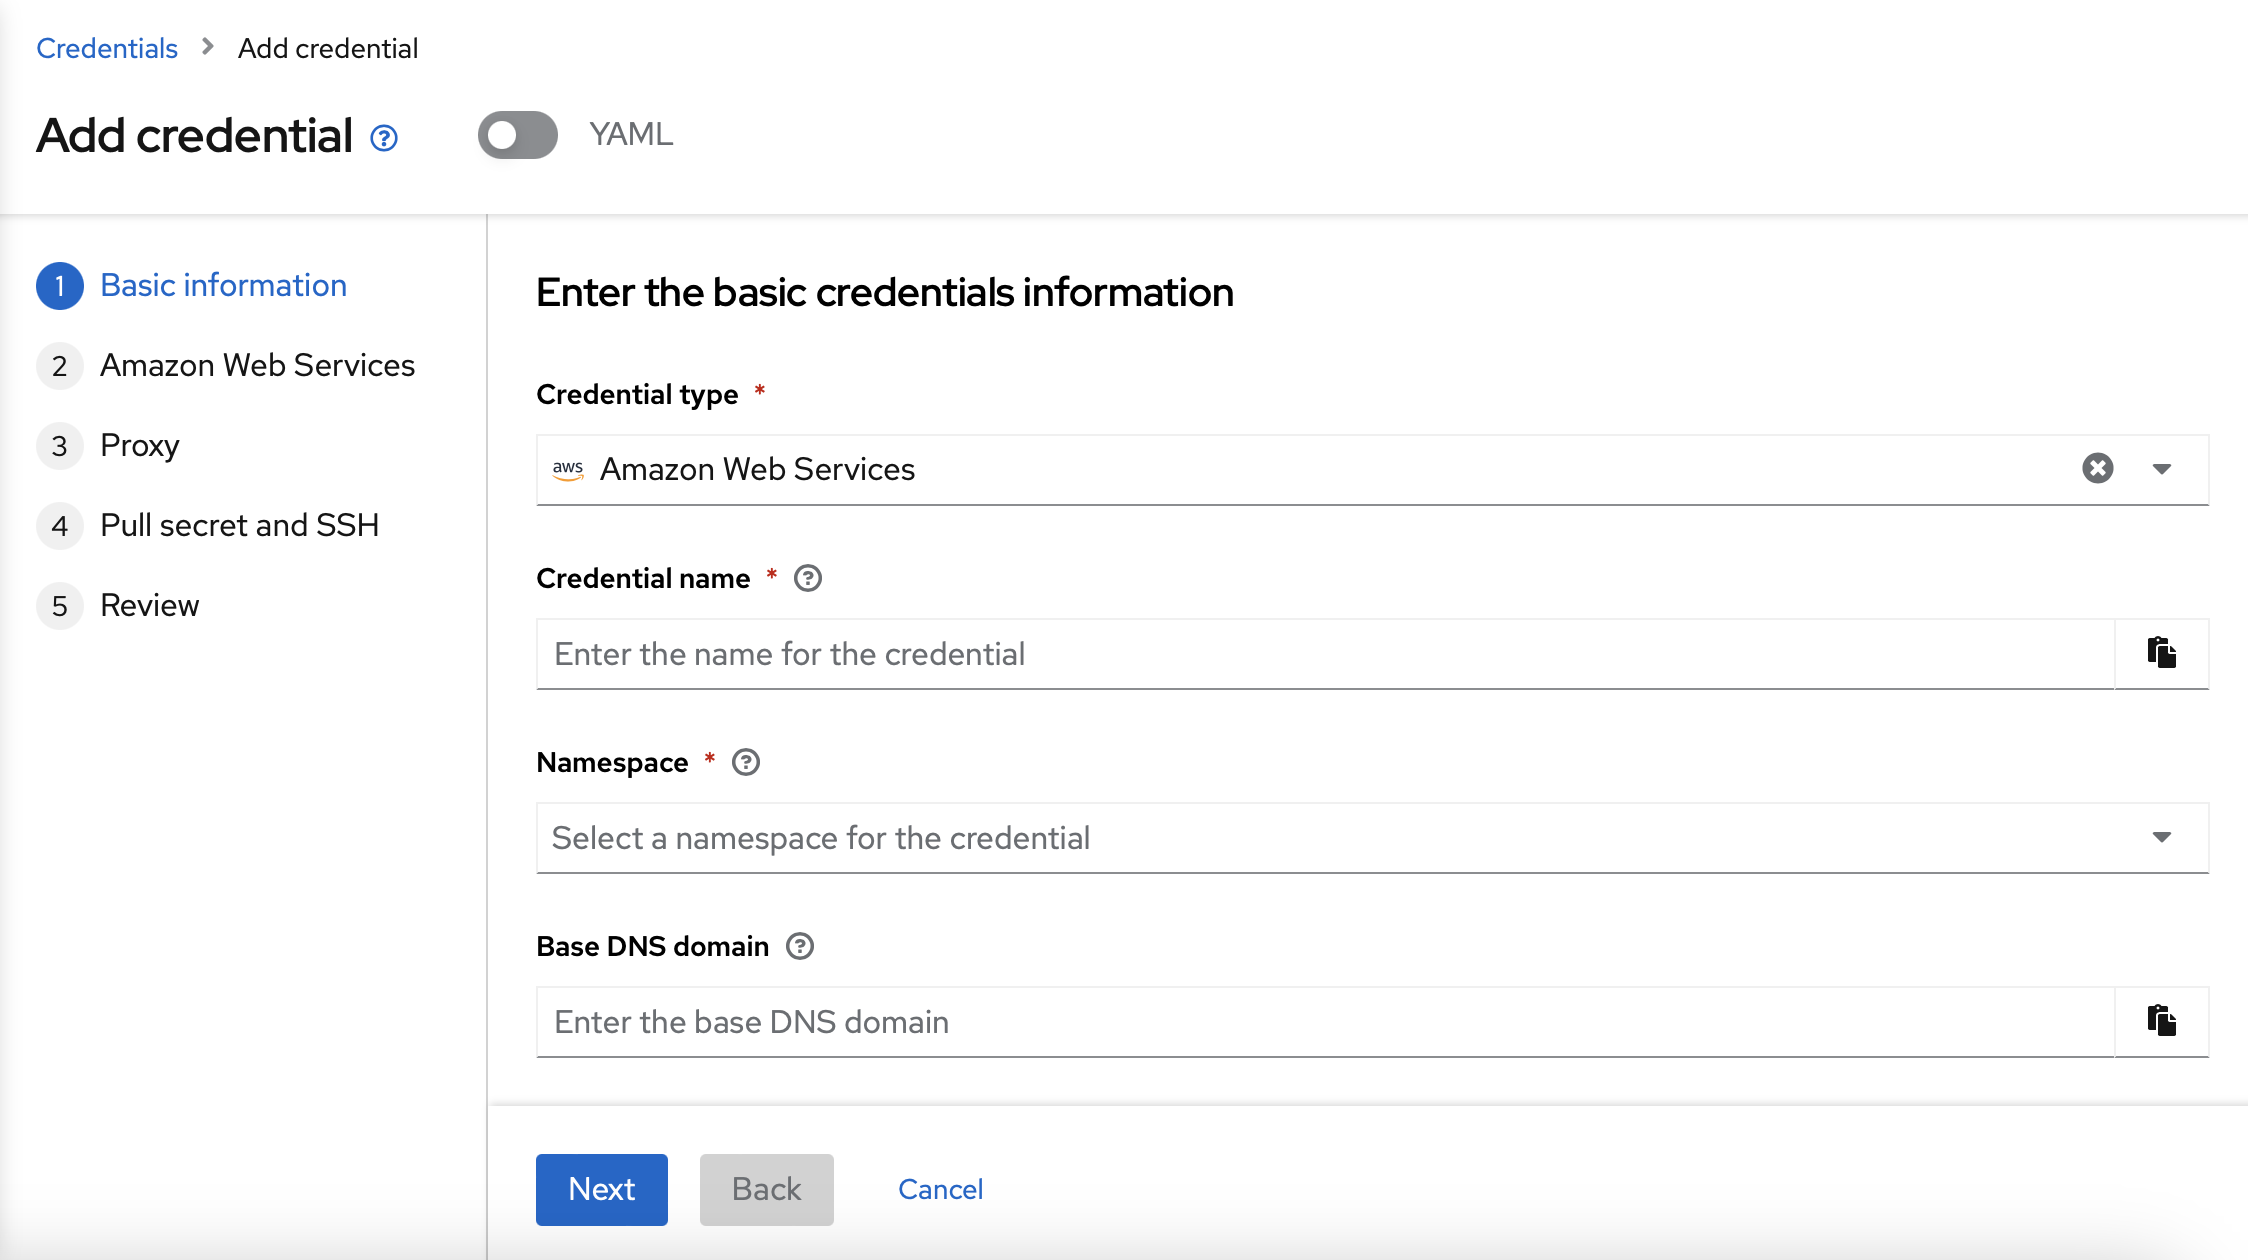
On the next form, you should choose a Credential name, the namespace where the credential is going to be stored and the Base DNS domain. You can type any Credential name, you can use the default namespace and you will need to add your Base DNS domain received in your email as the Base DNS domain.
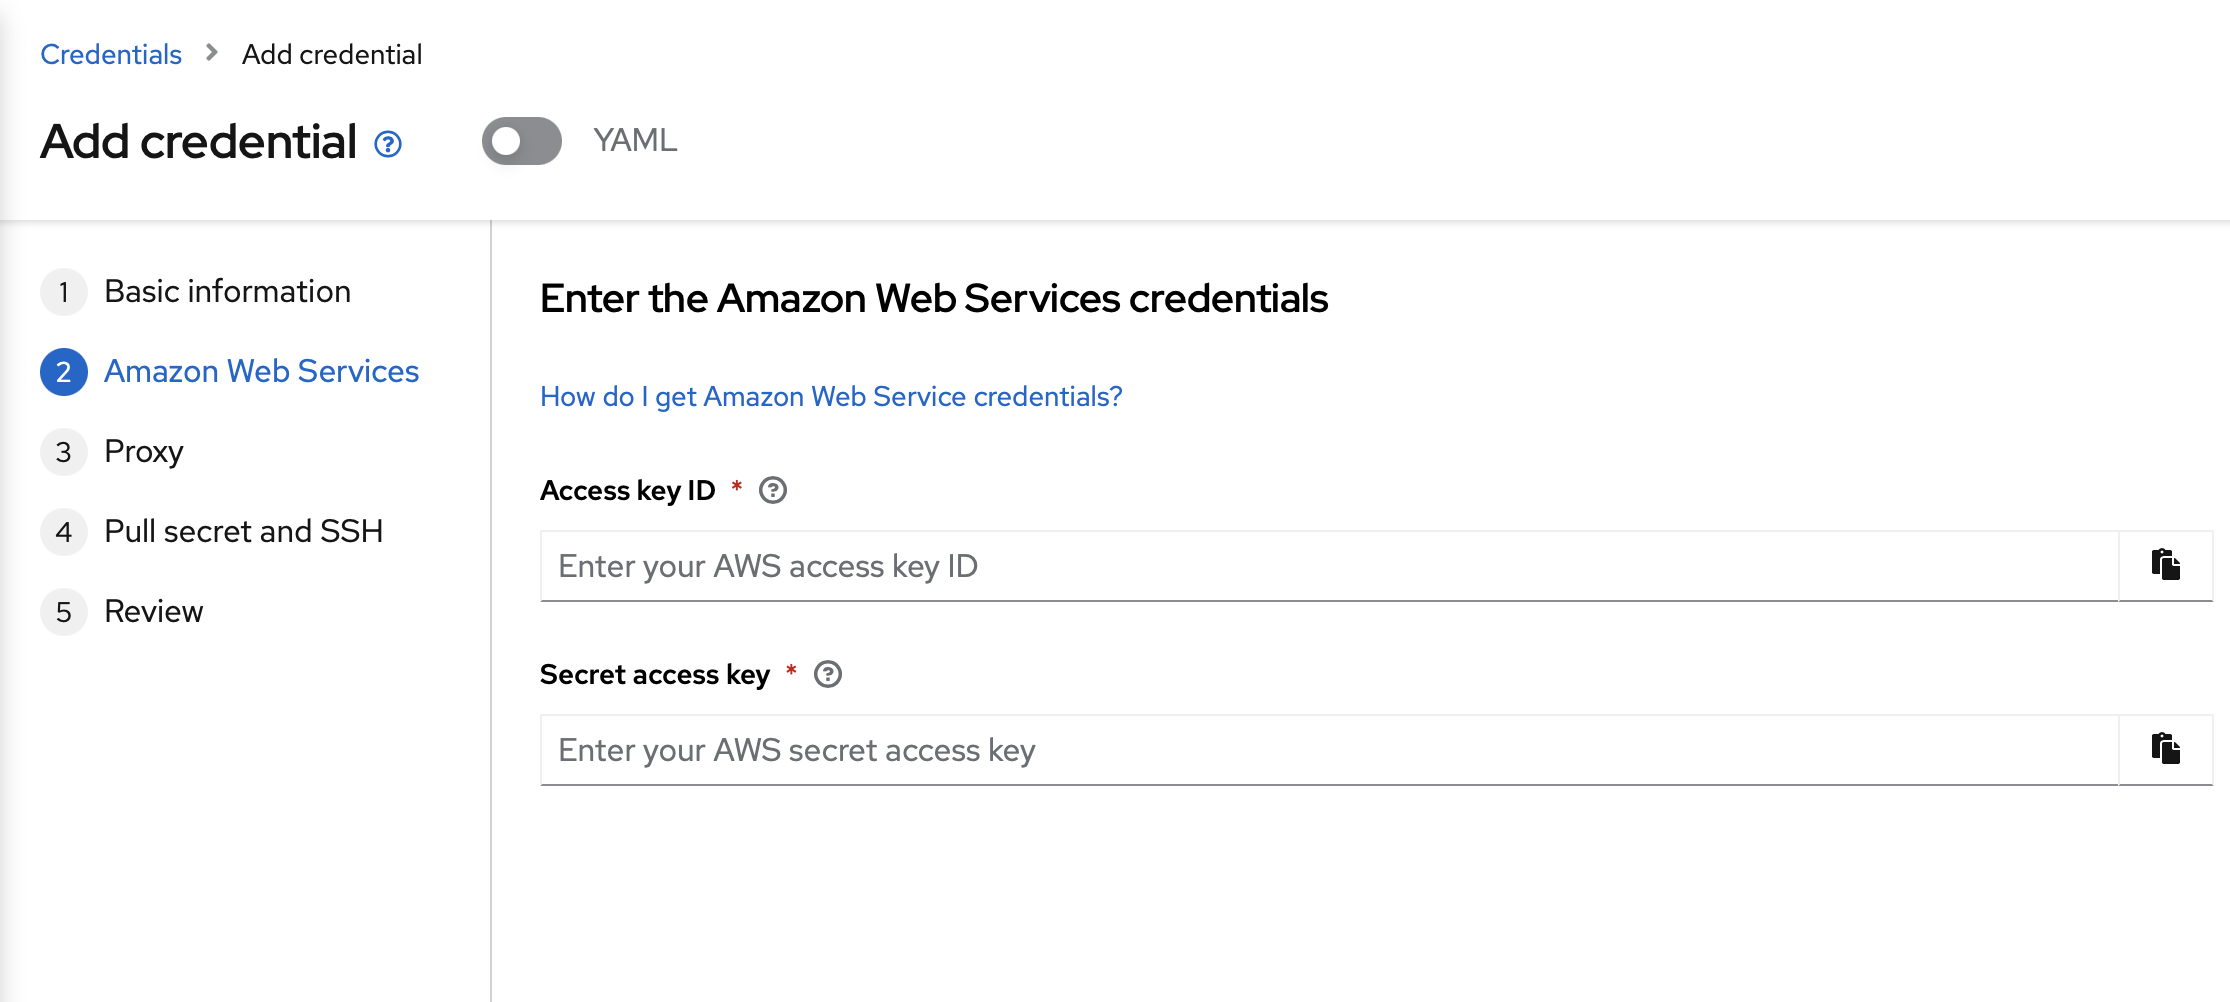
The next form will ask about the Amazon Web Services Access key ID and Secret access key. Both data are in the email received previously.
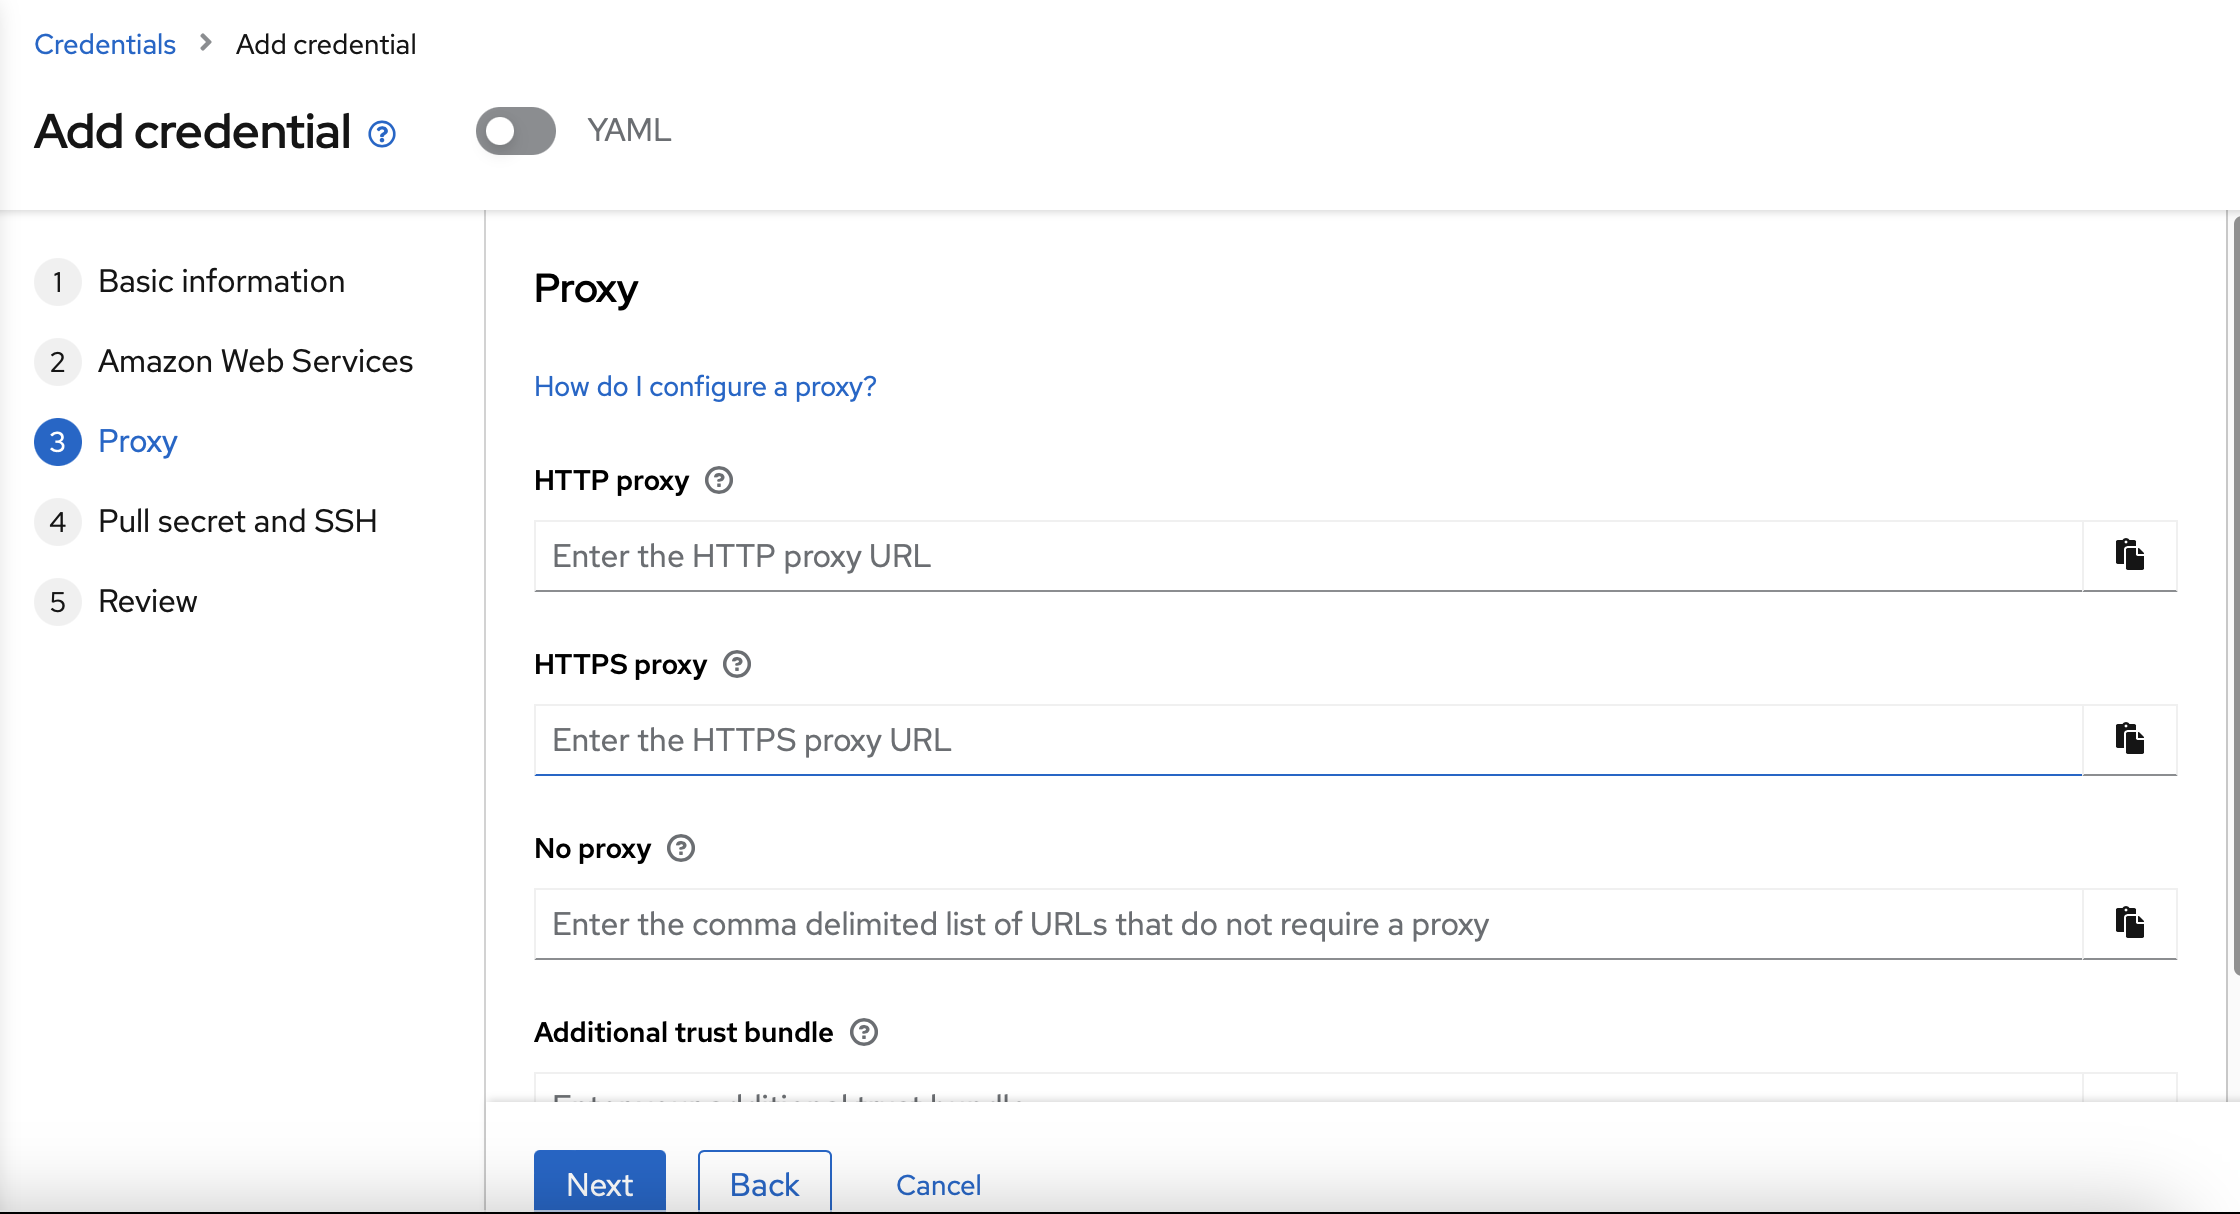
The proxy form, can be left emtpy, we are not going to use it in this LAB.
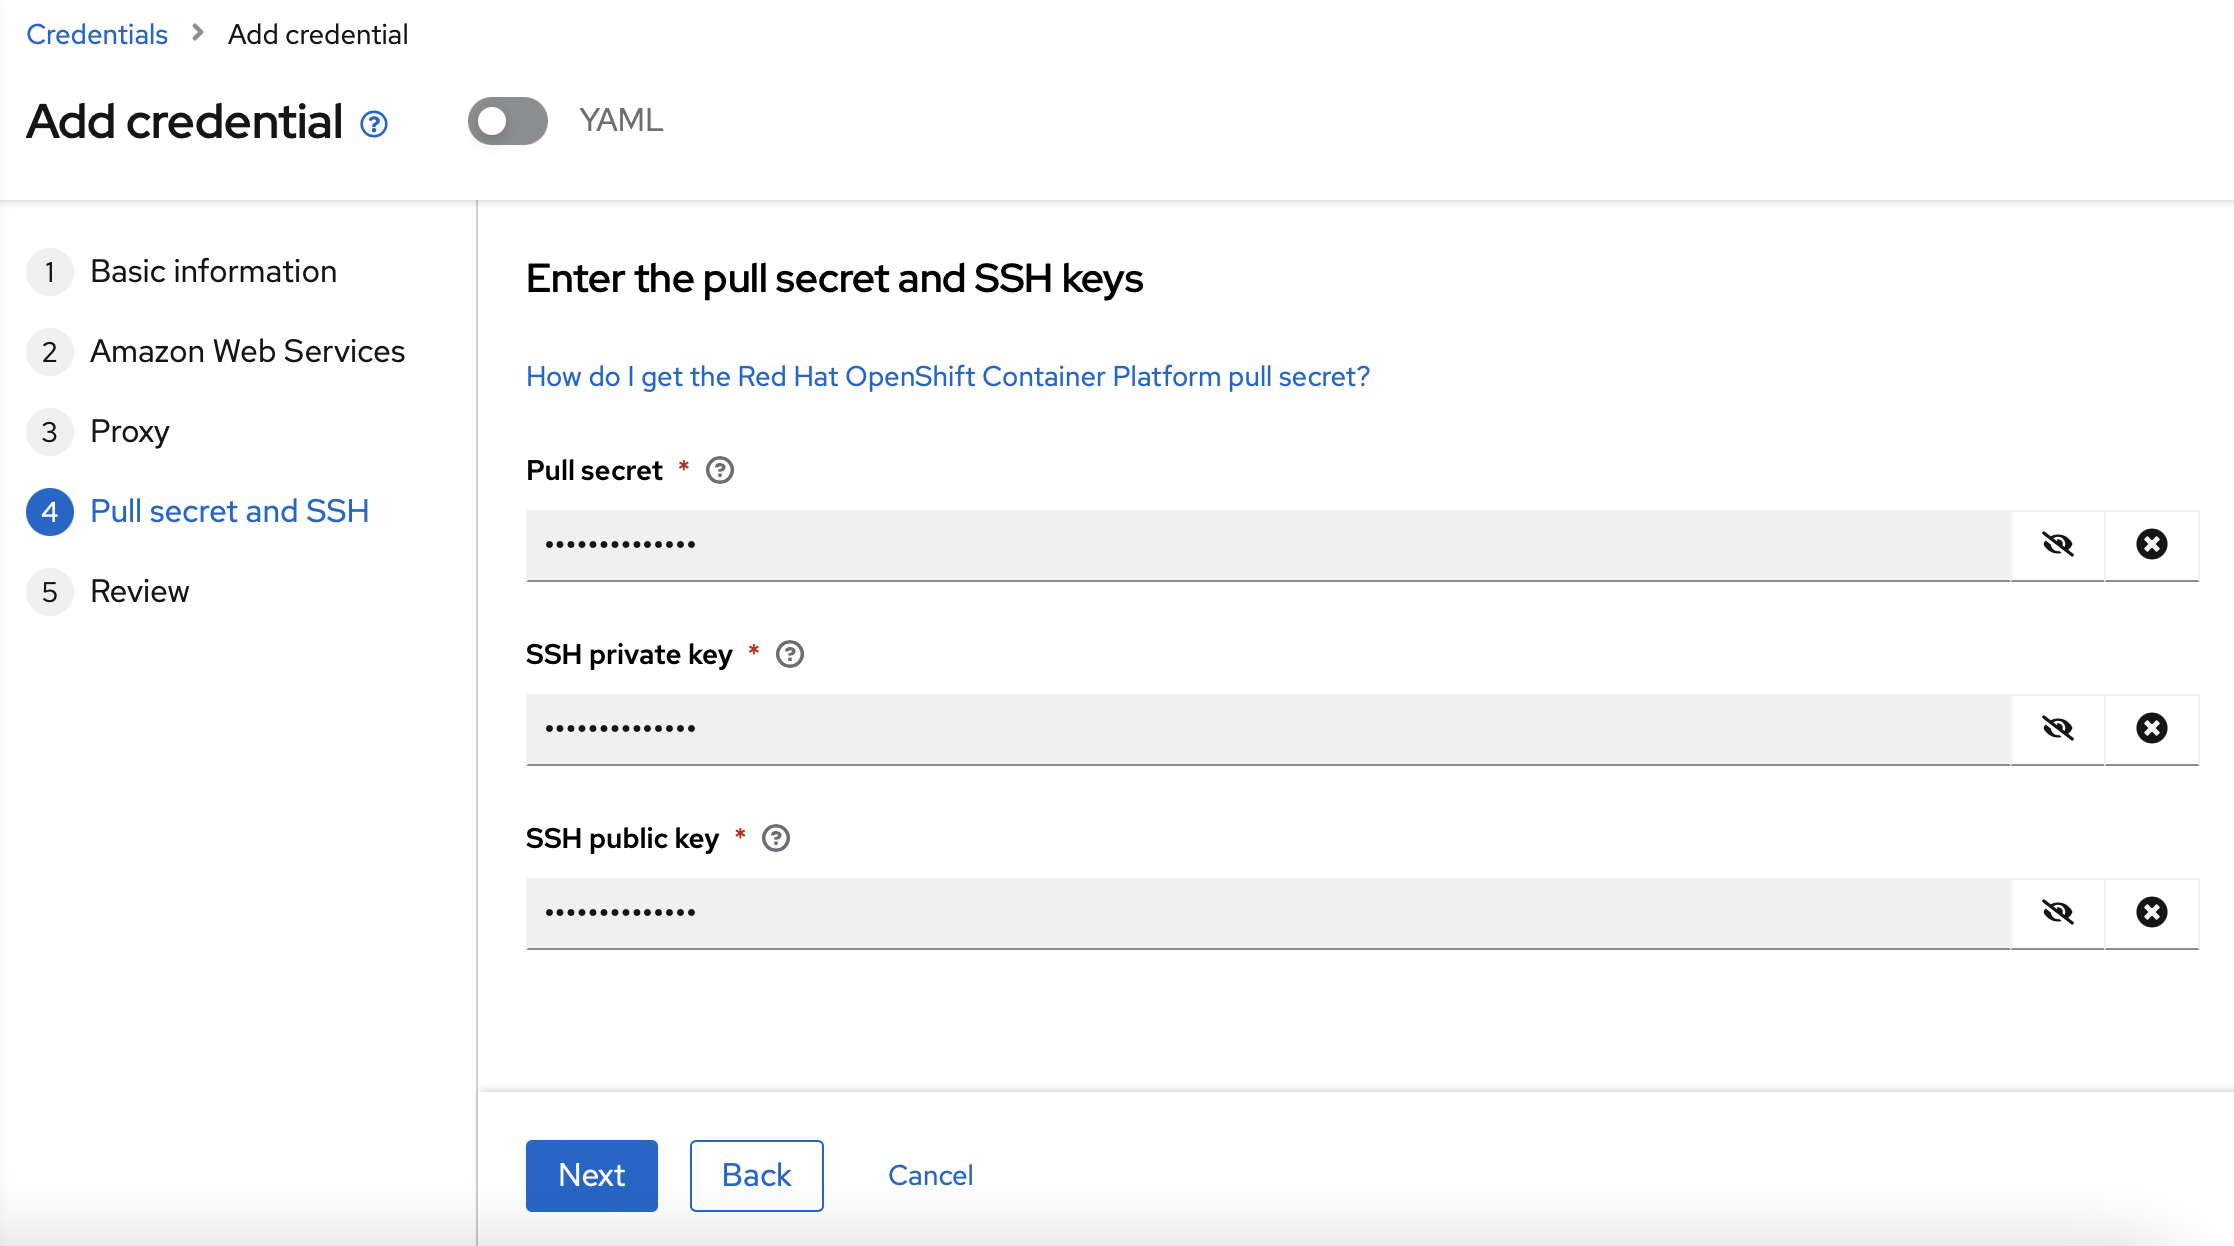
The next step is to add the Global Pull secret and the SSH keys.
Finally, you can review the data an add the credentials.
Setup credentials via CLI
To setup the AWS credentials using the CLI, you can use the following YAML example file to create one crentials.yaml file:
apiVersion: v1
kind: Secret
type: Opaque
metadata:
  name: <1 - Name of AWS credentials>
  namespace: <2 - Namespace where the credentials will be saved>
  labels:
    cluster.open-cluster-management.io/type: aws
    cluster.open-cluster-management.io/credentials: ""
stringData:
  aws_access_key_id: <3 - AWS Access Key ID>
  aws_secret_access_key: <4 - AWS Secret Key>
  baseDomain: <5 - Base domain>
  pullSecret: >
    <6 Global pull secret>
  ssh-privatekey: |
    <7 - A SSH private key>
  ssh-publickey: >
    ssh-rsa
    <7 - A SSH public key>
  httpProxy: ""
  httpsProxy: ""
  noProxy: ""
  additionalTrustBundle: ""
After you have created the file, you can create it with the following command:
oc create -f cretentials.yamlDeploy a new OpenShift cluster
To deploy applications using a multicluster architecture, you will need a second OpenShift cluster. In this LAB you will have one OpenShift cluster, and you will use Red Hat Advanced Cluster Management to deploy the second OpenShift cluster.
You can create the second OpenShift cluster using the Red Hat Advanced Cluster Management web interface or using the command line interface (CLI).
Deploy a new OpenShift cluster via web interface
To create the second OpenShift cluster using the web interface, you need to enter into the Red Hat Advanced Cluster Management route first. You can find it in the open-cluster-management namespace.
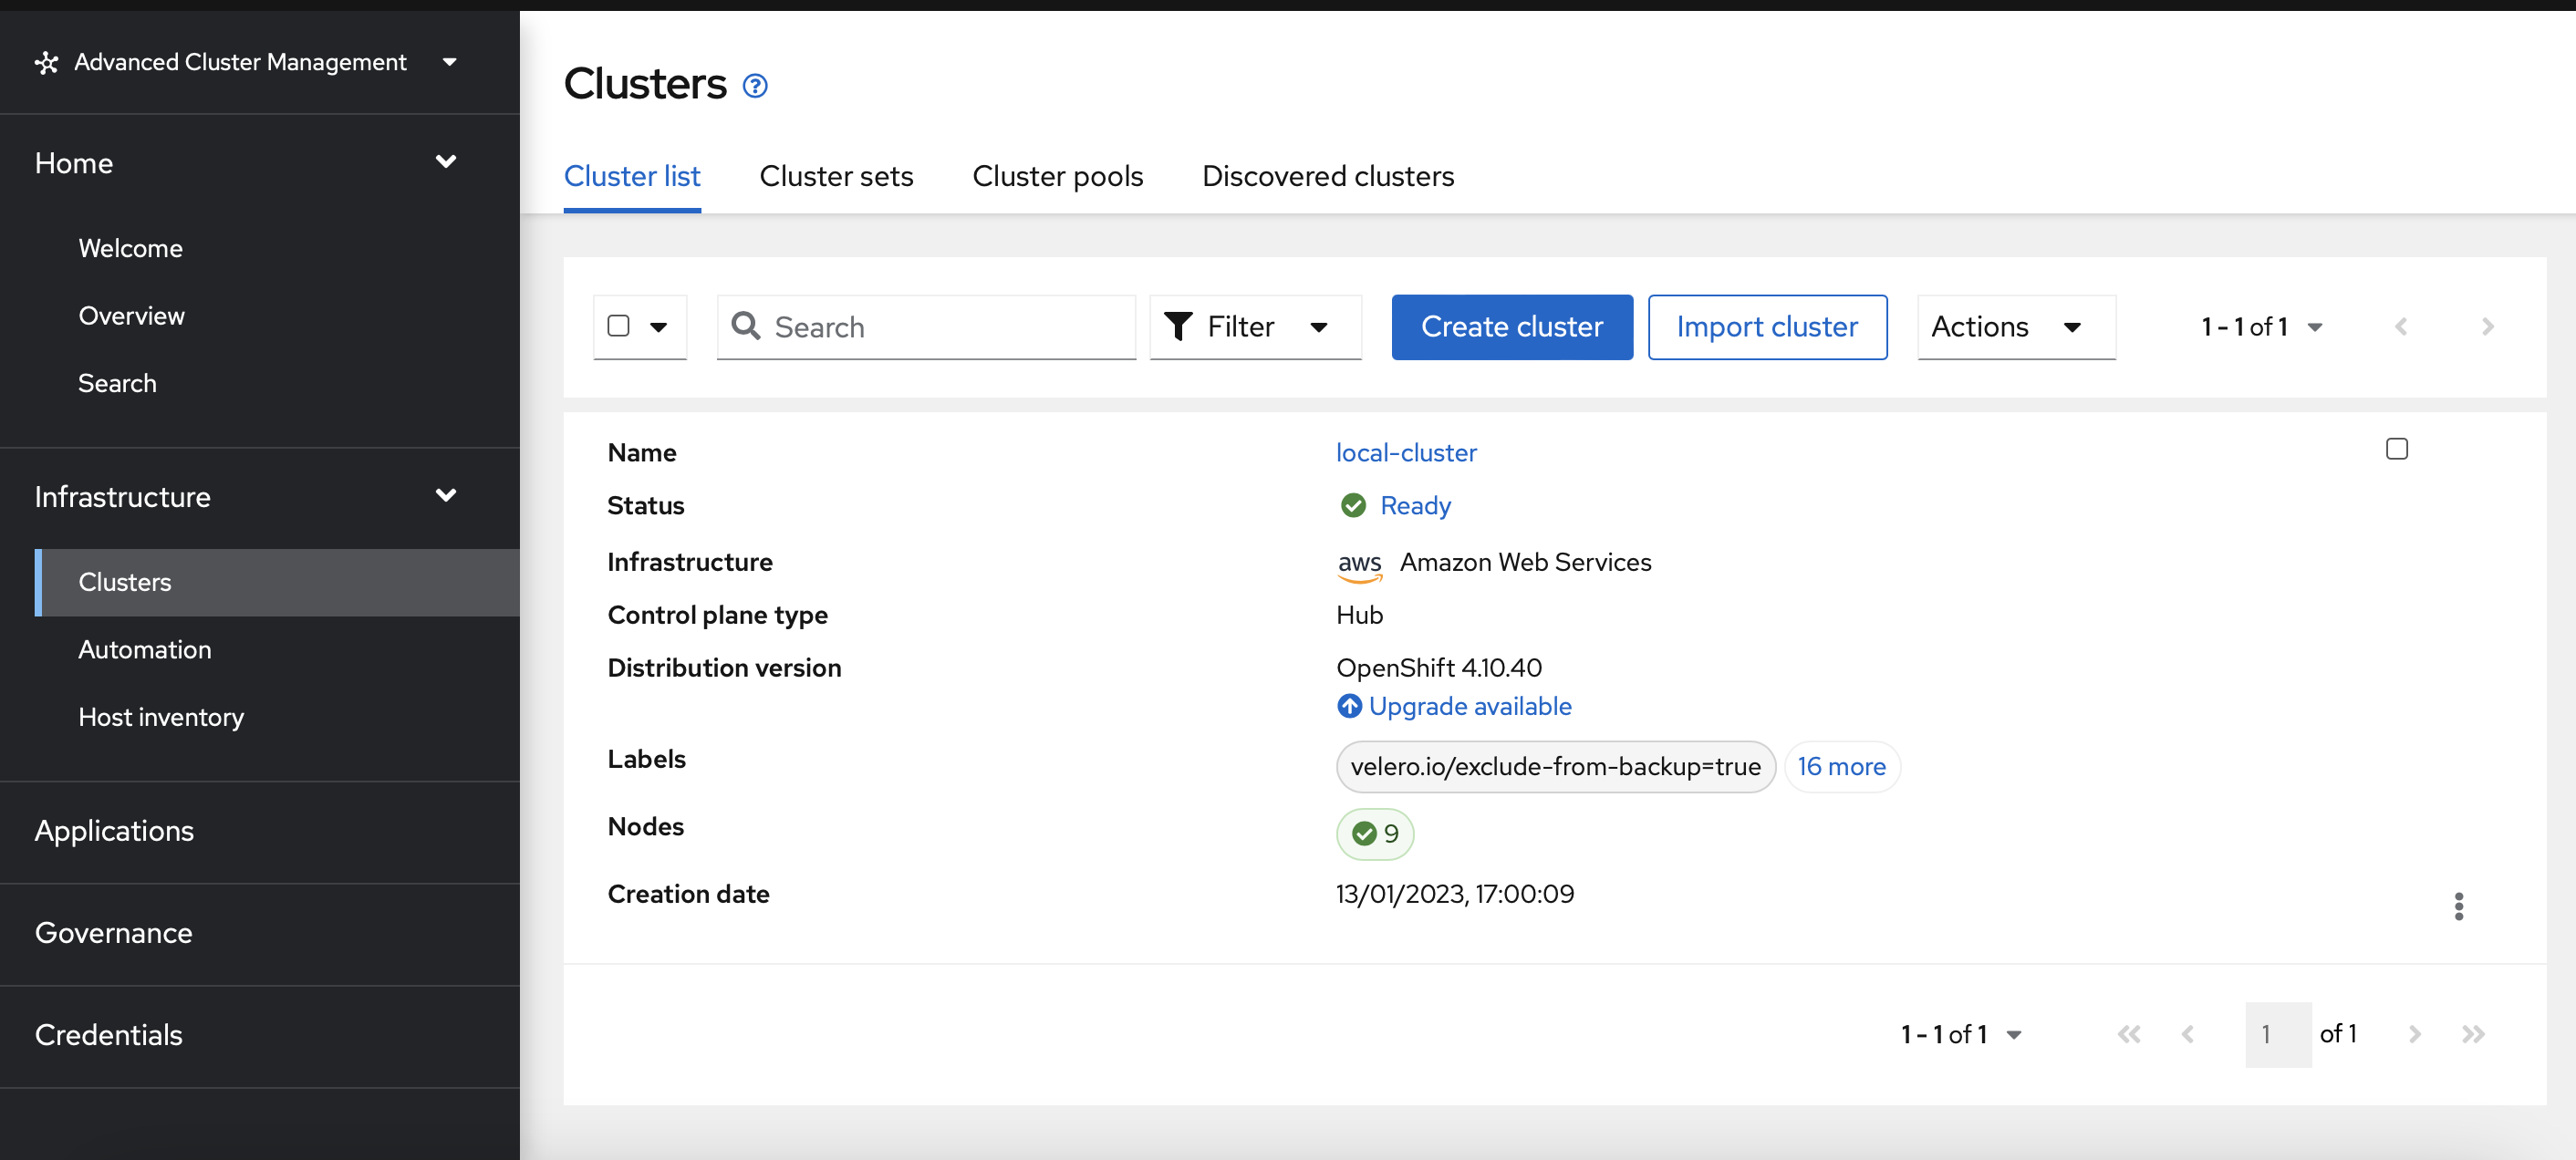
After entering into Red Hat Advanced Cluster Management web interface, you will need to enter into "Infrastructure" → "Clusters" section and click into "Create cluster" button.
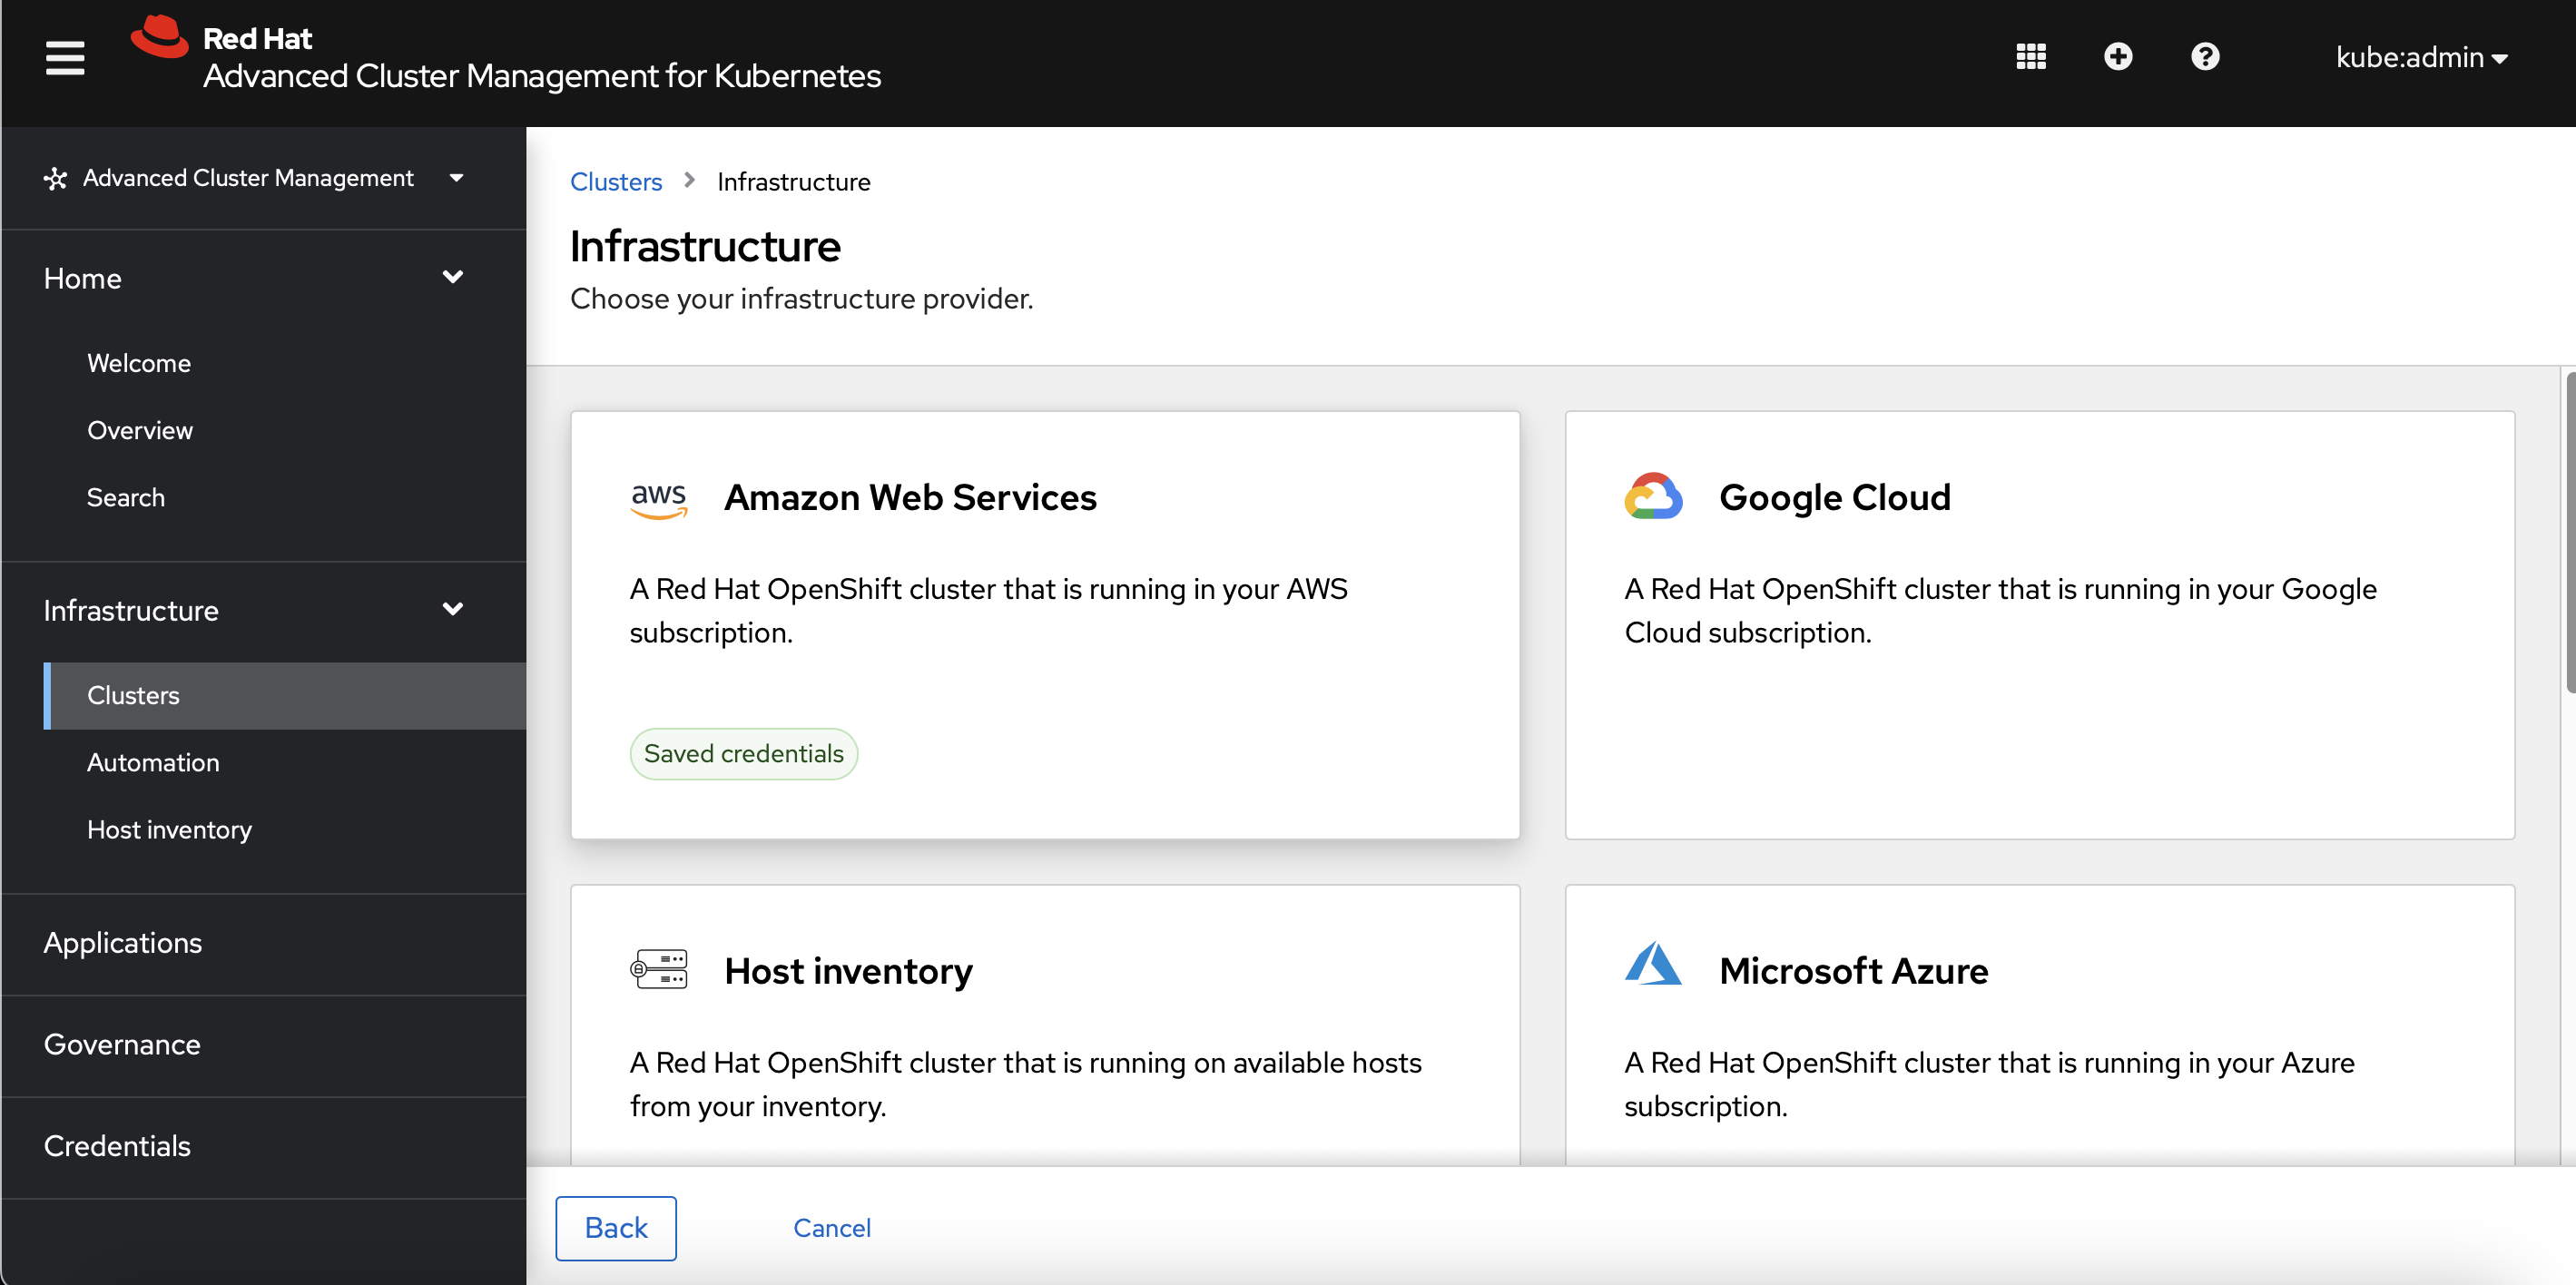
As the cluster will be installed on Amazon Web Services, you will need to choose Amazon Web Services.
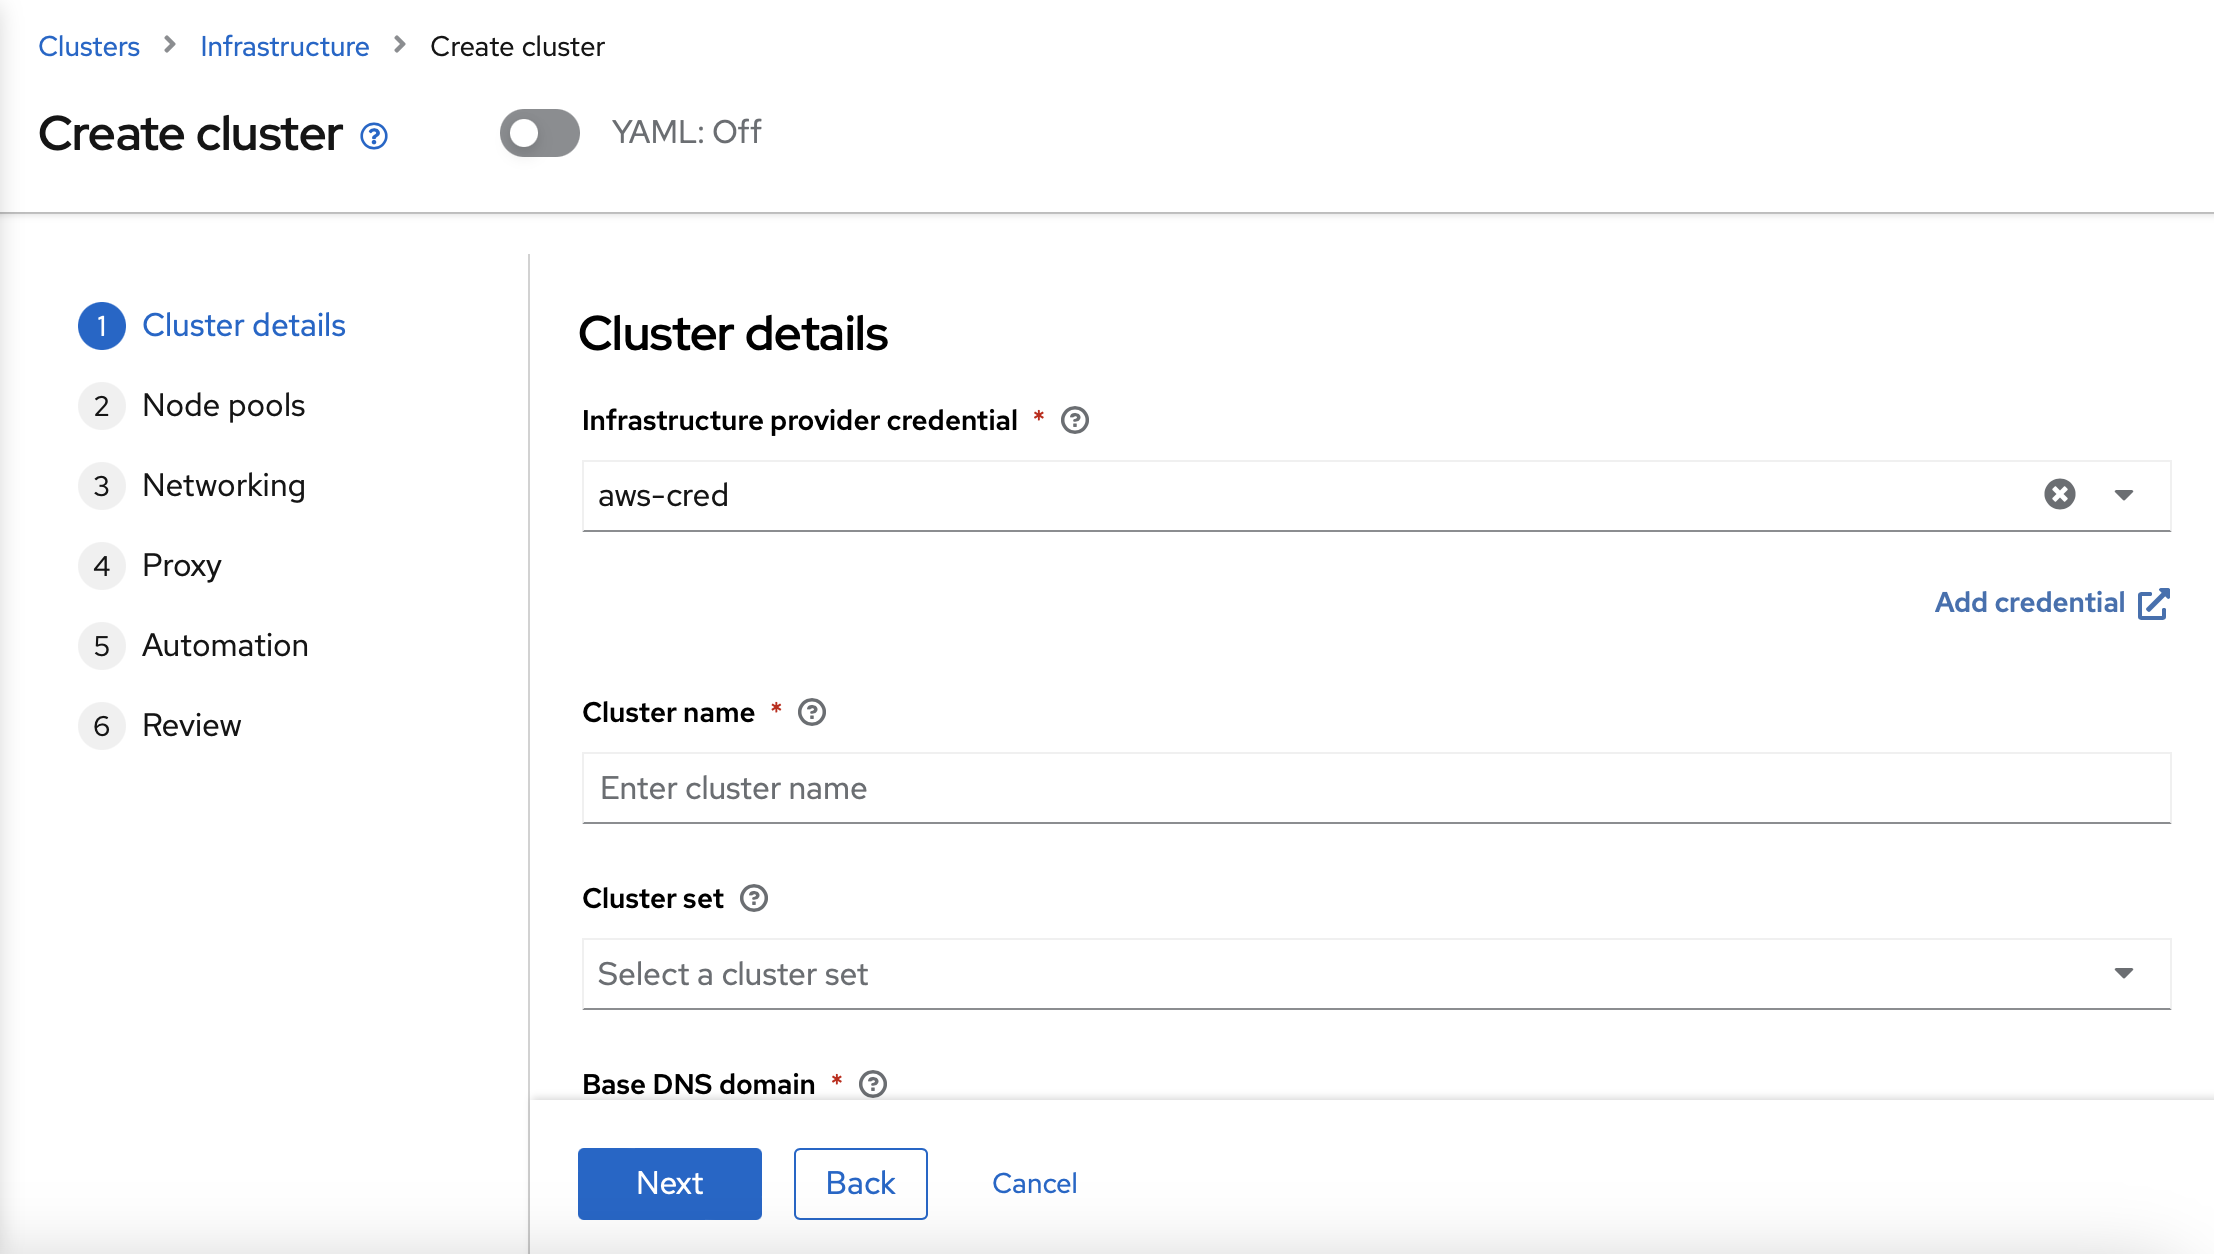
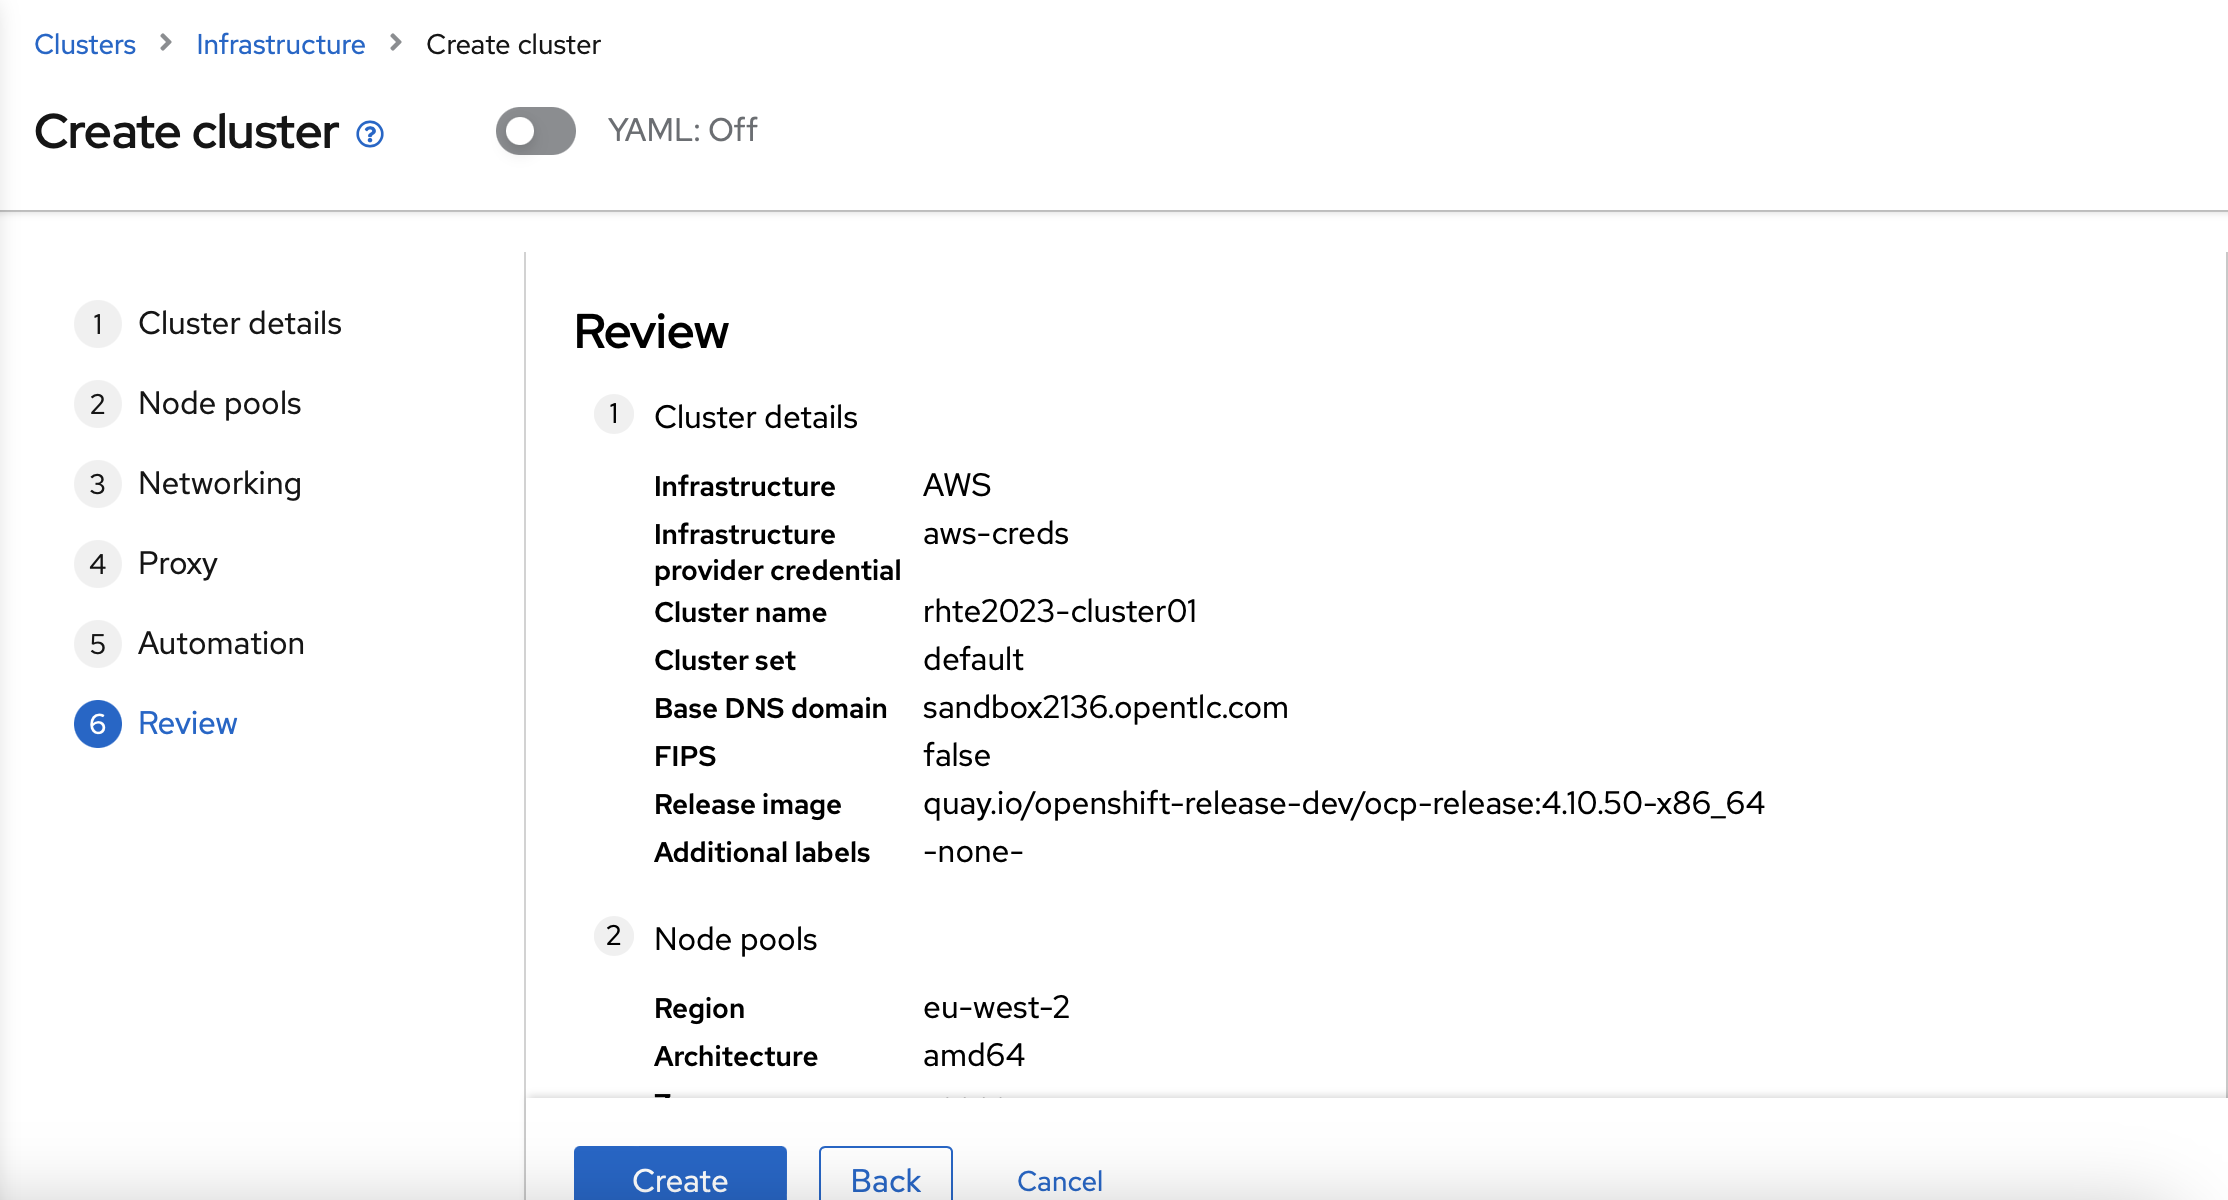
In the Cluster details form, you will need to choose a Cluster name, a Cluster set and the Base DNS domain. In the Cluster name, you can choose rhte2023-cluster01 as the Cluster name. In the Cluster set, you can choose the rhte2023-gitops-clusters Cluster set. In the Base DNS domain, you need to use the Base DNS domain received by email. In the "Release image", select the 4.10.X release image.
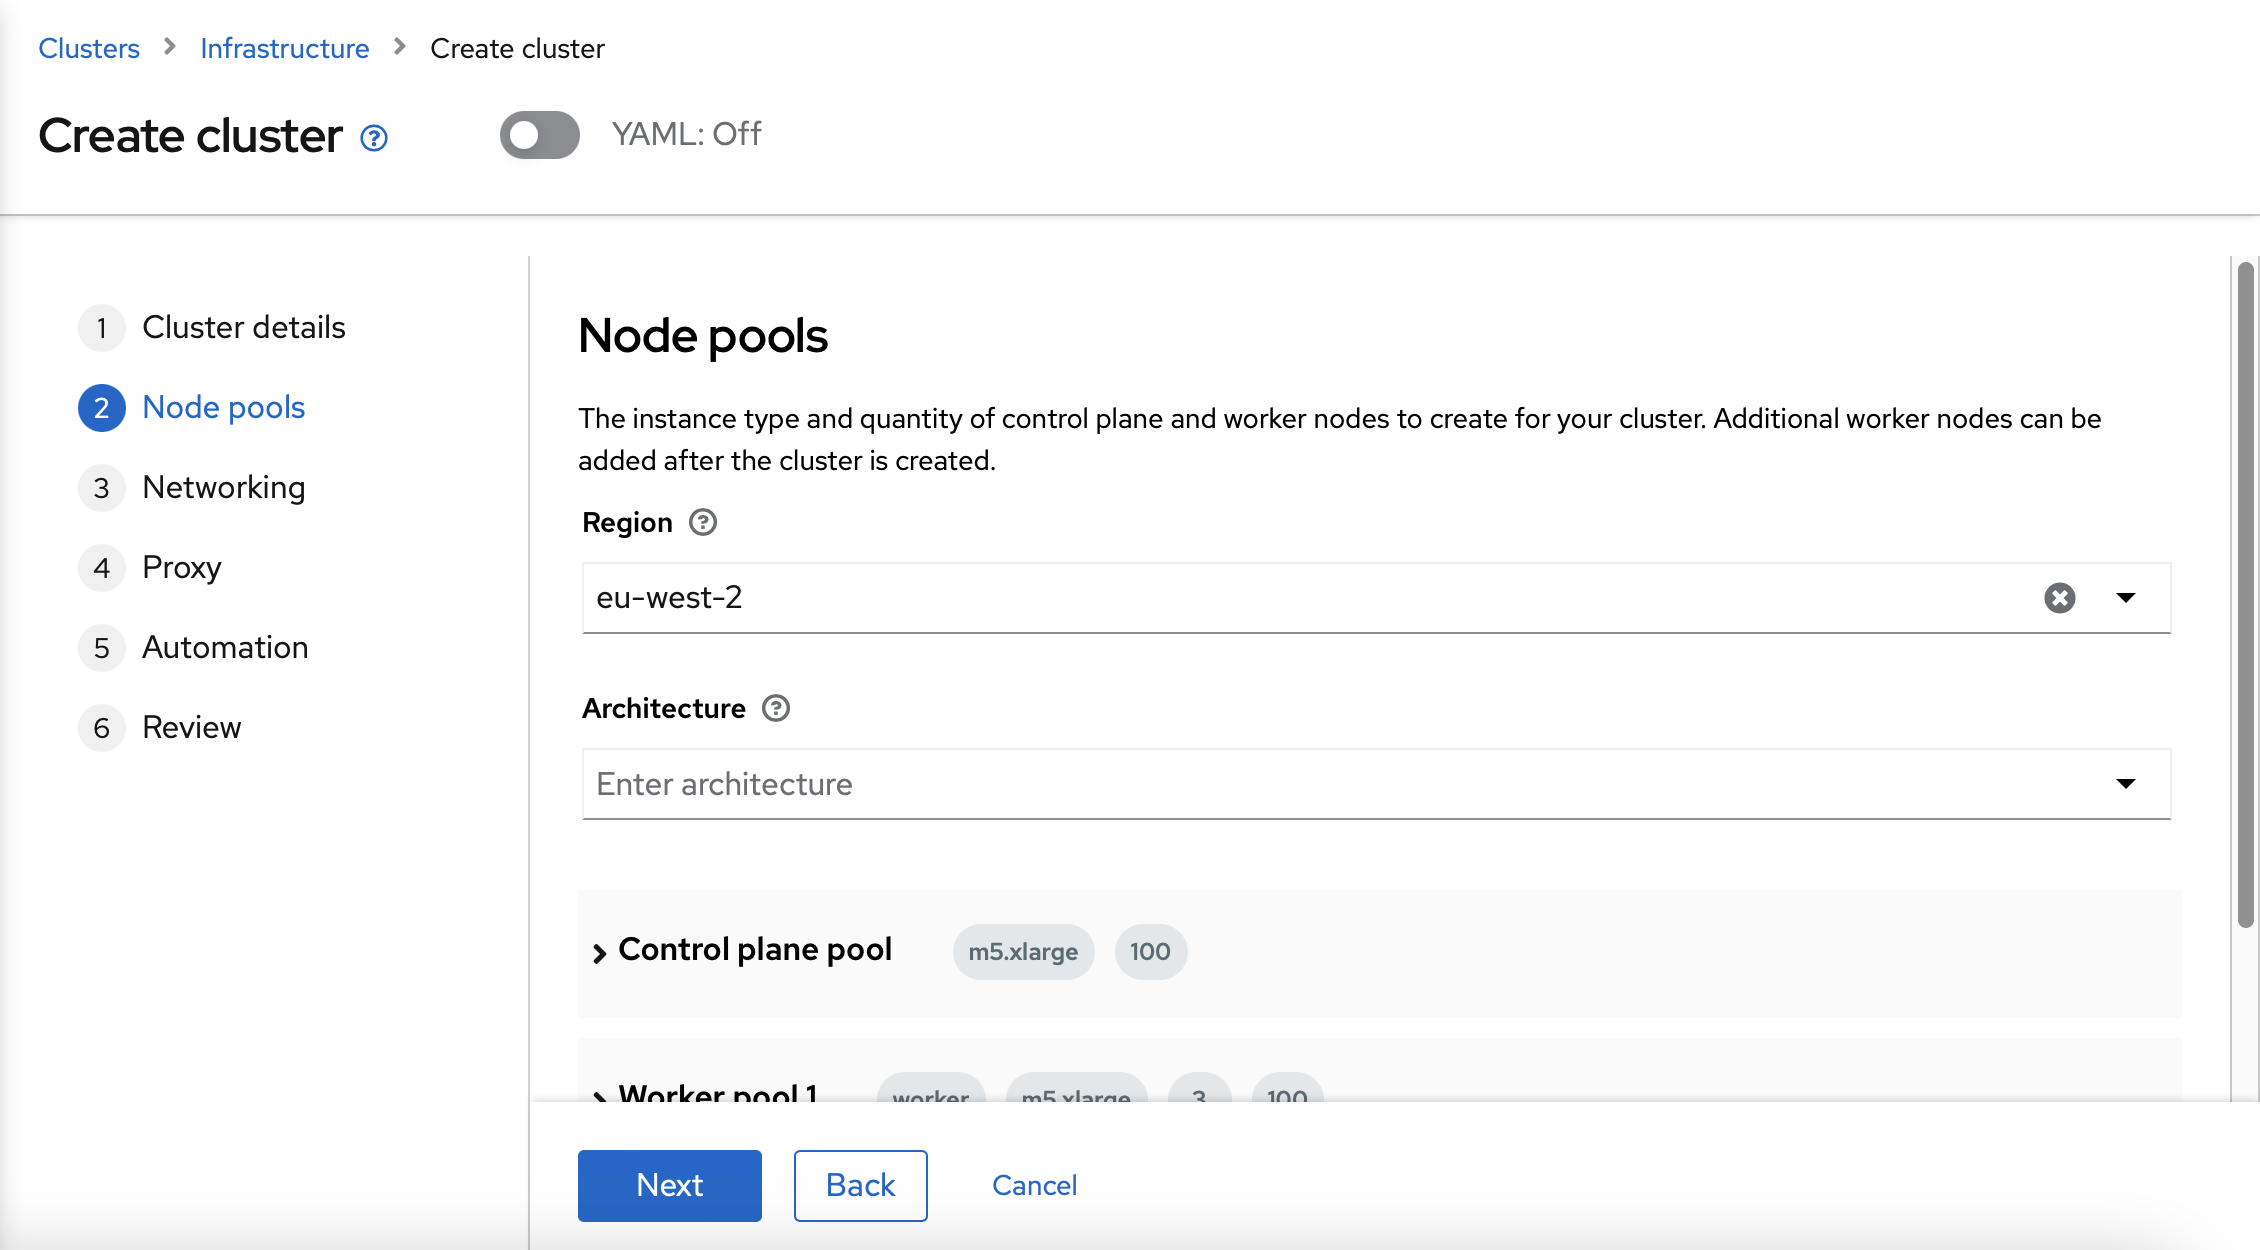
The next step is to configure the Region, Architecture and node sizing. You can use eu-west-2 as the Region and amd64 as the Architecture. The node sizing can be modified, but it is not necessary in this LAB.
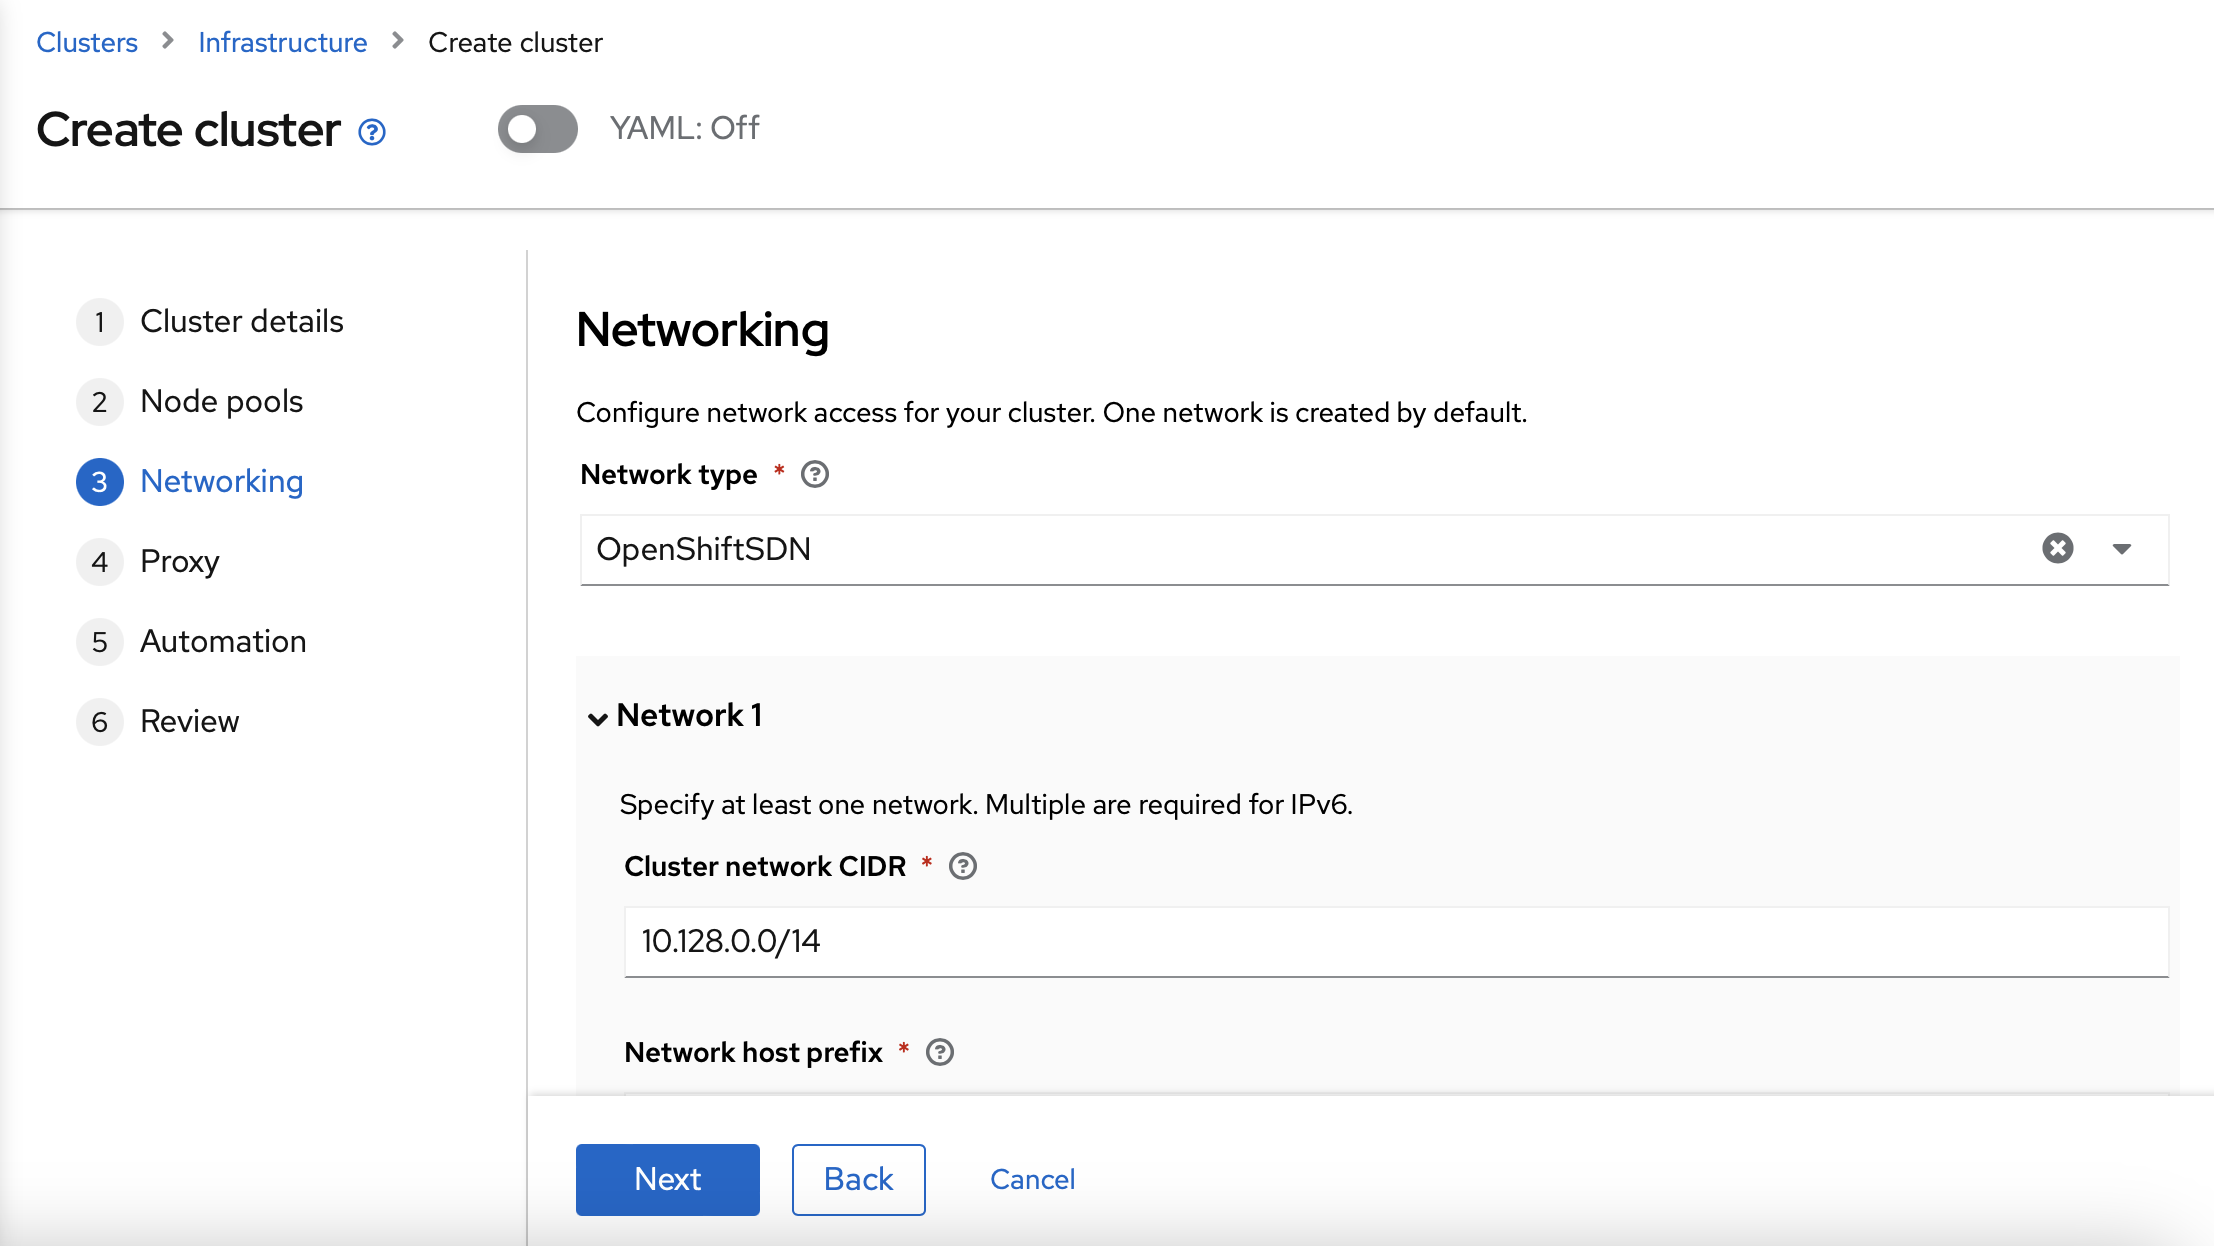
On the Networking form, you can use the default values.
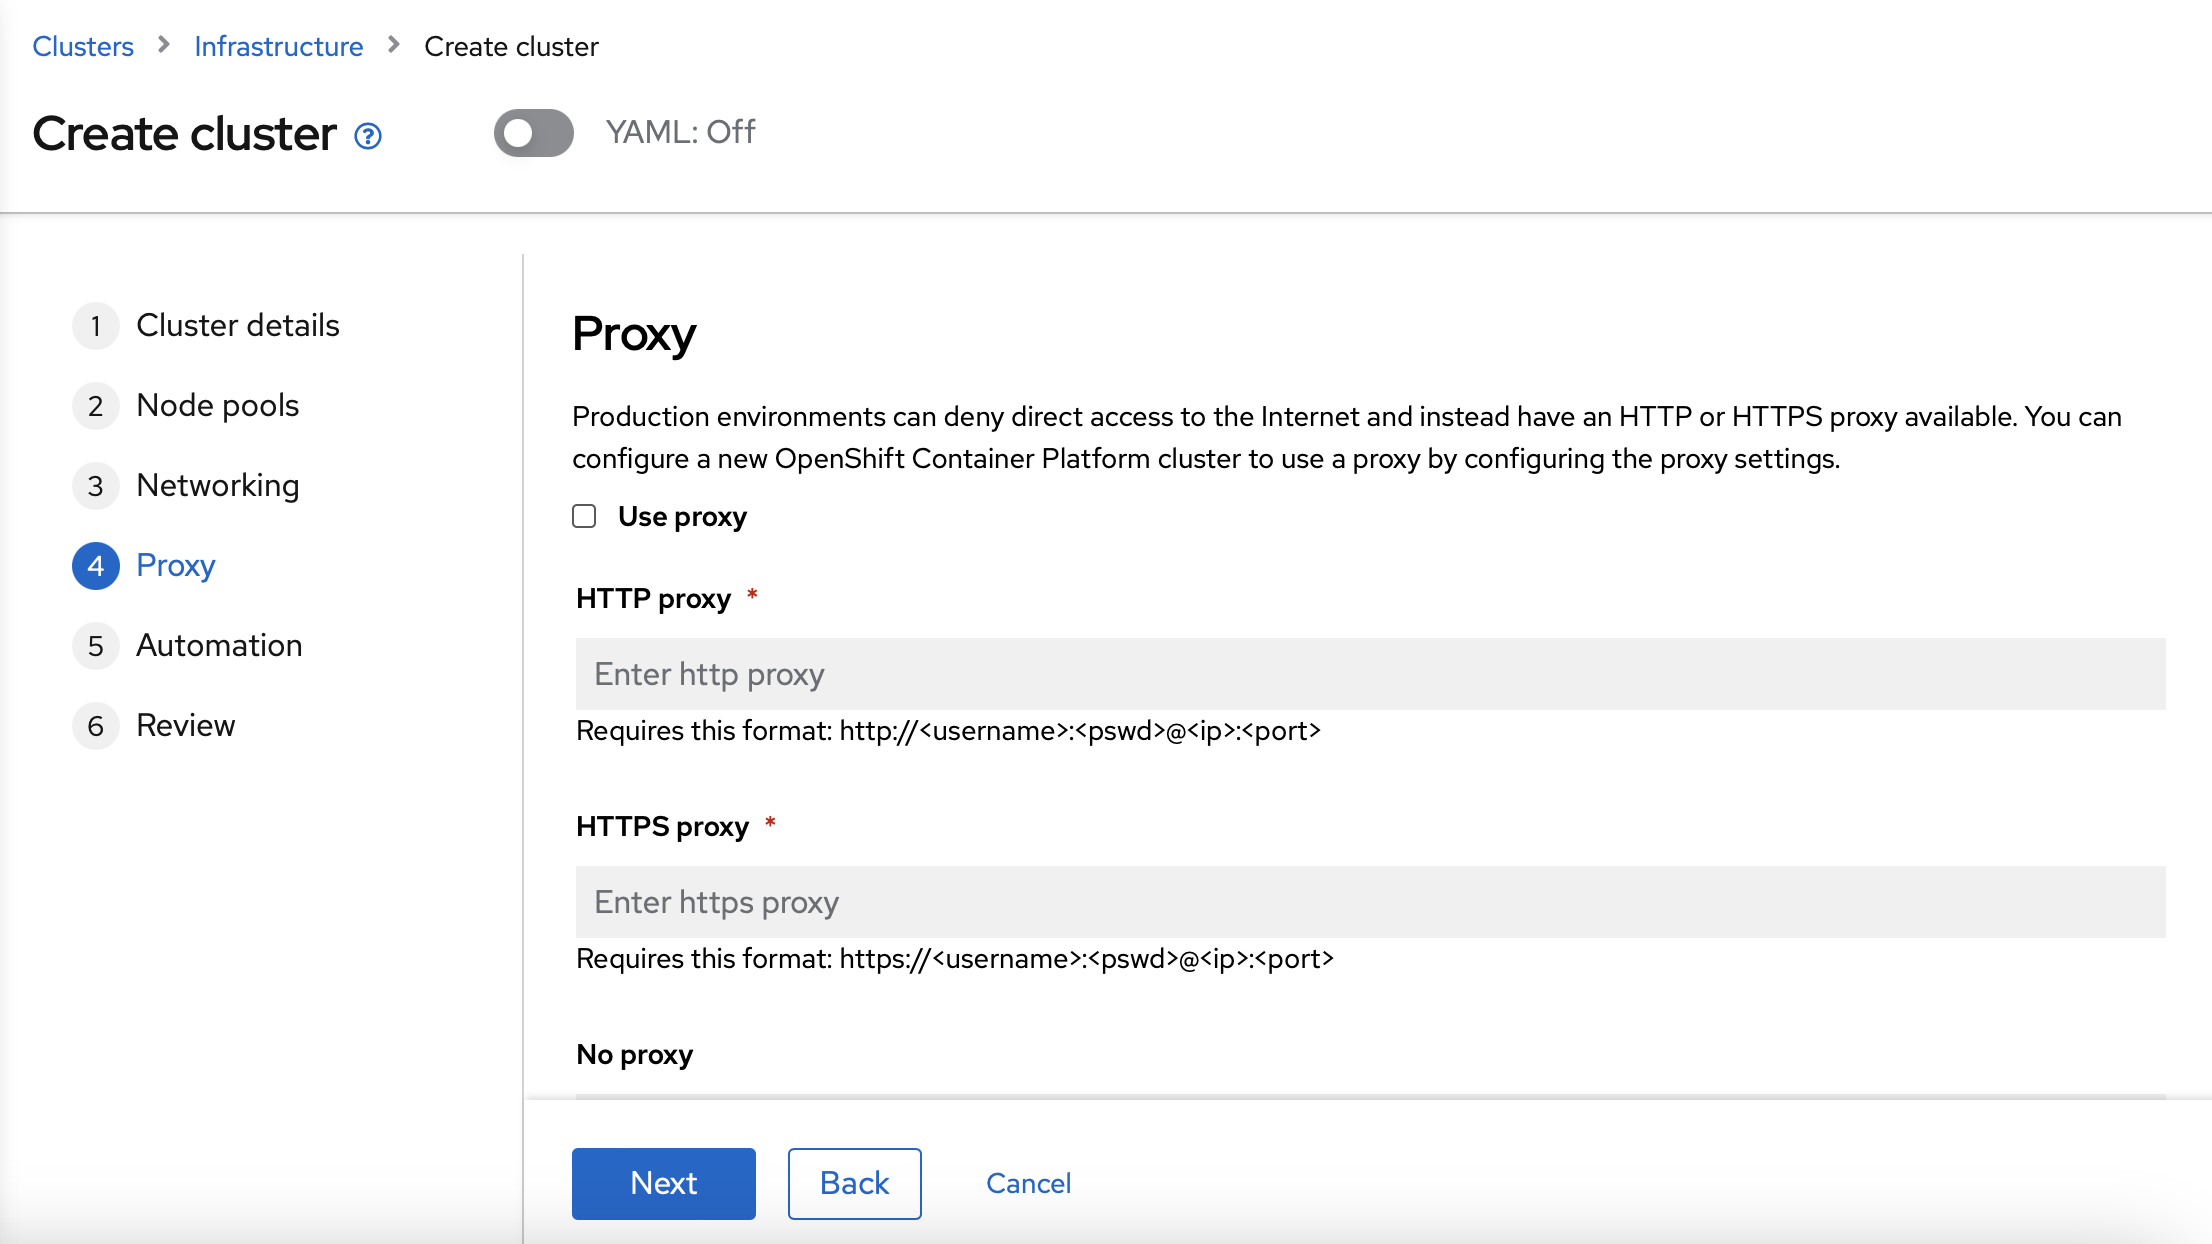
The Proxy is not going to be used in this LAB, so you don’t need to define the Proxy values.
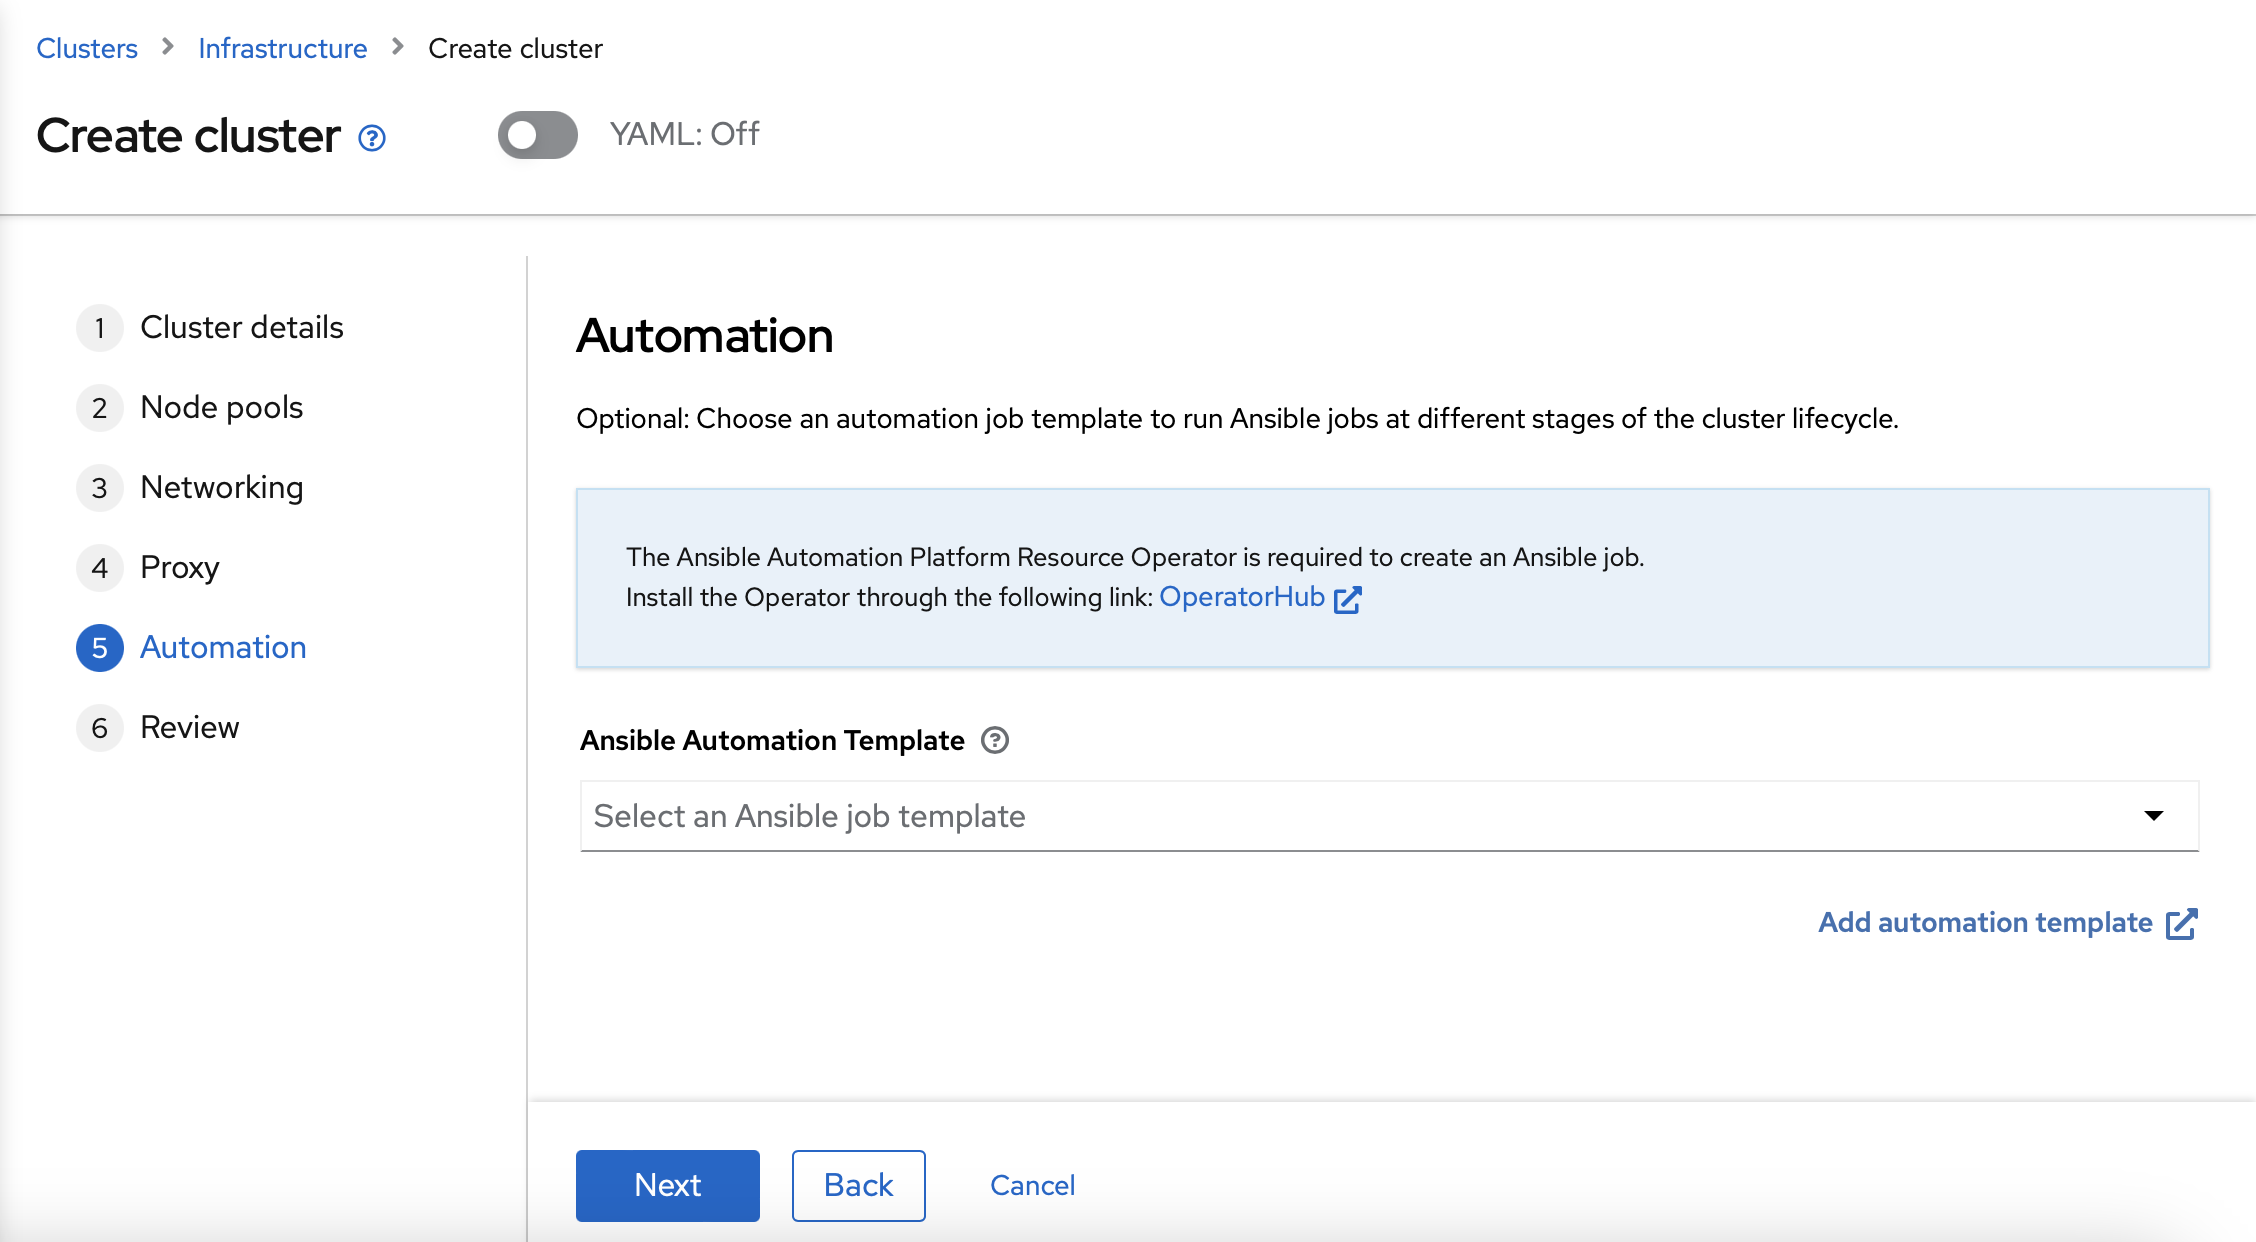
The Automation is not going to be used in this LAB also, so you don’t need to define any values.
Finally, you can review the data and create the cluster
The cluster installation will take around 30 minutes. So go the next section, you can do it while the cluster is being installed.
Deploy a new OpenShift cluster via CLI
To deploy a new OpenShift cluster via CLI, you will need to create a install-config.yaml file first. You can use this example as a template:
apiVersion: v1
metadata:
  name: 'rhte2023-cluster01'
baseDomain: <1 - Base DNS domain>
controlPlane:
  architecture: amd64
  hyperthreading: Enabled
  name: master
  replicas: 3
  platform:
    aws:
      rootVolume:
        iops: 4000
        size: 100
        type: io1
      type: m5.xlarge
compute:
- hyperthreading: Enabled
  architecture: amd64
  name: 'worker'
  replicas: 3
  platform:
    aws:
      rootVolume:
        iops: 2000
        size: 100
        type: io1
      type: m5.xlarge
networking:
  networkType: OpenShiftSDN
  clusterNetwork:
  - cidr: 10.128.0.0/14
    hostPrefix: 23
  machineNetwork:
  - cidr: 10.0.0.0/16
  serviceNetwork:
  - 172.30.0.0/16
platform:
  aws:
    region: eu-west-2
pullSecret: "" # skip, hive will inject based on it's secrets
sshKey: |-
    <2 - Your SSH public key>
After creating the file, you will need to encode it to base64. You can convert it with the following command:
cat install-config.yaml | base64Save the output, you will need it on the next step.
Now, you can create the needed resources to create the second cluster. You will need to create a rhte2023-cluster01.yaml file. You can follow this example, and modify it with the variables of your environment:
apiVersion: hive.openshift.io/v1
kind: ClusterDeployment
metadata:
  name: 'rhte2023-cluster01'
  namespace: 'rhte2023-cluster01'
  labels:
    cloud: 'AWS'
    region: 'eu-west-1'
    vendor: OpenShift
    cluster.open-cluster-management.io/clusterset: 'default'
spec:
  baseDomain: <1 - Base DNS Domain>
  clusterName: 'rhte2023-cluster01'
  controlPlaneConfig:
    servingCertificates: {}
  installAttemptsLimit: 1
  installed: false
  platform:
    aws:
      credentialsSecretRef:
        name: rhte2023-cluster01-aws-creds
      region: eu-west-1
  provisioning:
    installConfigSecretRef:
      name: rhte2023-cluster01-install-config
    sshPrivateKeySecretRef:
      name: rhte2023-cluster01-ssh-private-key
    imageSetRef:
       #quay.io/openshift-release-dev/ocp-release:4.10.47-x86_64
      name: img4.10.47-x86-64-appsub
  pullSecretRef:
    name: rhte2023-cluster01-pull-secret
---
apiVersion: cluster.open-cluster-management.io/v1
kind: ManagedCluster
metadata:
  labels:
    cloud: Amazon
    region: eu-west-1
    name: 'rhte2023-cluster01'
    vendor: OpenShift
    cluster.open-cluster-management.io/clusterset: 'default'
  name: 'rhte2023-cluster01'
spec:
  hubAcceptsClient: true
---
apiVersion: hive.openshift.io/v1
kind: MachinePool
metadata:
  name: rhte2023-cluster01-worker
  namespace: 'rhte2023-cluster01'
spec:
  clusterDeploymentRef:
    name: 'rhte2023-cluster01'
  name: worker
  platform:
    aws:
      rootVolume:
        iops: 2000
        size: 100
        type: io1
      type: m5.xlarge
  replicas: 3
---
apiVersion: v1
kind: Secret
metadata:
  name: rhte2023-cluster01-pull-secret
  namespace: 'rhte2023-cluster01'
stringData:
  .dockerconfigjson: |-
    <2 - Global pull secret>
type: kubernetes.io/dockerconfigjson
---
apiVersion: v1
kind: Secret
metadata:
  name: rhte2023-cluster01-install-config
  namespace: 'rhte2023-cluster01'
type: Opaque
data:
  # Base64 encoding of install-config yaml
  install-config.yaml: <3 - Base64 encoded file>
---
apiVersion: v1
kind: Secret
metadata:
  name: rhte2023-cluster01-ssh-private-key
  namespace: 'rhte2023-cluster01'
stringData:
  ssh-privatekey: |-
    <4 - SSH private key>
type: Opaque
---
apiVersion: v1
kind: Secret
type: Opaque
metadata:
  name: rhte2023-cluster01-aws-creds
  namespace: 'rhte2023-cluster01'
stringData:
  aws_access_key_id: <5 - AWS Access key ID>
  aws_secret_access_key: <6 - AWS Secret Key>
---
apiVersion: agent.open-cluster-management.io/v1
kind: KlusterletAddonConfig
metadata:
  name: 'rhte2023-cluster01'
  namespace: 'rhte2023-cluster01'
spec:
  clusterName: 'rhte2023-cluster01'
  clusterNamespace: 'rhte2023-cluster01'
  clusterLabels:
    cloud: Amazon
    vendor: OpenShift
  applicationManager:
    enabled: true
  policyController:
    enabled: true
  searchCollector:
    enabled: true
  certPolicyController:
    enabled: true
  iamPolicyController:
    enabled: true
Now, apply the file:
oc create -f rhte2023-cluster01.yamlThe second cluster installation, will be launched. The cluster installation will take around 30 minutes. So, go the next section, you can do it while the cluster is being installed.
Remember completing both sections below once the new Cluster rhte2023-cluster01 is deployed.
|
Switching context for the new cluster
Once the clusters installation in completed and in order to easily switch between Openshift clusters in this lab, we will create a new context for the new rhte2023-cluster01.
-
Login into the
rhte2023-cluster01
Once the cluster is deployed, go to cluster section on ACM, choose rhte2023-cluster01 and you will see the kubeadmin password there.
|
oc login -u kubeadmin -p <password> --insecure-skip-tls-verify https://api.<your_cluster>:6443-
Rename the current context to
cluster01
oc config rename-context $(oc config current-context) cluster01-
List
cluster01context
oc config get-contexts cluster01-
Check the new oc context works properly
oc --context cluster01 get nodesRegistering rhte2023-cluster01 to GitOps
Let’s add the new cluster rhte2023-cluster01 to the existing ClusterSet rhte2023-gitops-clusters-vendor as follows:
oc --context acm label ManagedCluster rhte2023-cluster01 cluster.open-cluster-management.io/clusterset=rhte2023-gitops-clusters --overwriteWell done!! ;-)