Deploy Red Hat Advanced Management Policies
Now, you are going to create two policies. The policies can be used to check that the OpenShift clusters are compliant.
First, you are going to create a policy to check that a specific namespace exists on both clusters. As the namespace does not exsit and the policy is on Inform mode only, the policy is not going to be compliant. Later, you can create the namespace in one or two OpenShift clusters and check again the policy. The policy will be compliant on the cluster or clusters where the namespace will be created.
Finally, you are going to create another policy to check if the Compliance Operator is installed. This policy is going to be on Enforce mode, so it is going to remediate itself if the policy is not compliant. As the Compliance Operator is not installed by default, you are going to check that the policy is going to install the operator itself to be compliant.
To create the policies, you can use the Red Hat Advanced Cluster Management web interface, or you can use the command line interface (CLI).
Setup the first policy via web interface
To setup the first policy, you need to enter into the Red Hat Advanced Cluster Management route first. You can find it in the open-cluster-management namespace.
After entering into Red Hat Advanced Cluster Management web interface, you need to enter into the "Governance" section.
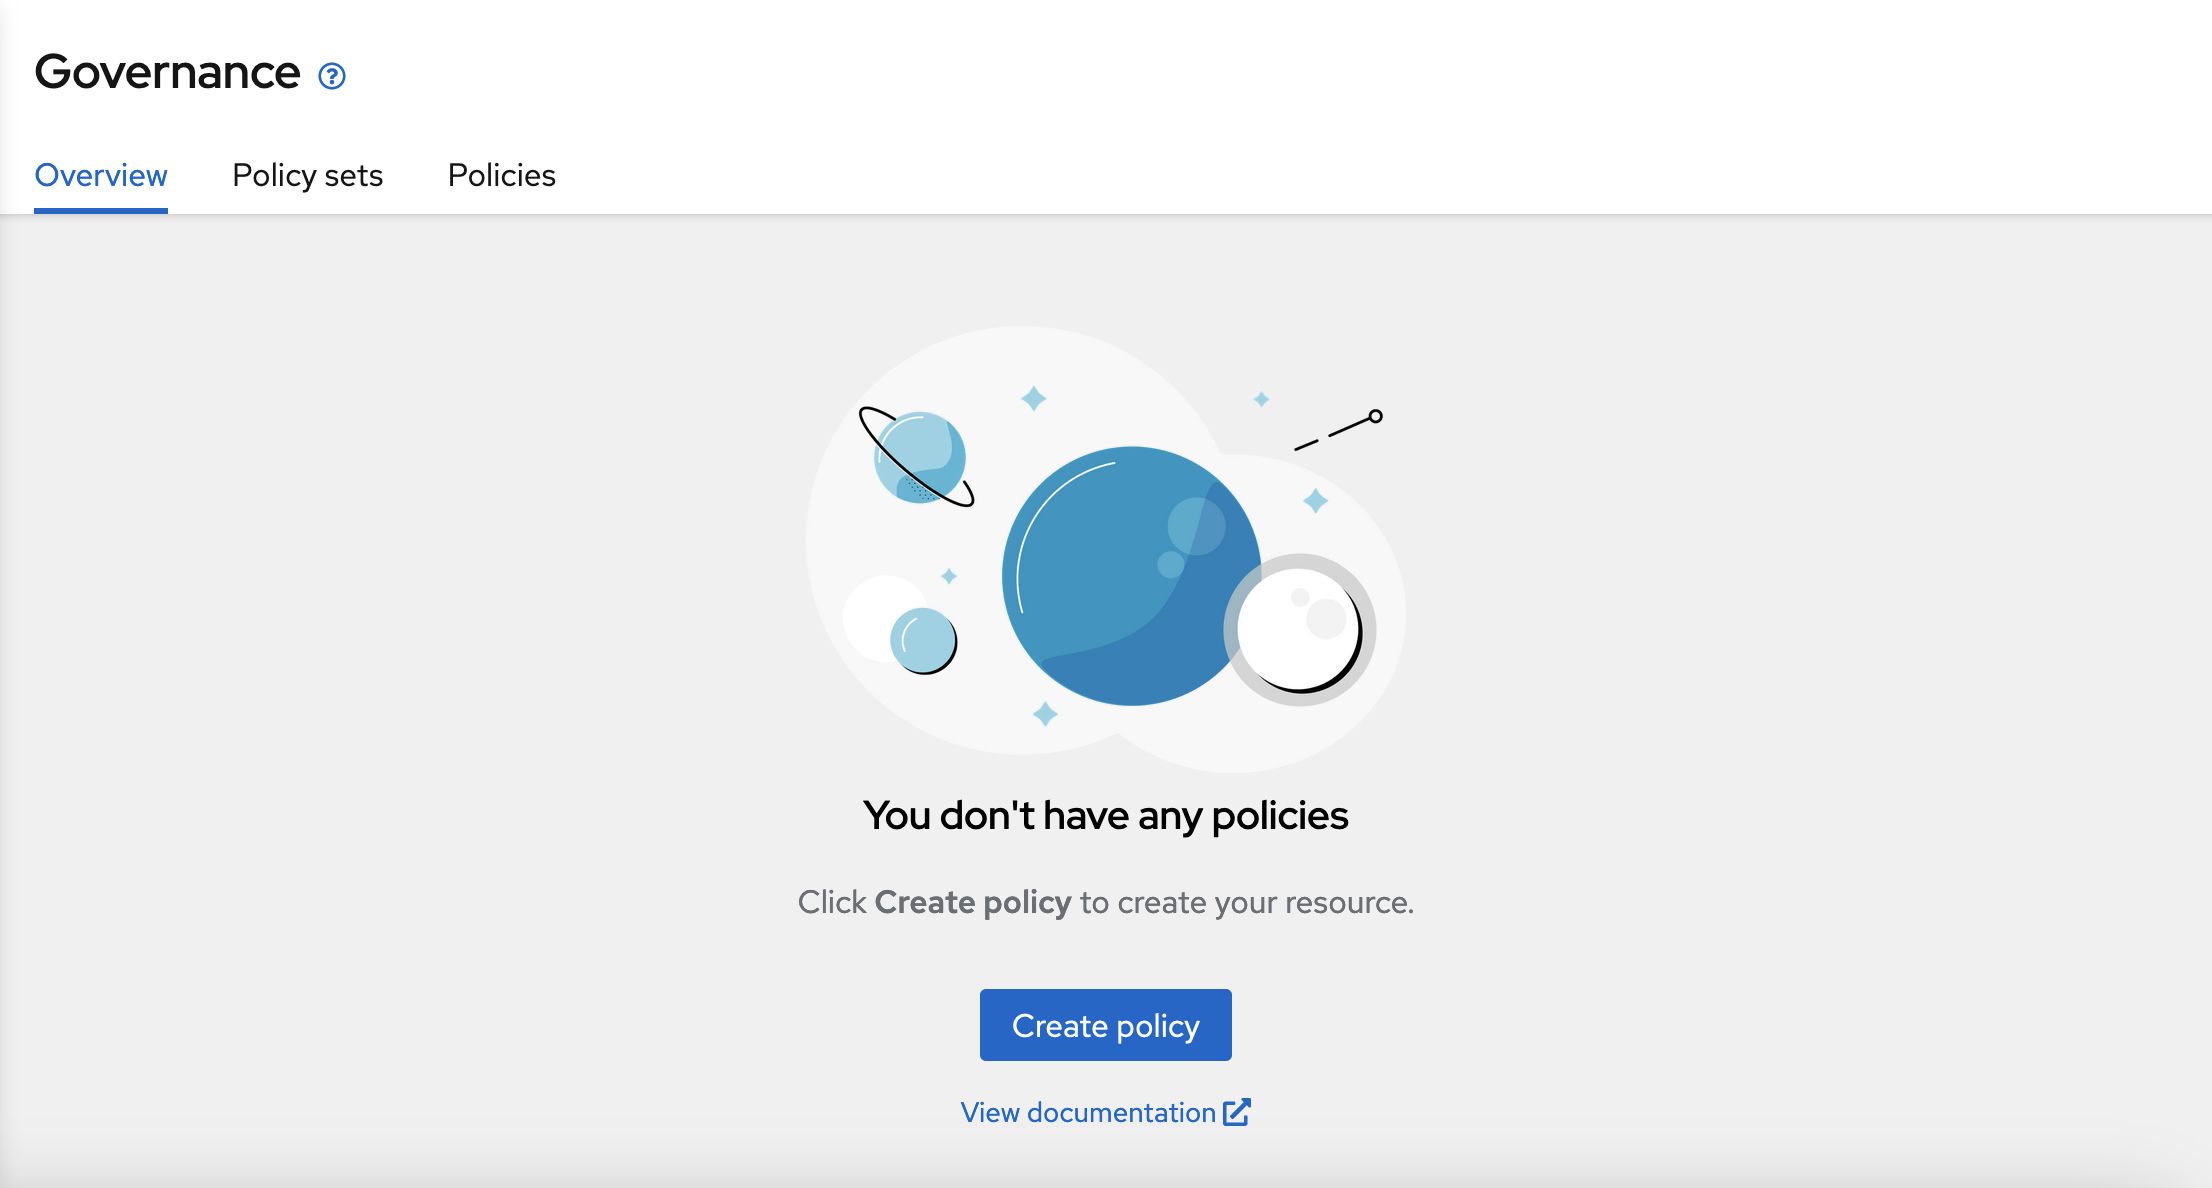
To create the policy, you should click into the "Create policy" button.
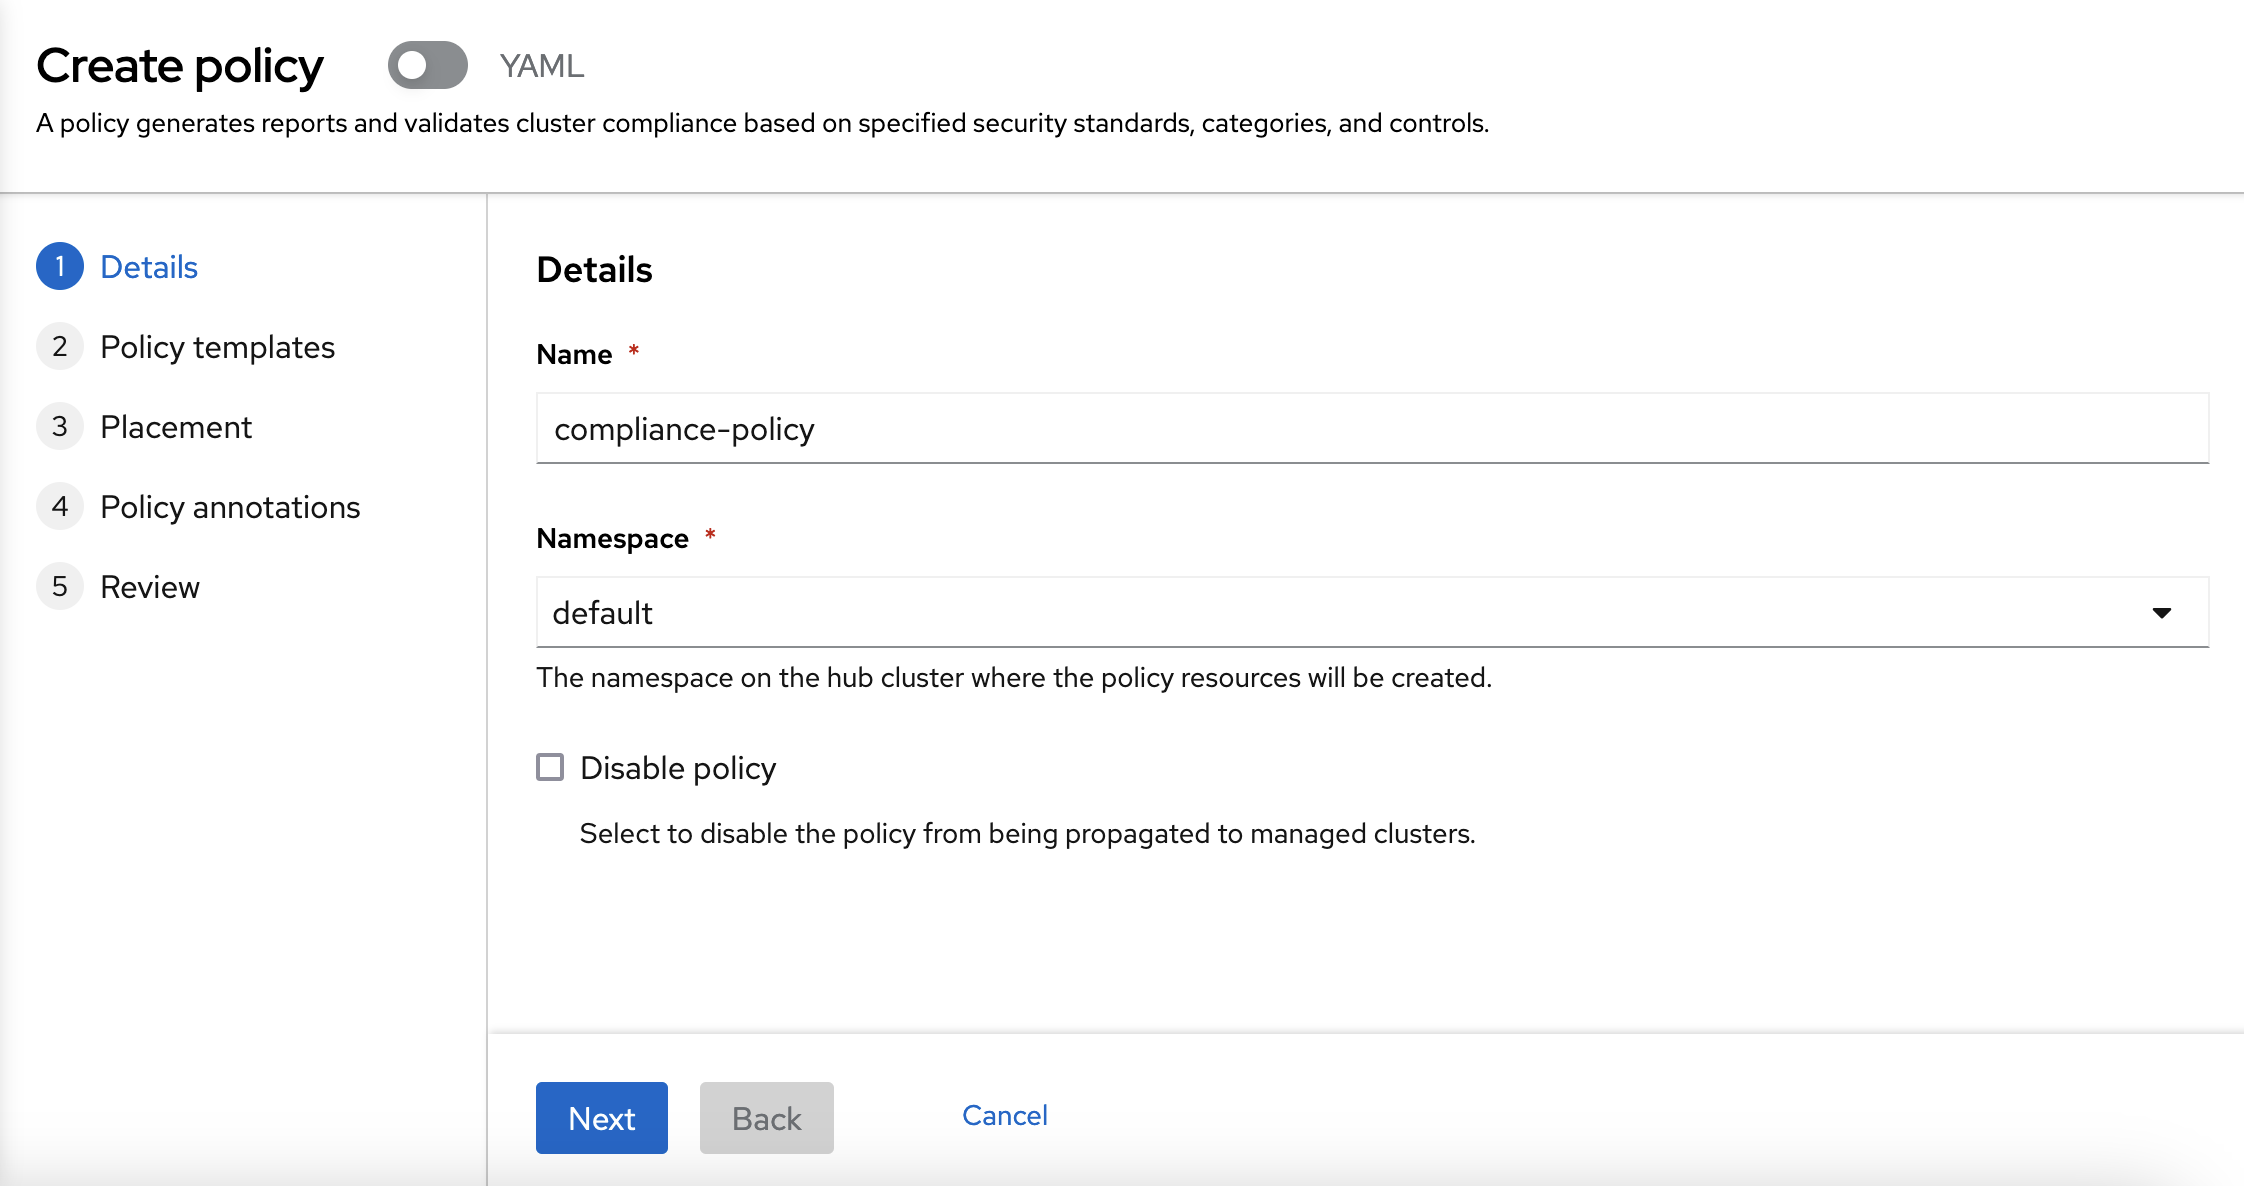
You need to choose a name and a namespace. You can use any name and you can use the "default" namespace.
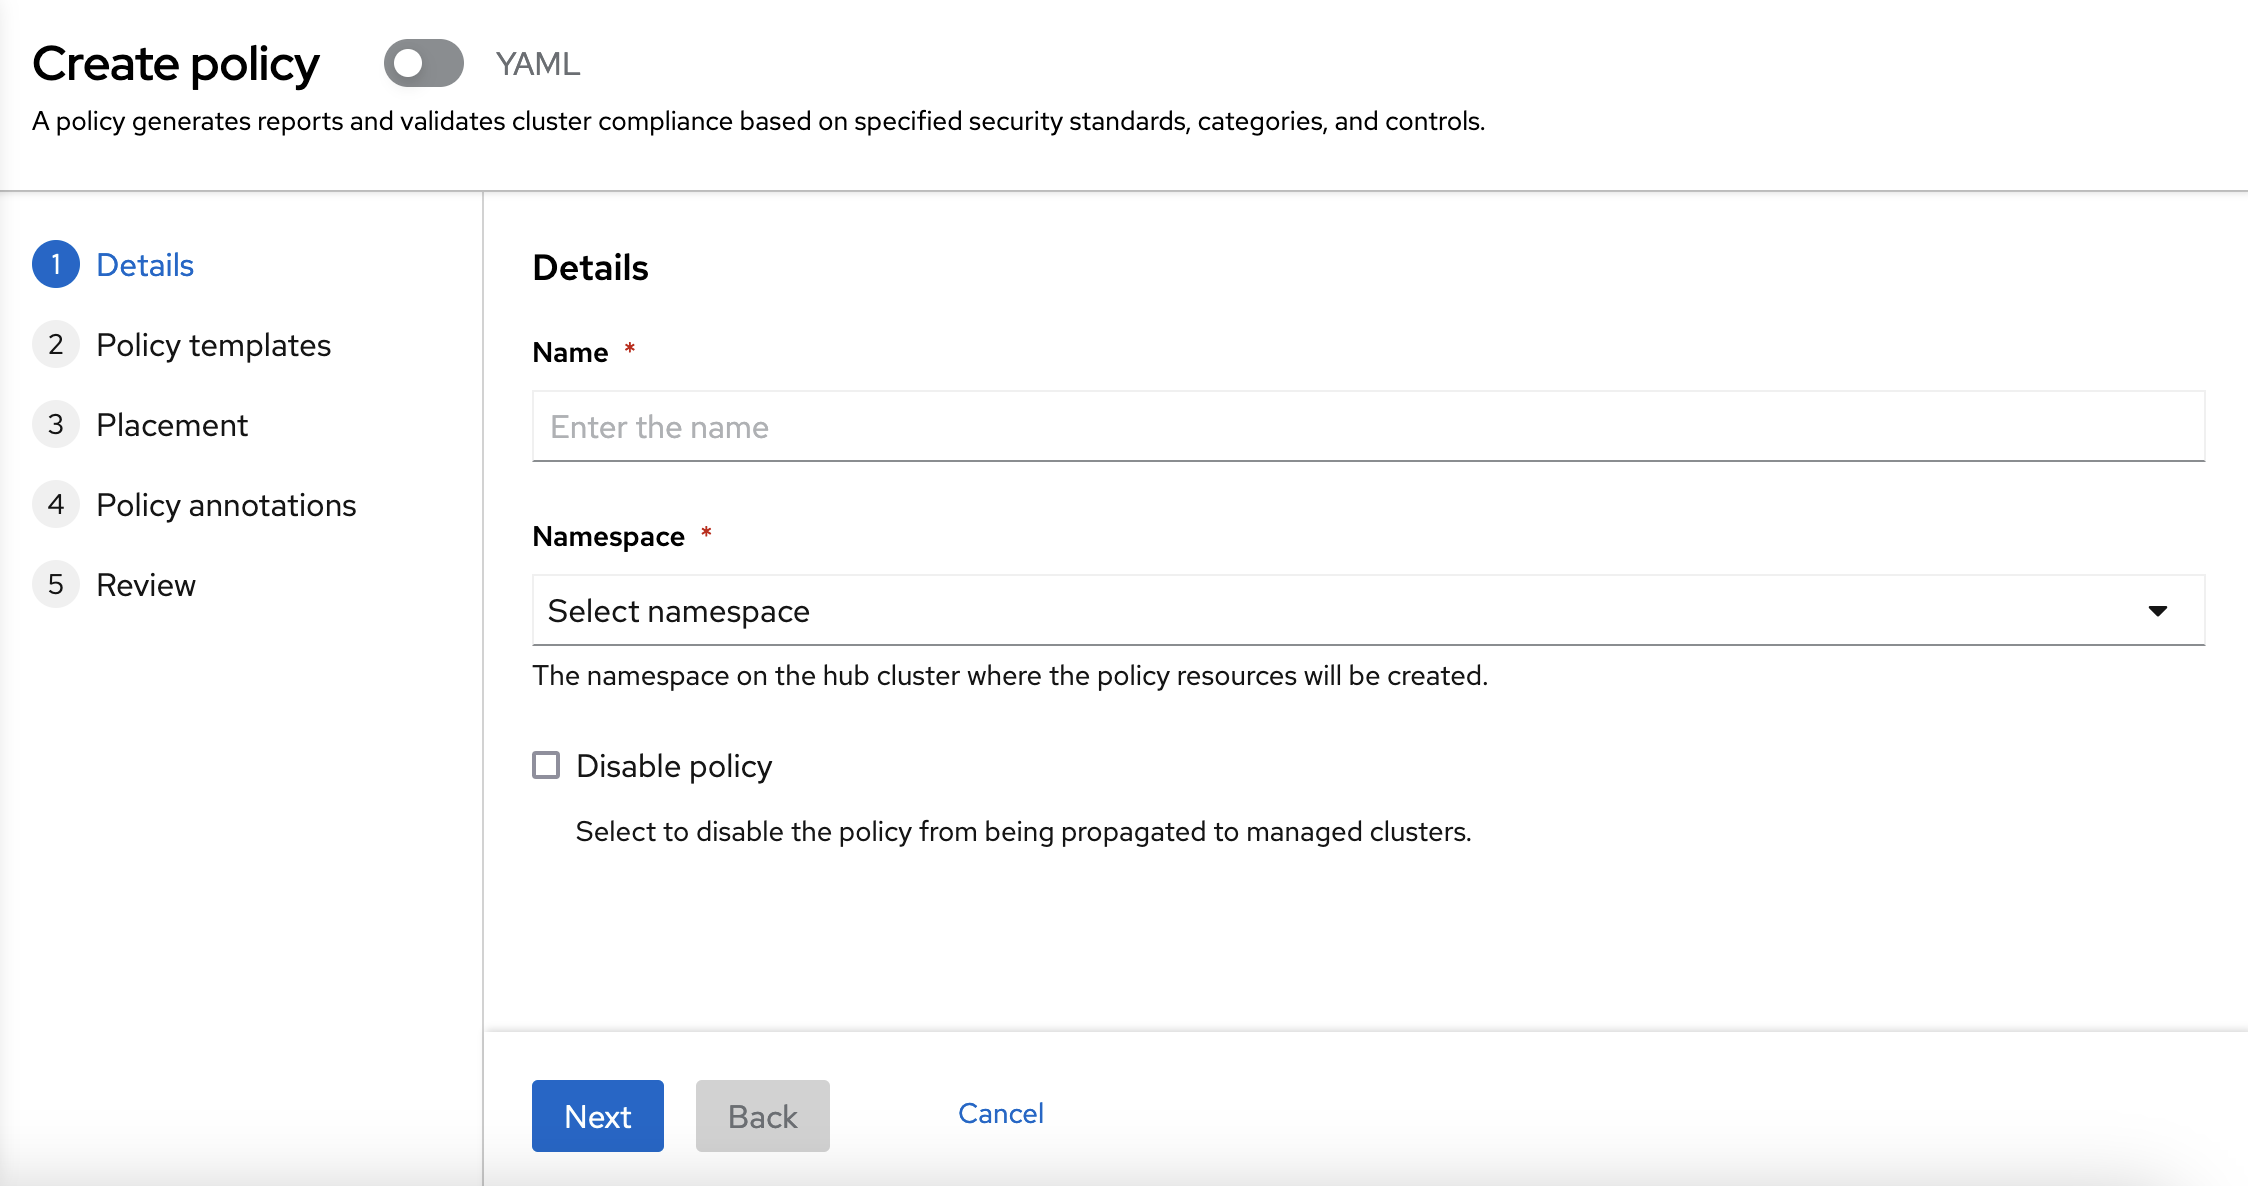
The policy will be in "Inform" mode. You need to click into the "Add policy template" link.
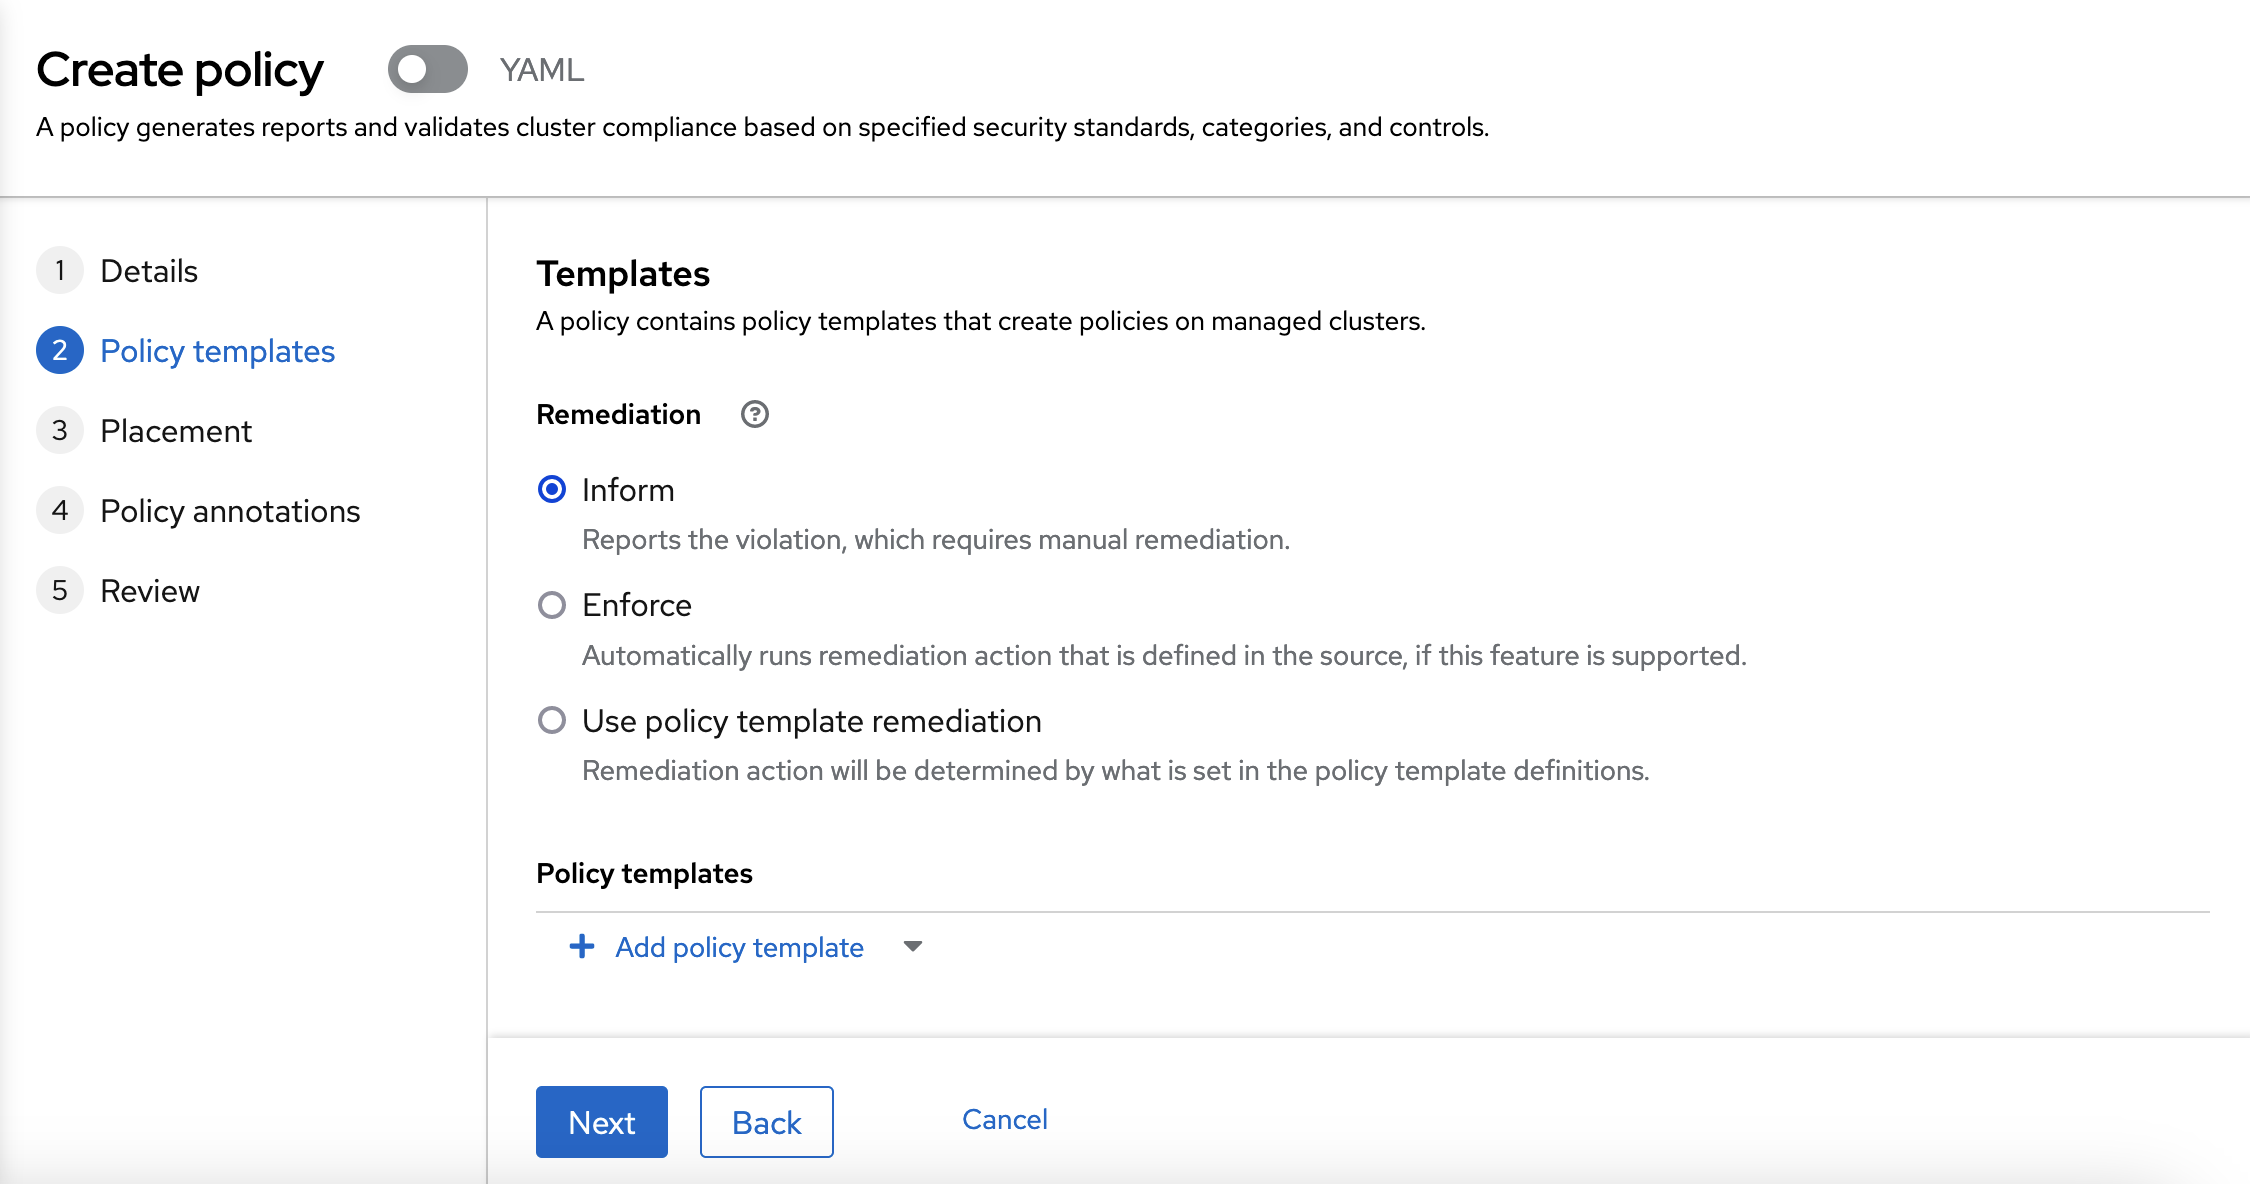
You need to choose the "Namespace must exist" policy.
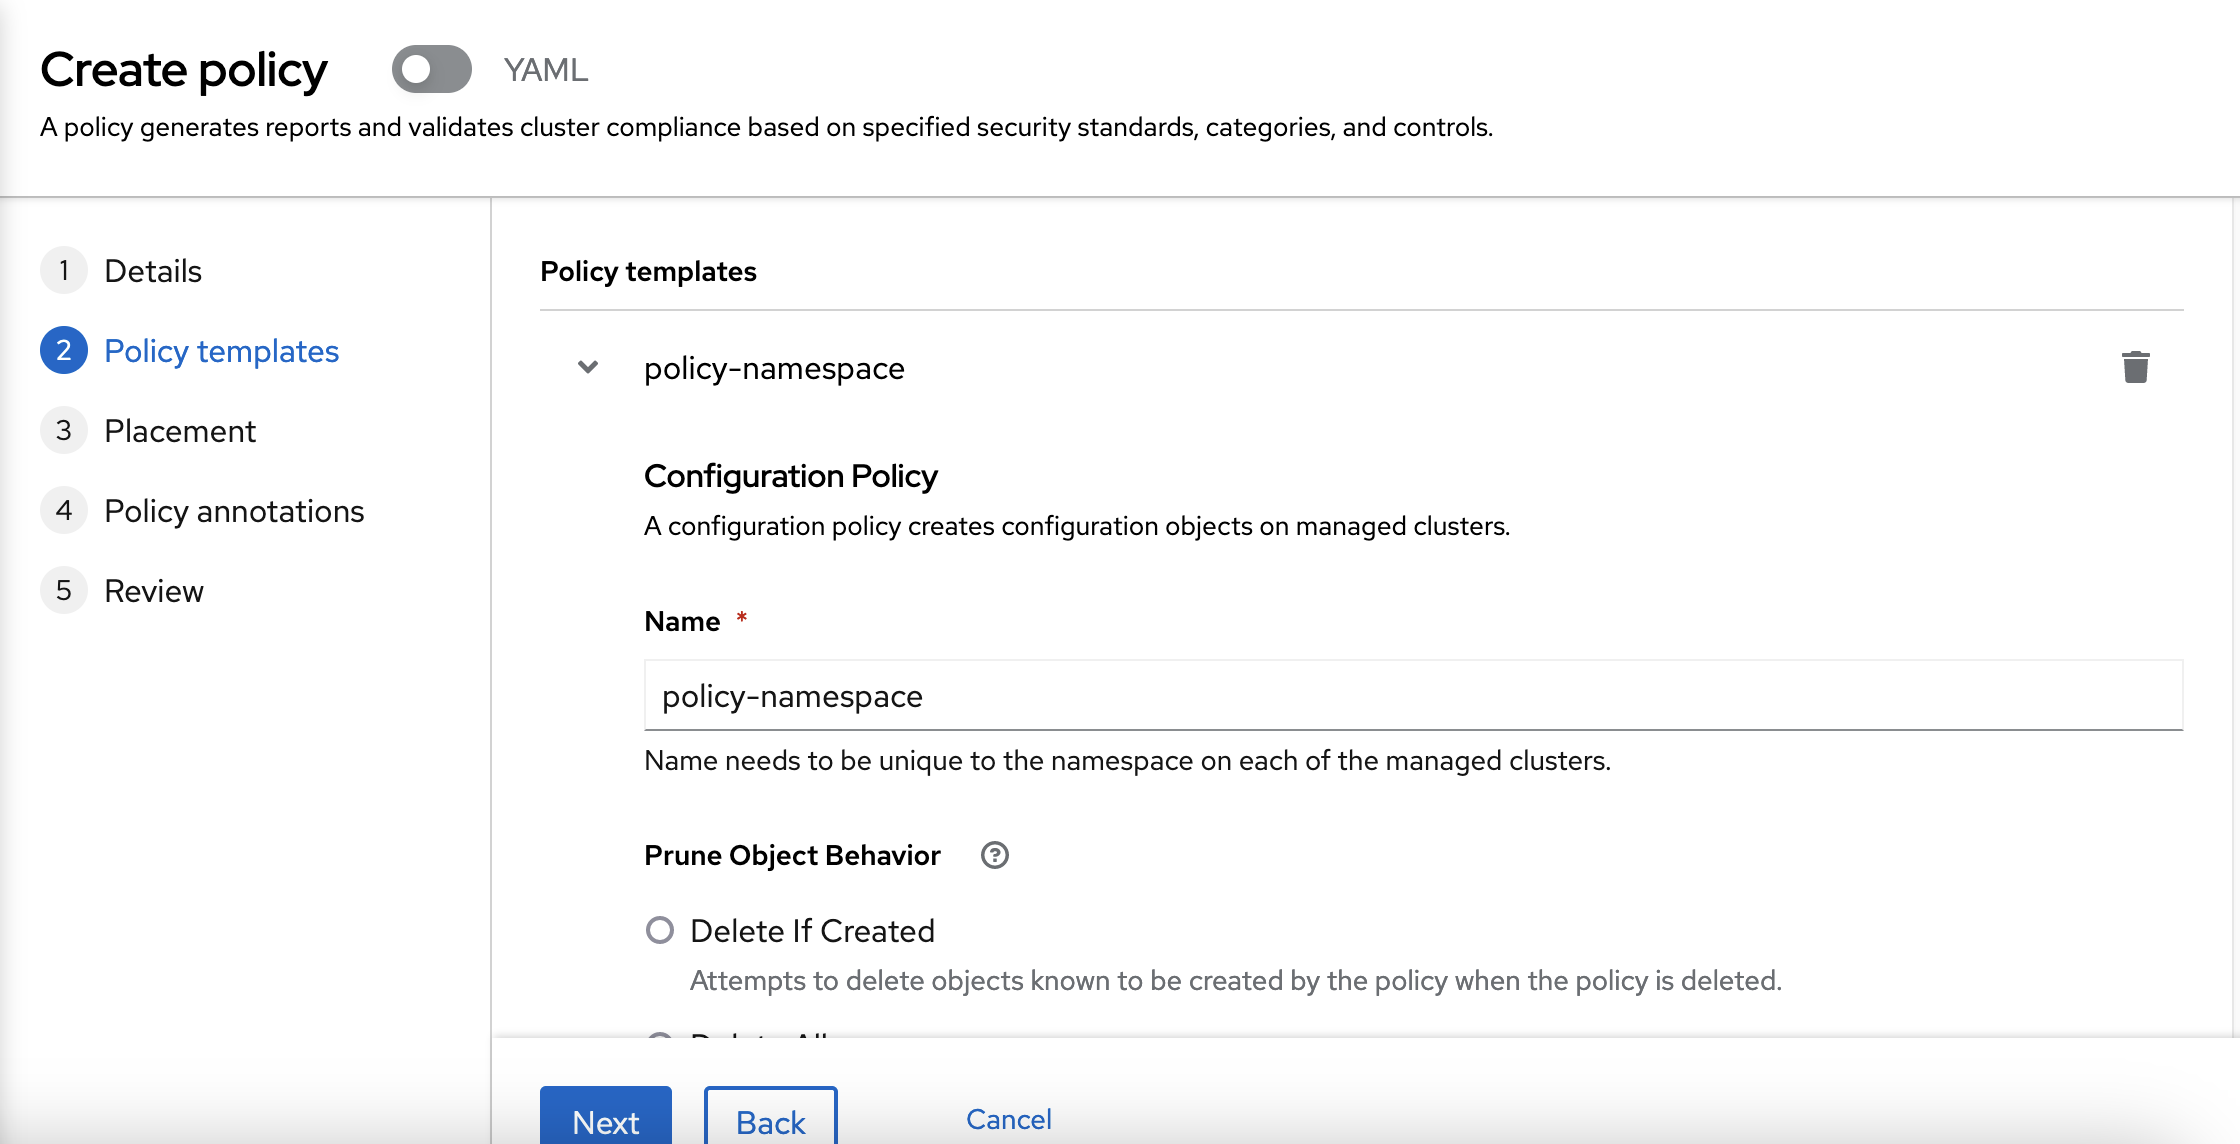
Then, you need to describe the policy. So, we are going to check that the namespace named "rhte" should exist. So, write "rhte" into the name form in "Must have namespace" section. You can use "default" in "Include namespaces".
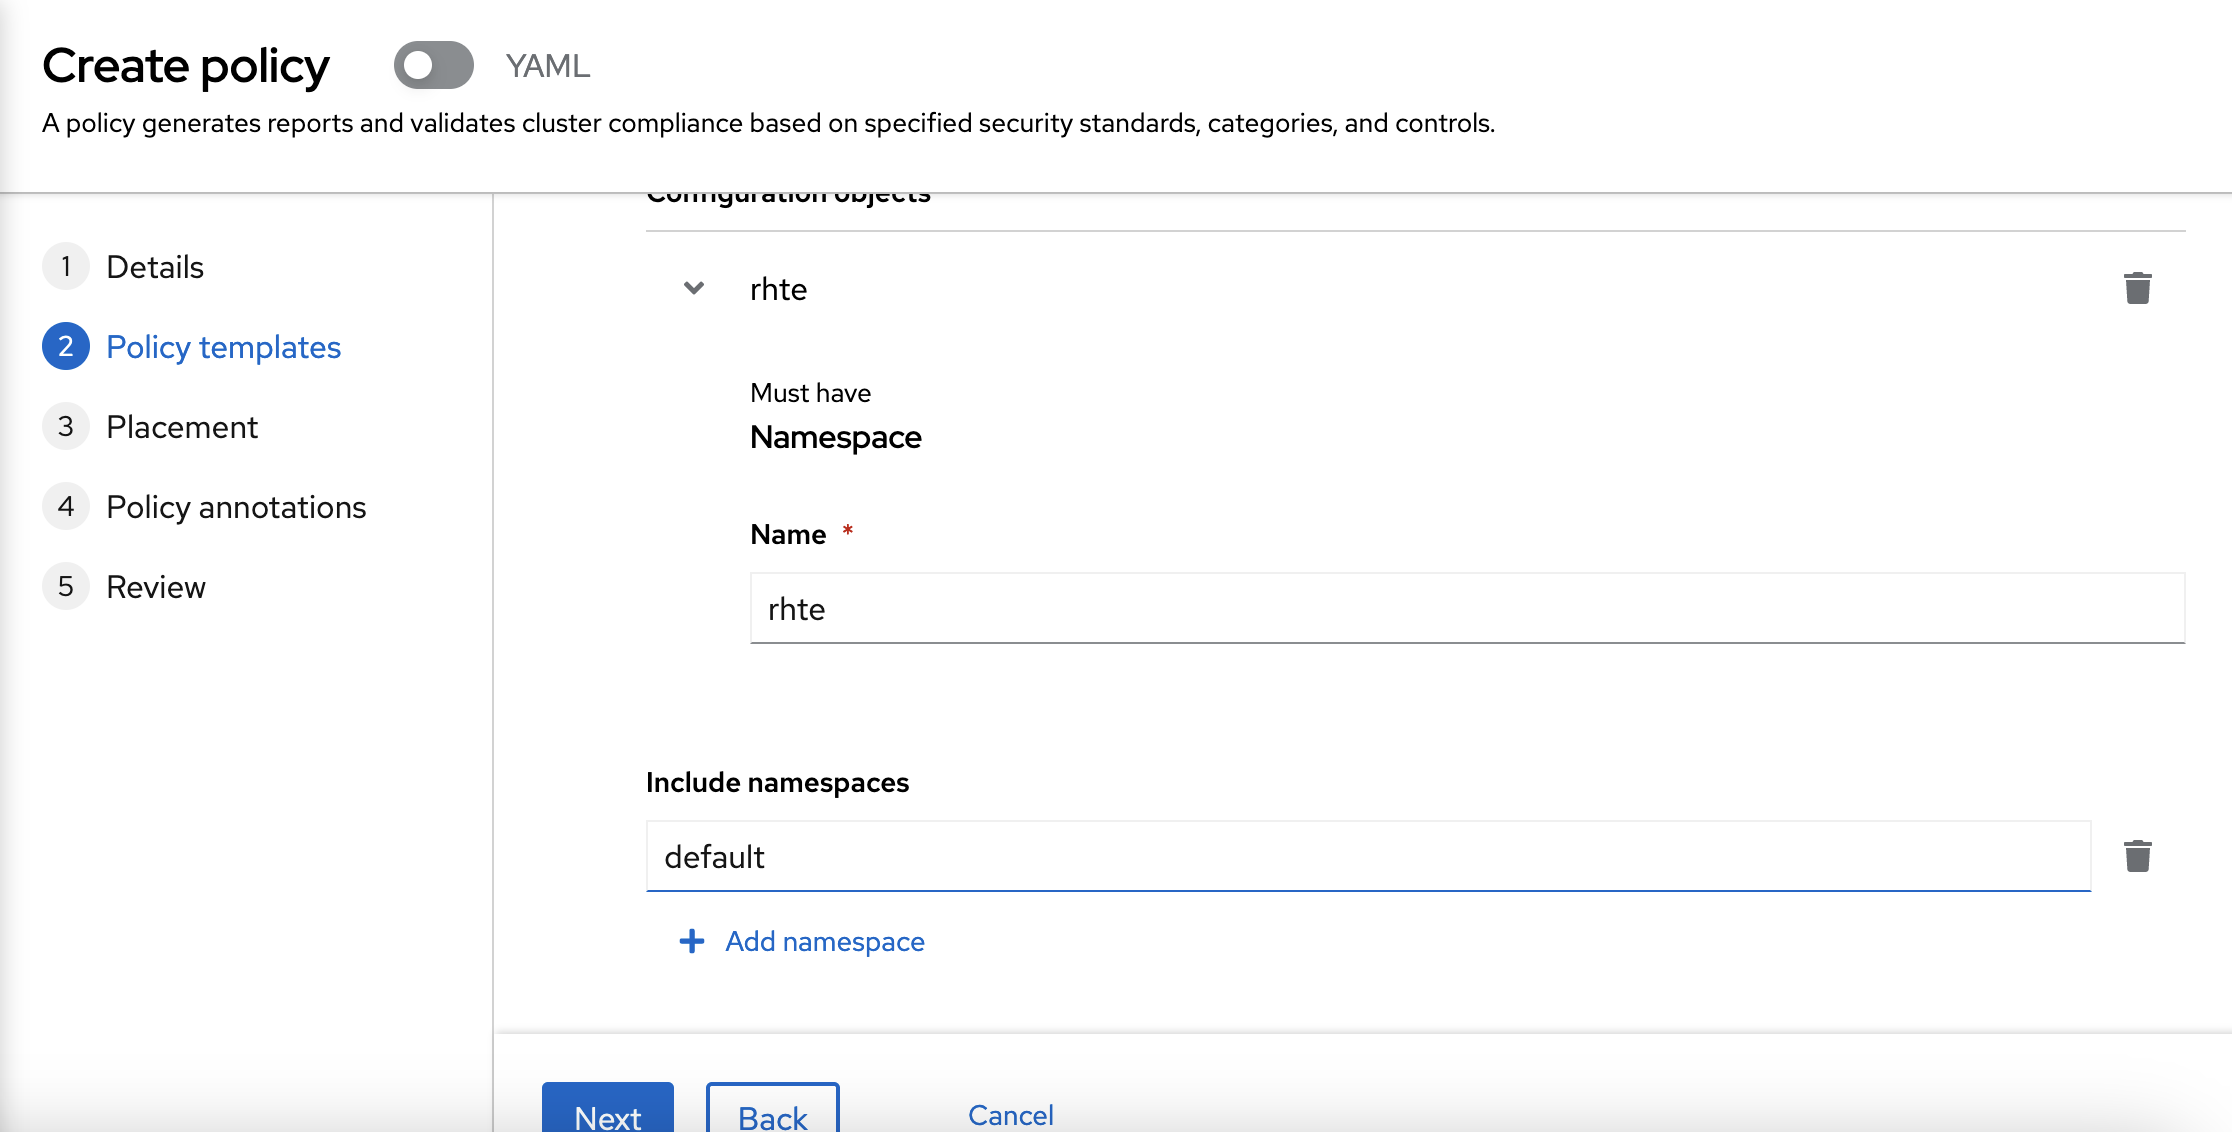
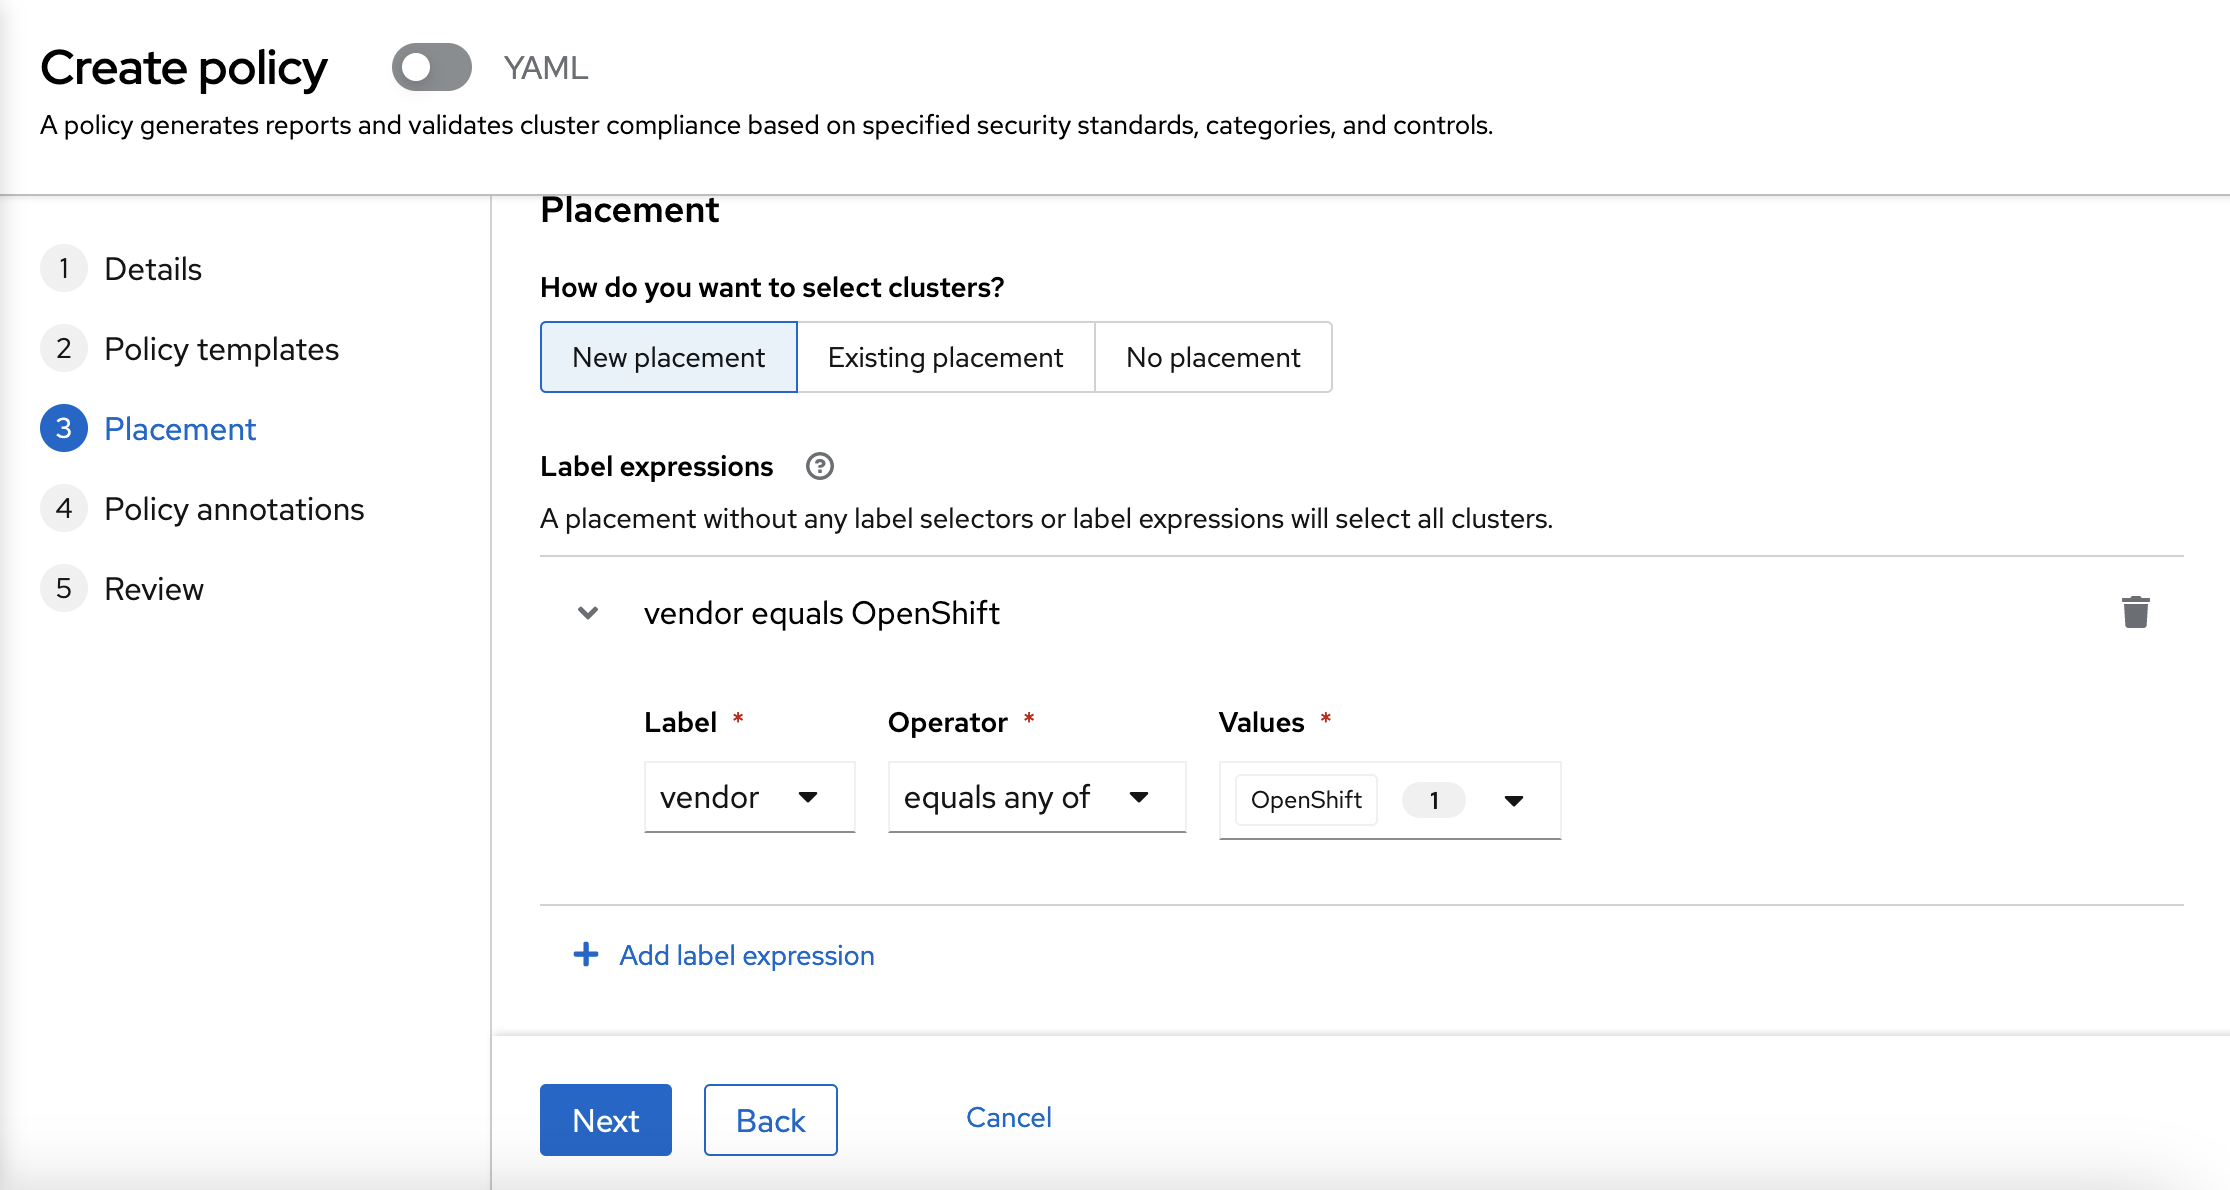
After that, you can go to the next step, which is to create a New placement for the policy.
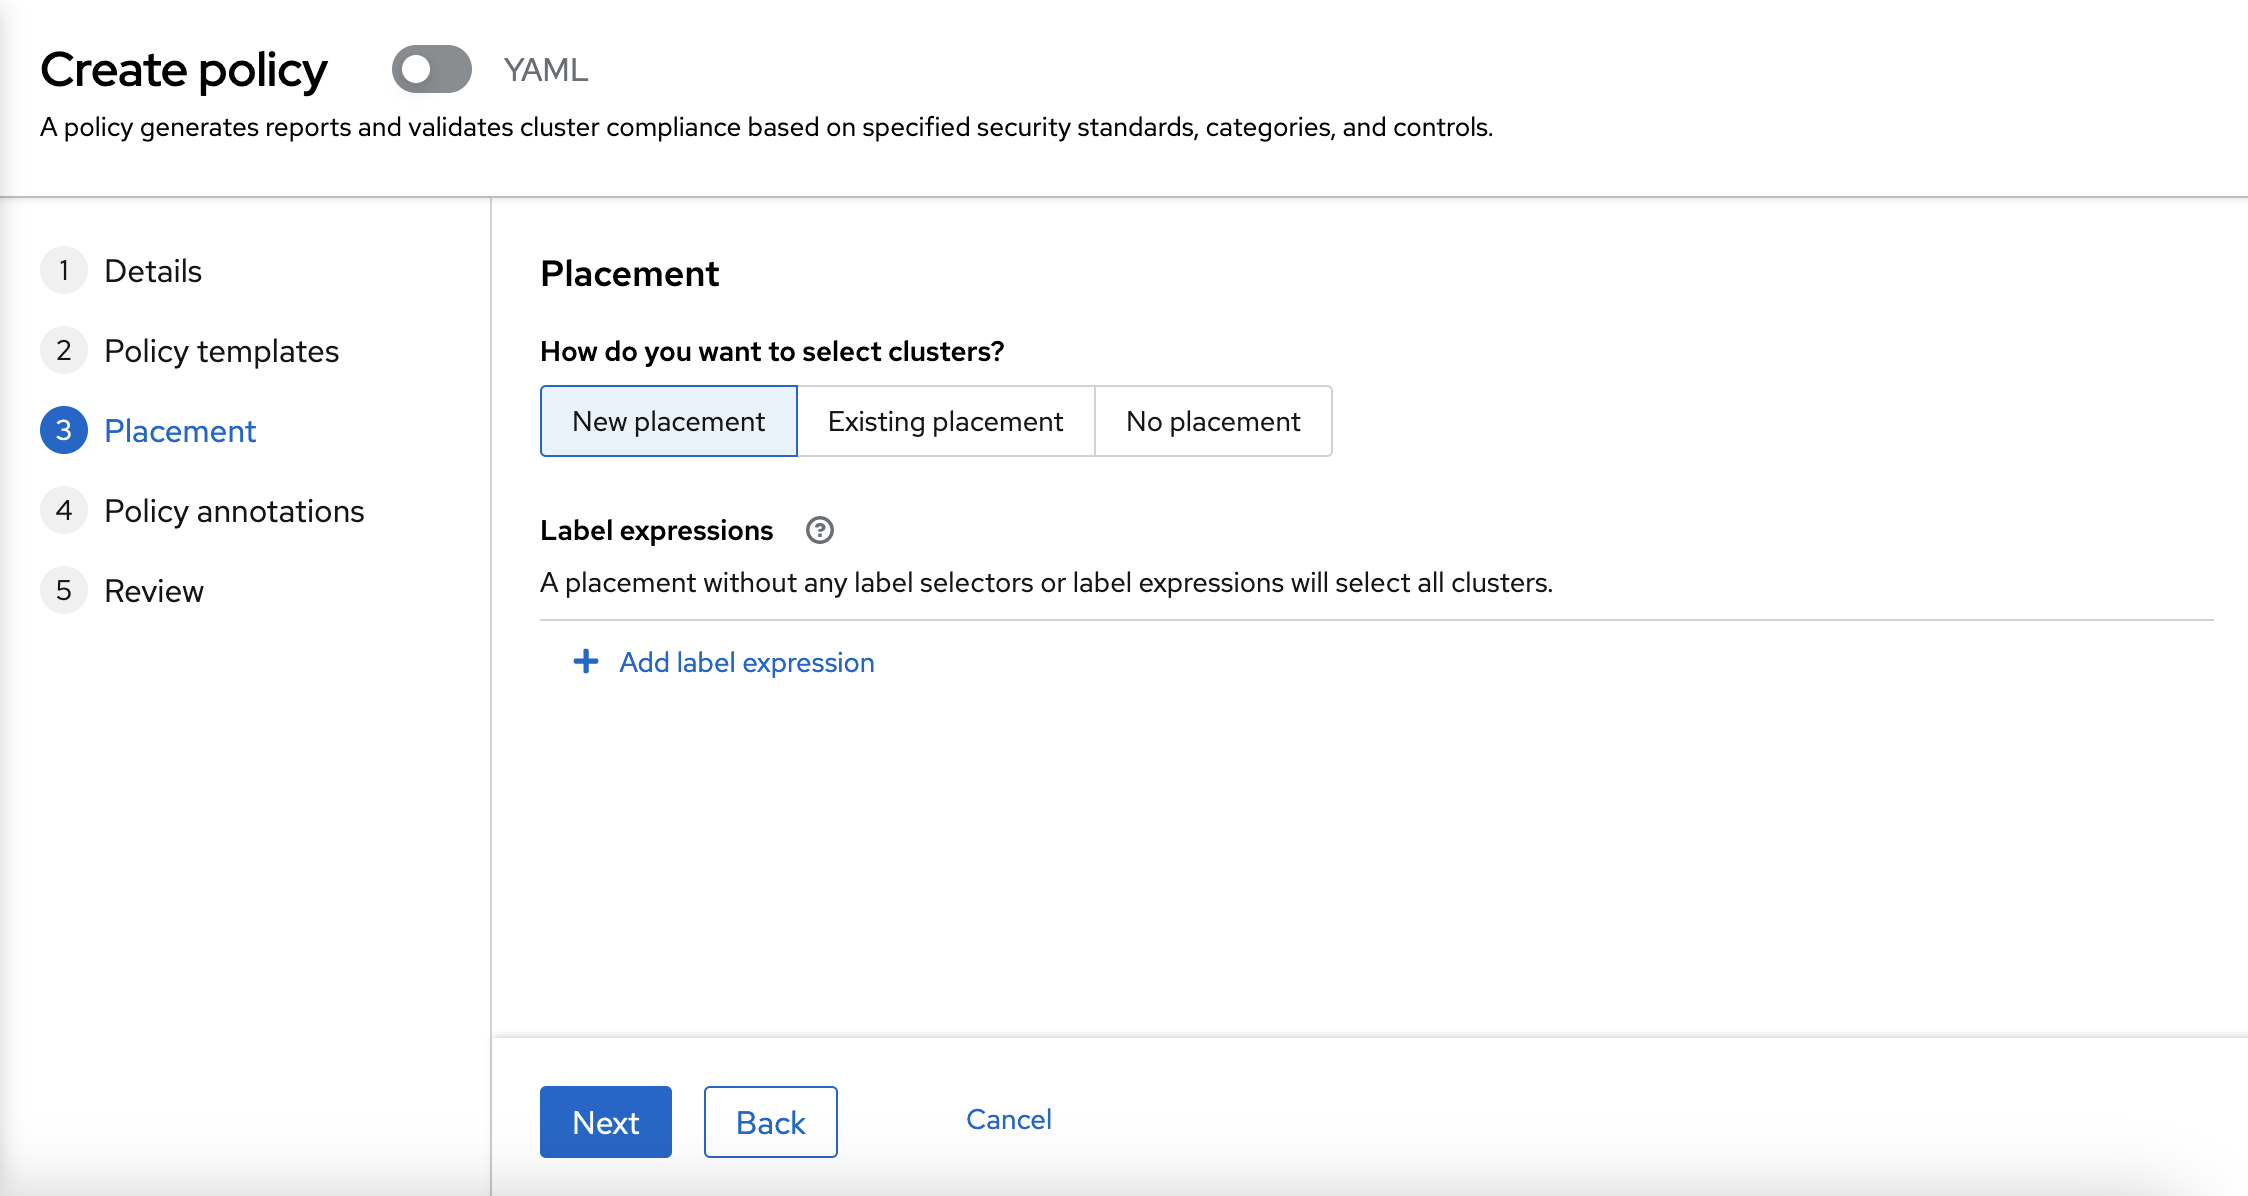
To create the new placement, you need to choose the labels.
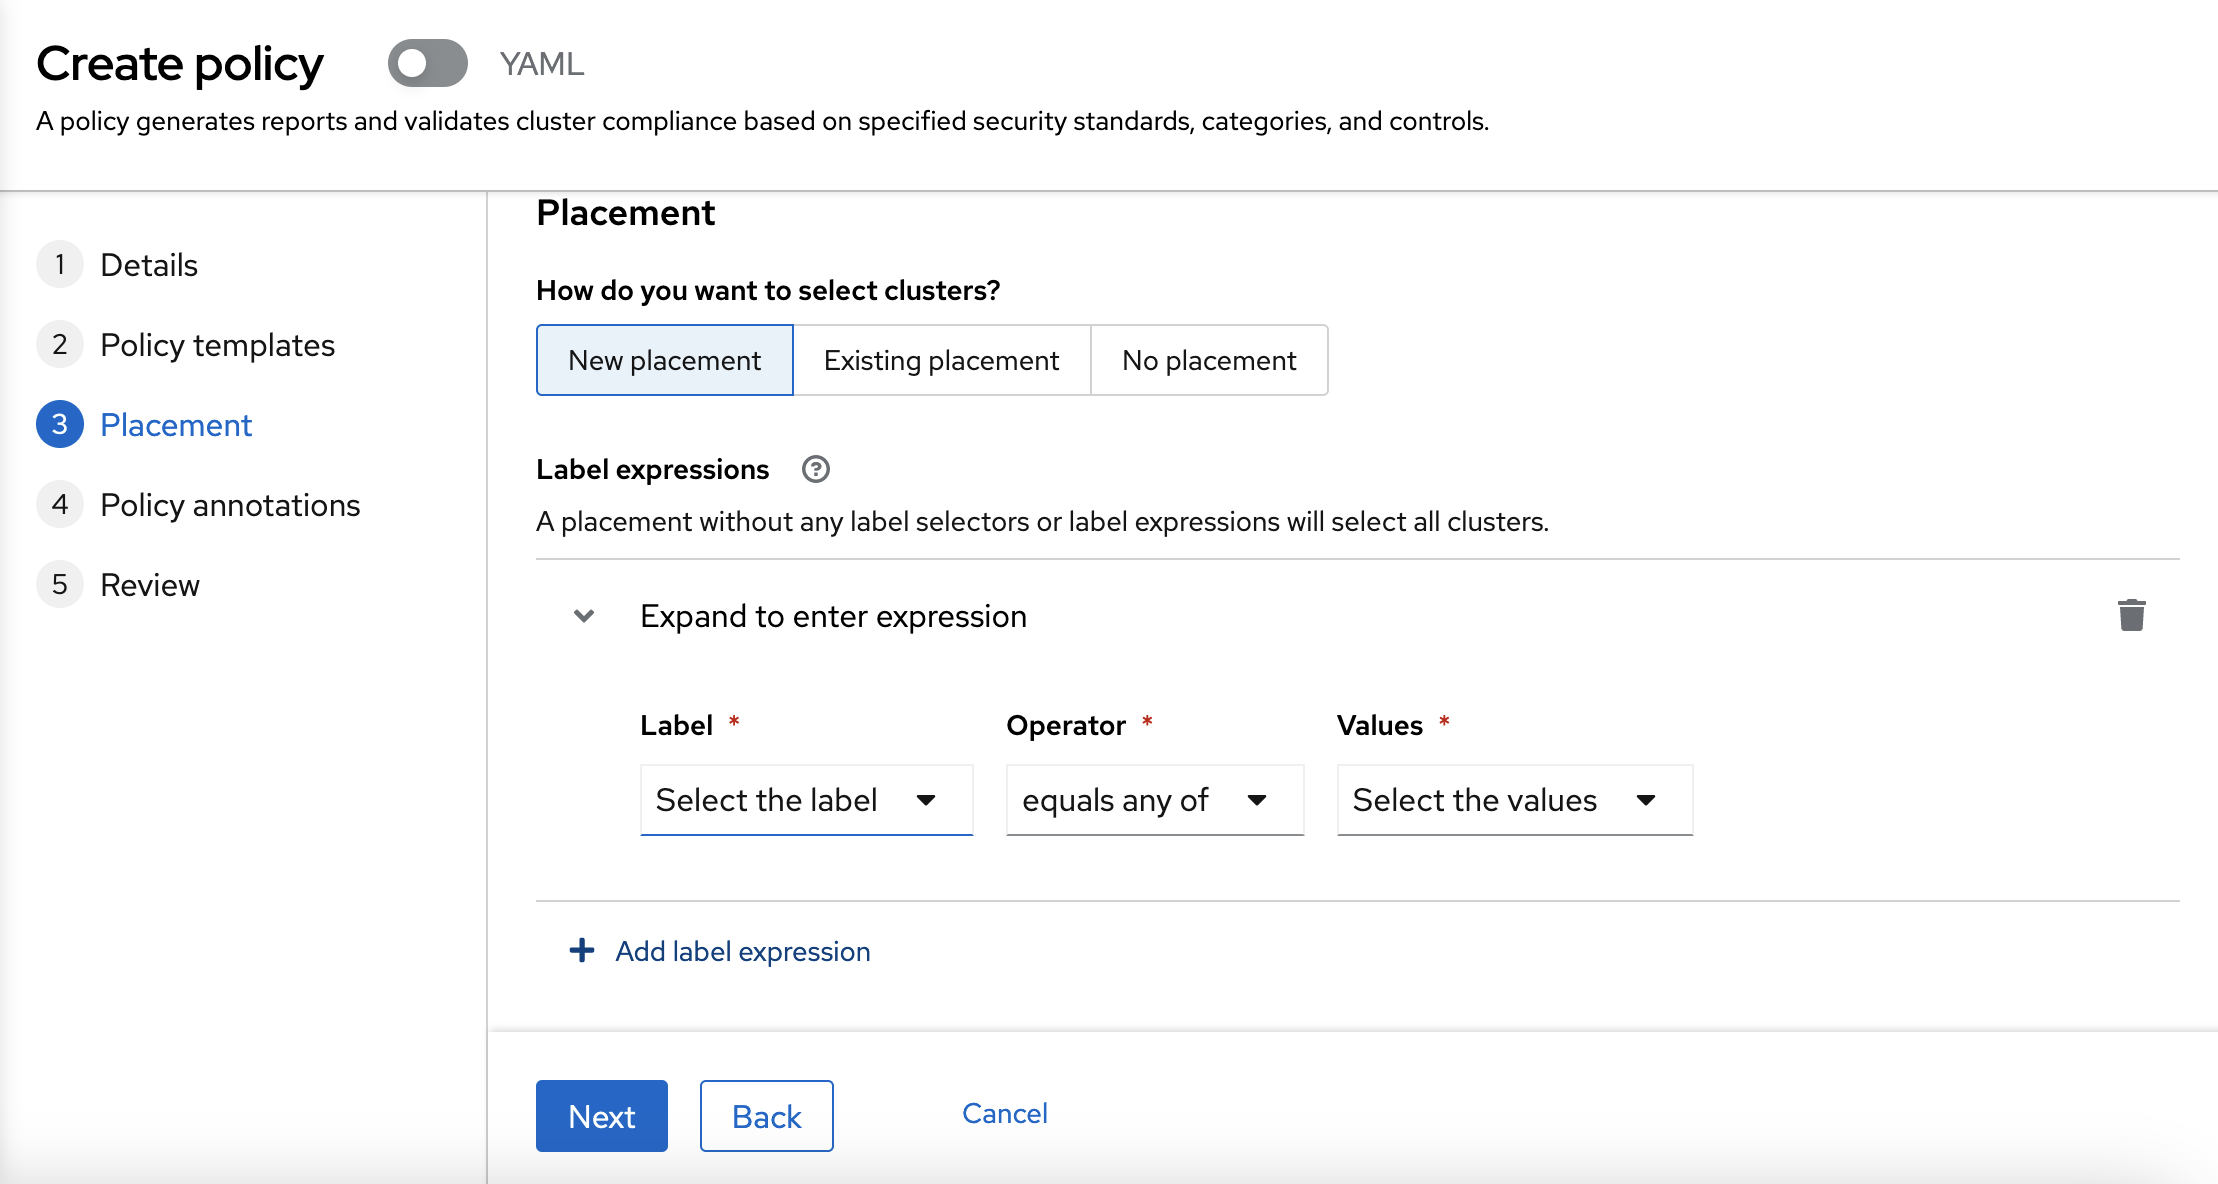
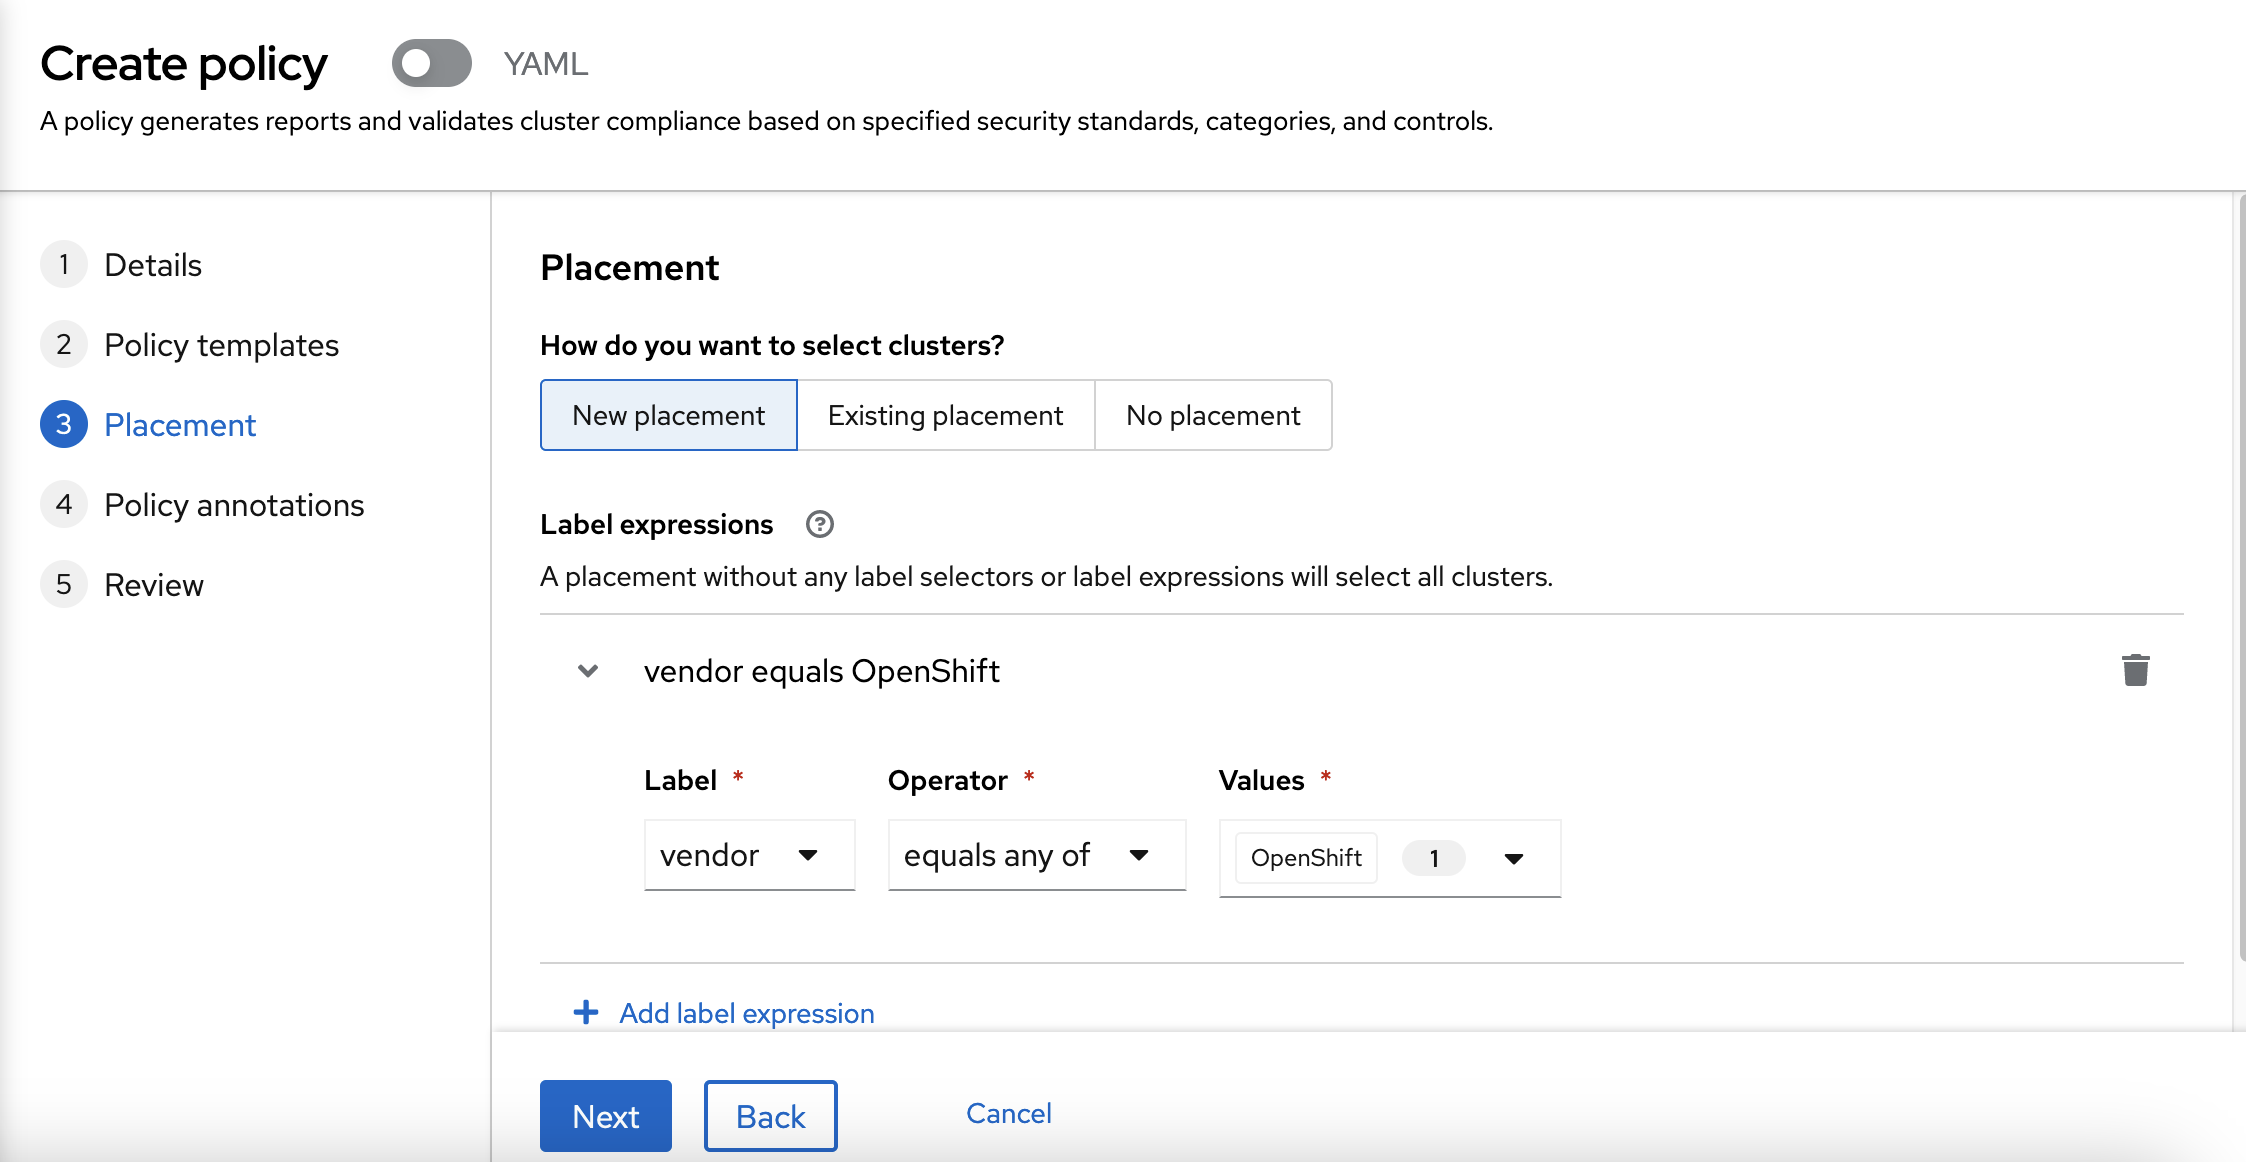
In this case, we are going to use the vendor: OpenShift label.
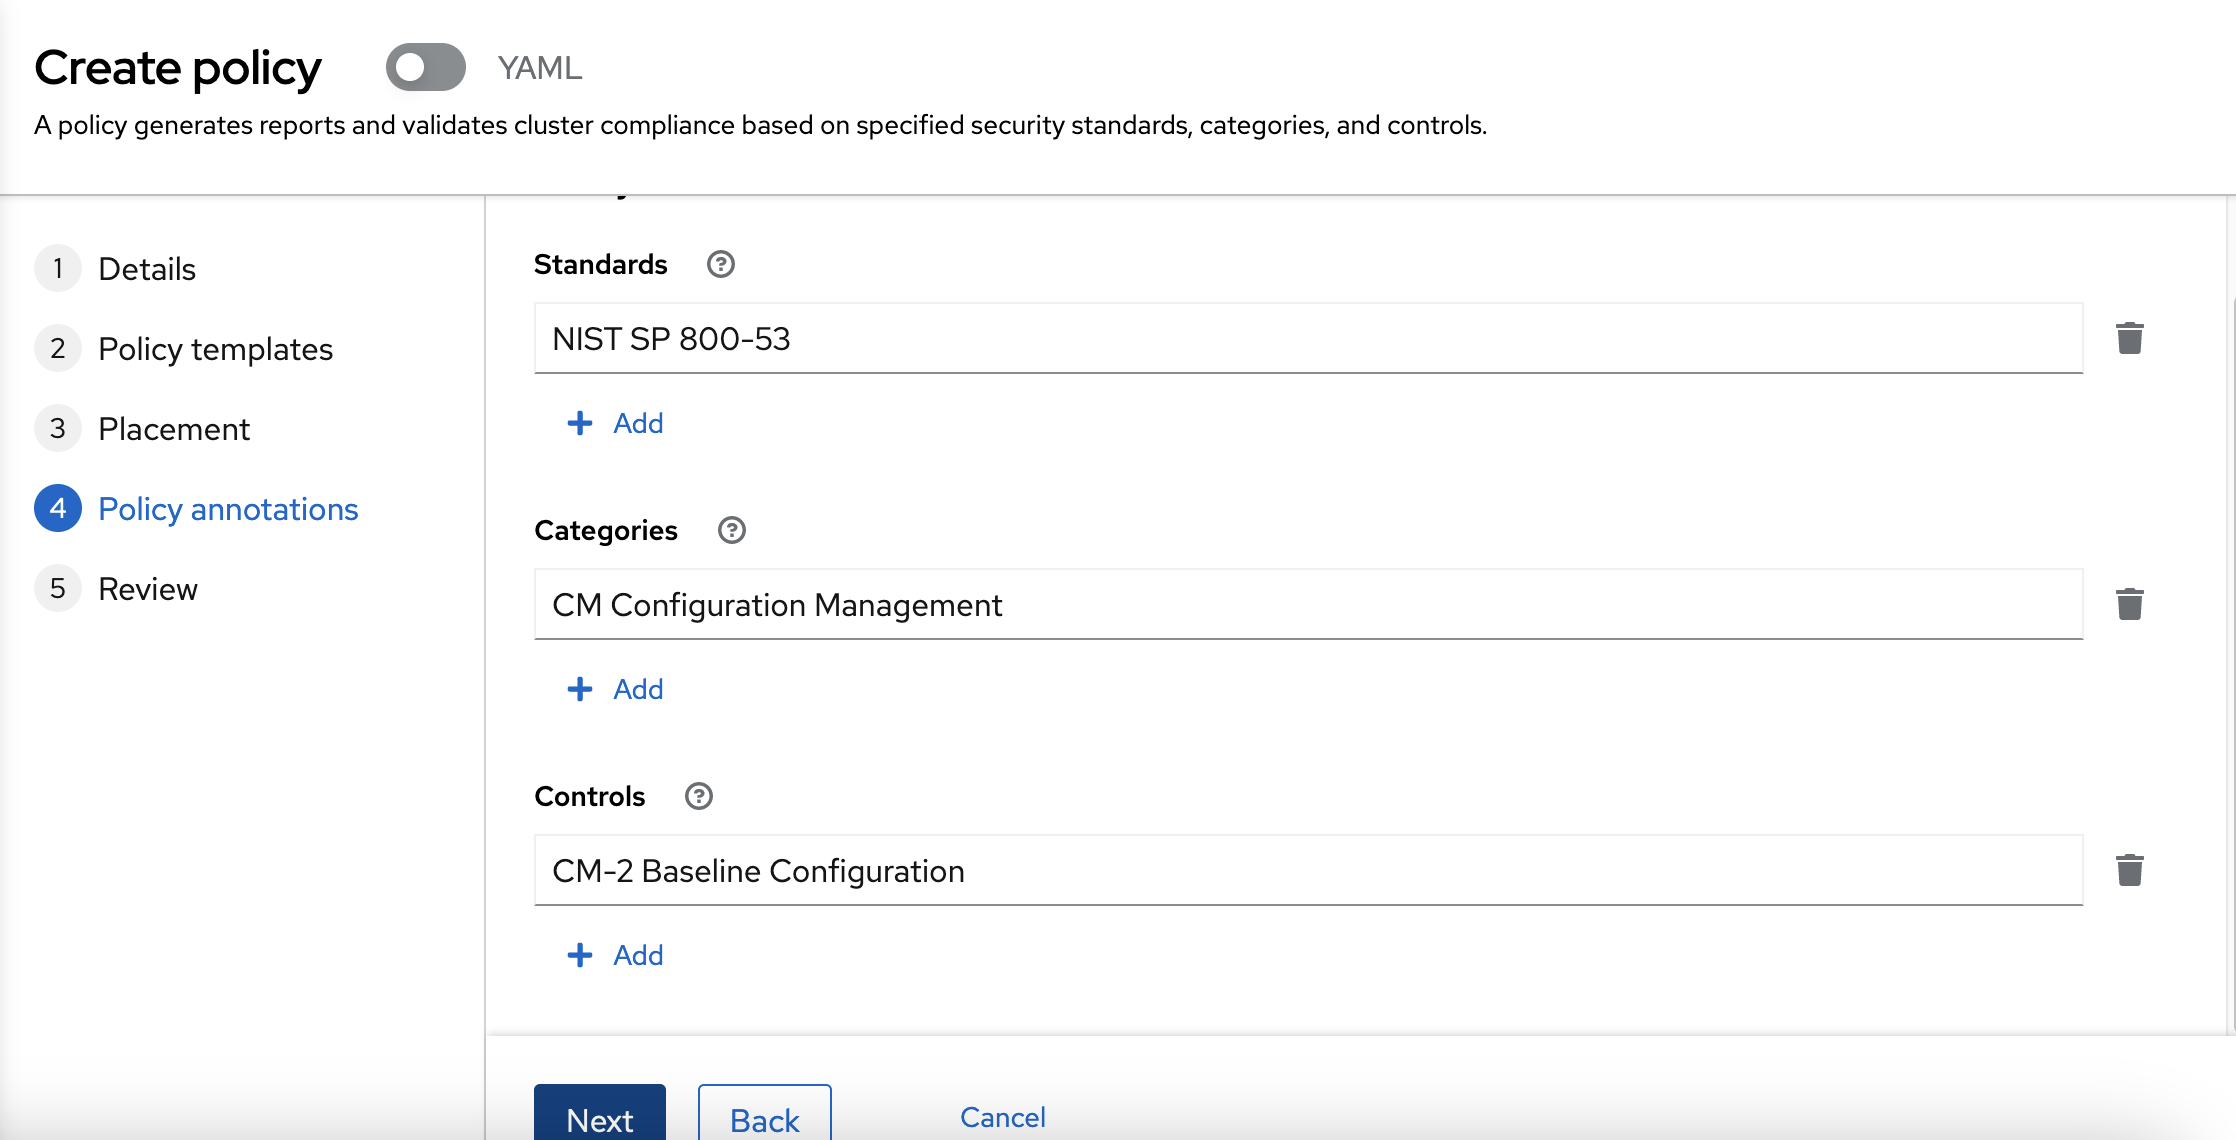
Now, you can review the Policy annotations. You don’t need no modify any field of this form.
Finally, you can review your policy and create it.
After the policy is created, you can check if the policy is compliant or not. As the namespace does not exist, the policy should not be compliant. You can create the "rhte" project on one or two OpenShift clusters and check if the policy is now compliant.
Setup the second policy via web interface
Now, we are going to create the second policy. You need to choose the name and the namespace again. You can use any name and the "default" namespace.
In this case, you are going to select "Enforce" as a remediation. As this policy is going to remediate itself.
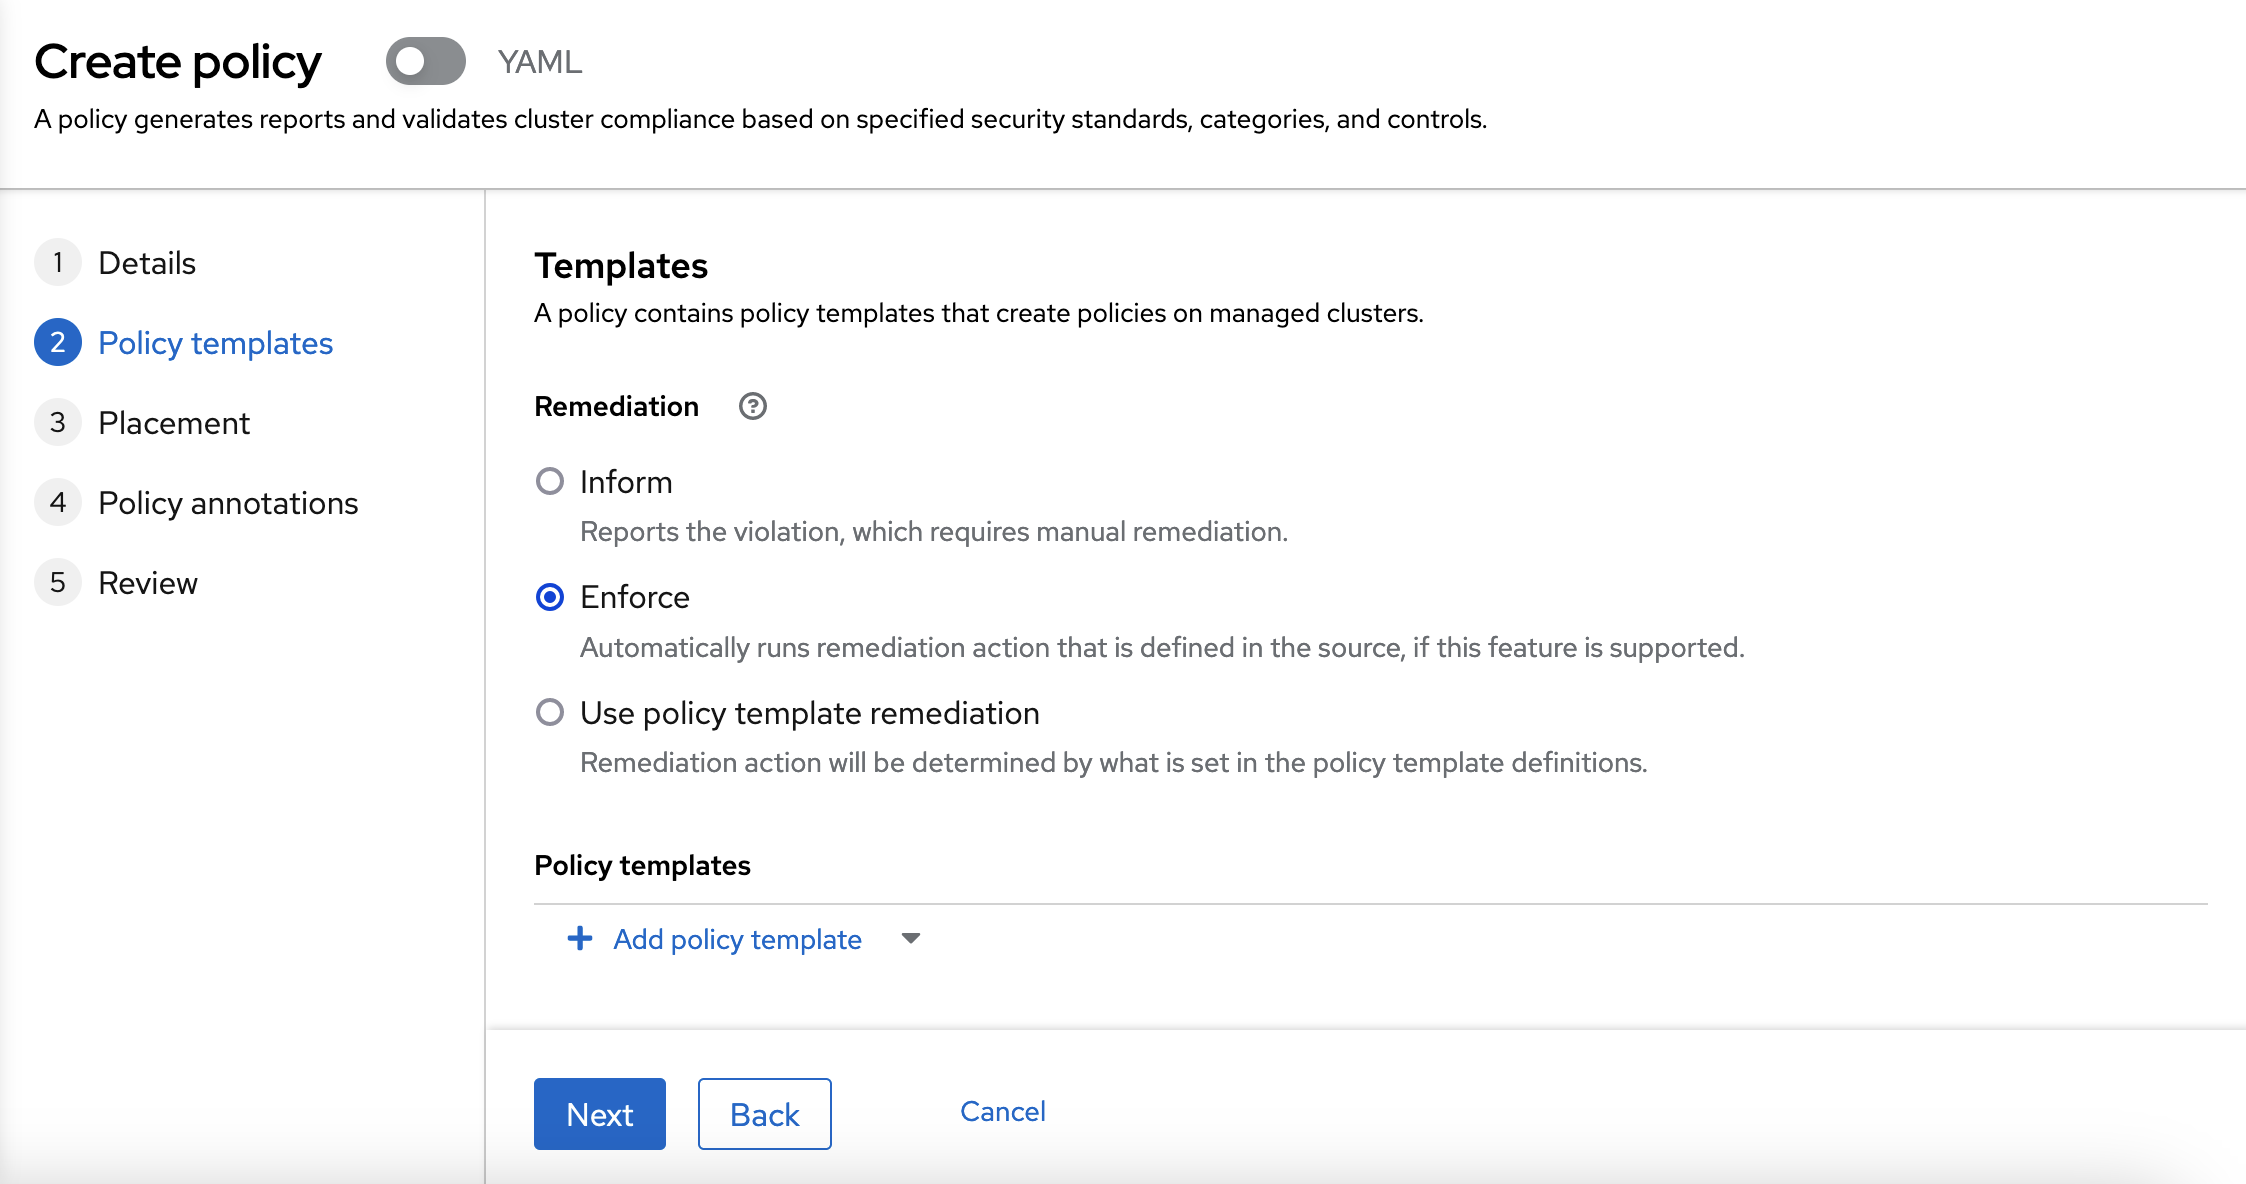
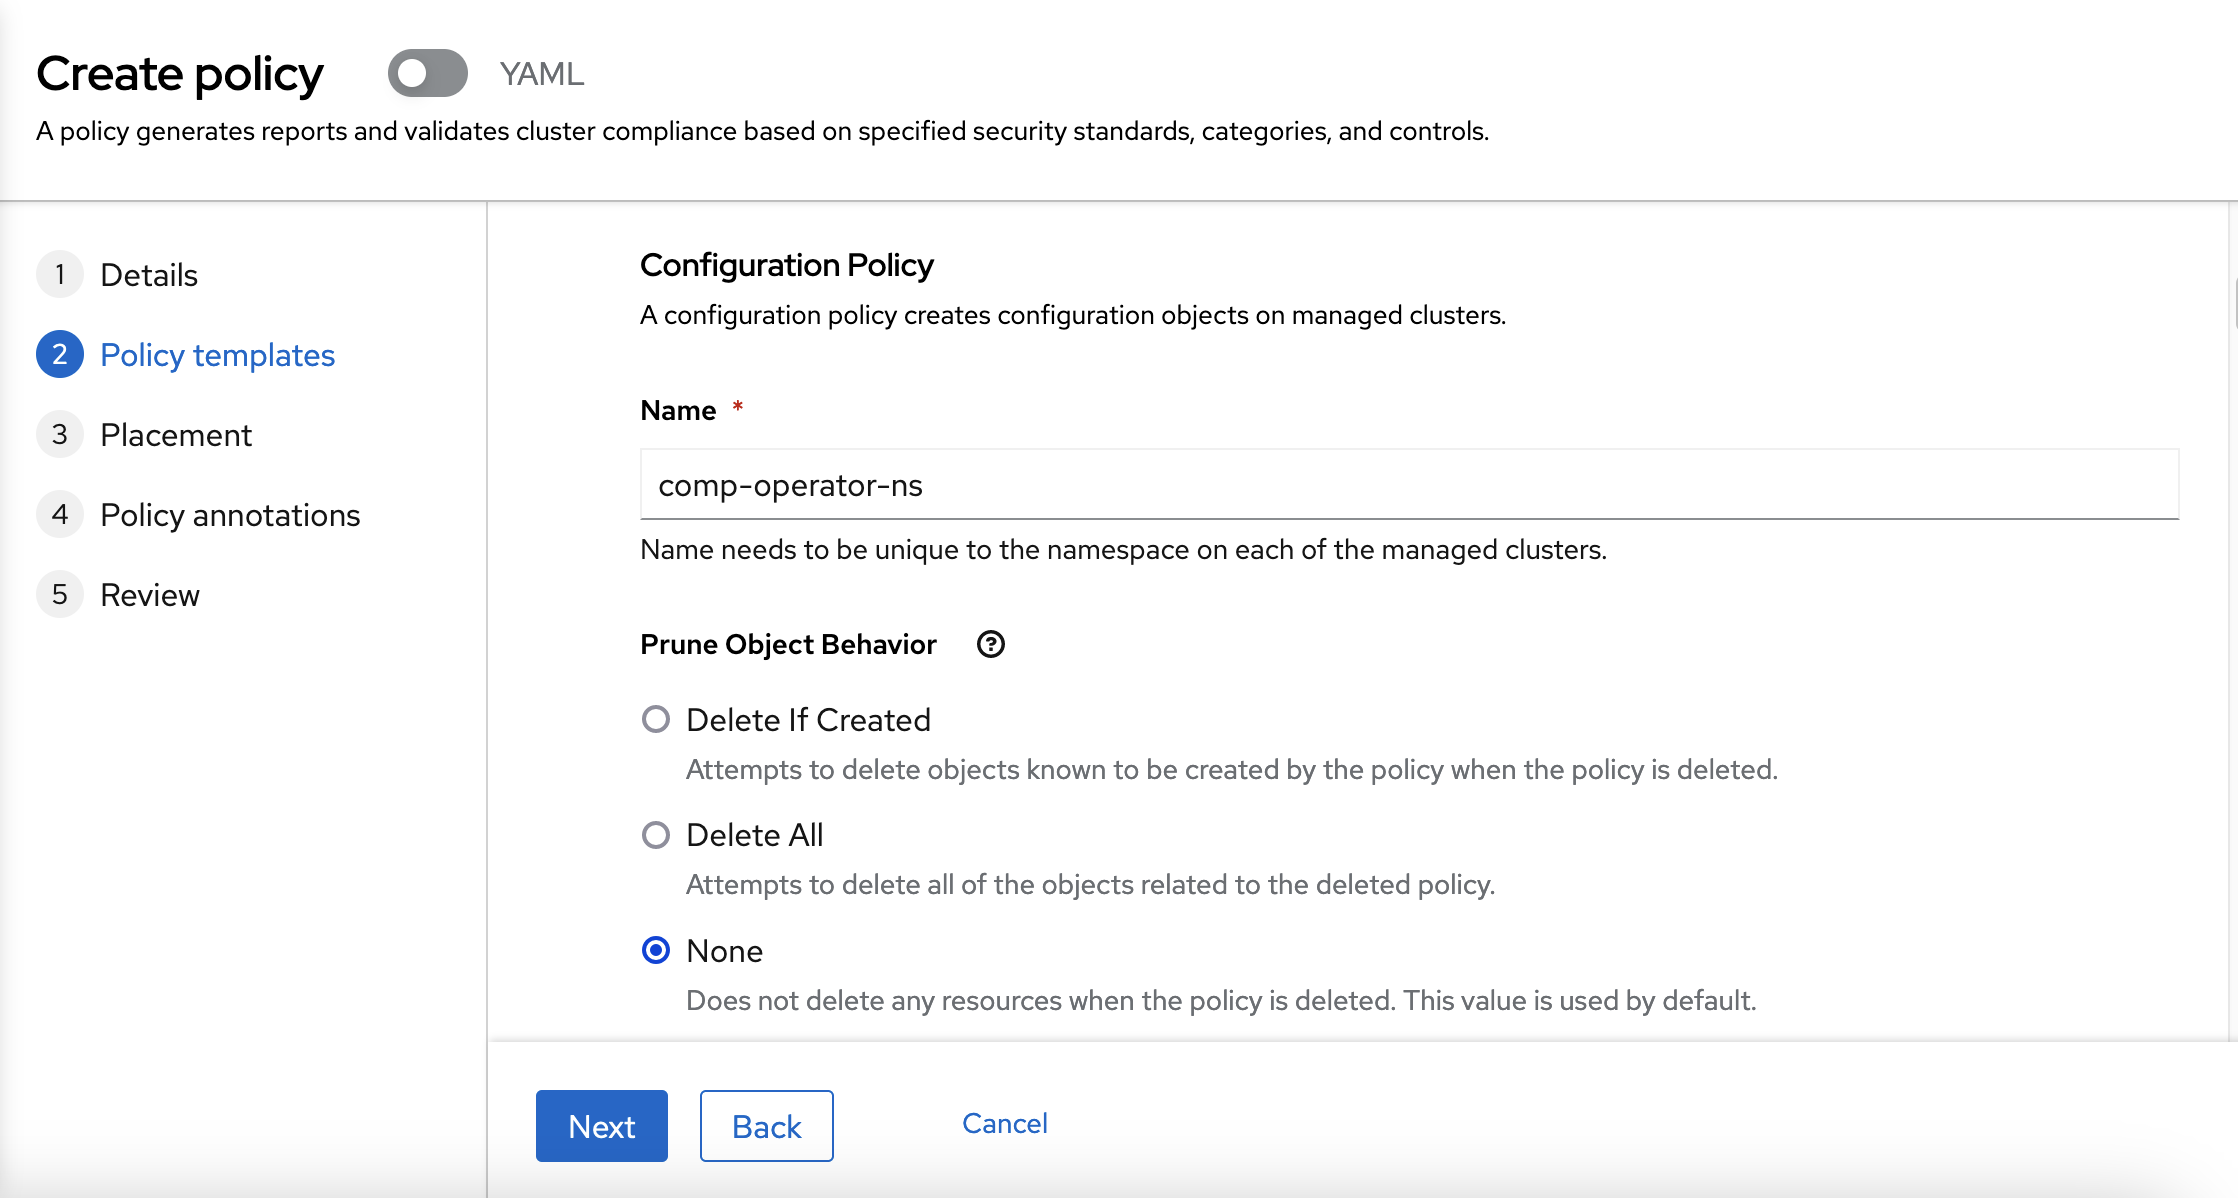
You need to click into "Add policy template" and use "Install the Compliance Operator". You need to choose "None" as a Prune Object Behaviour in all Configuration Policy objects.
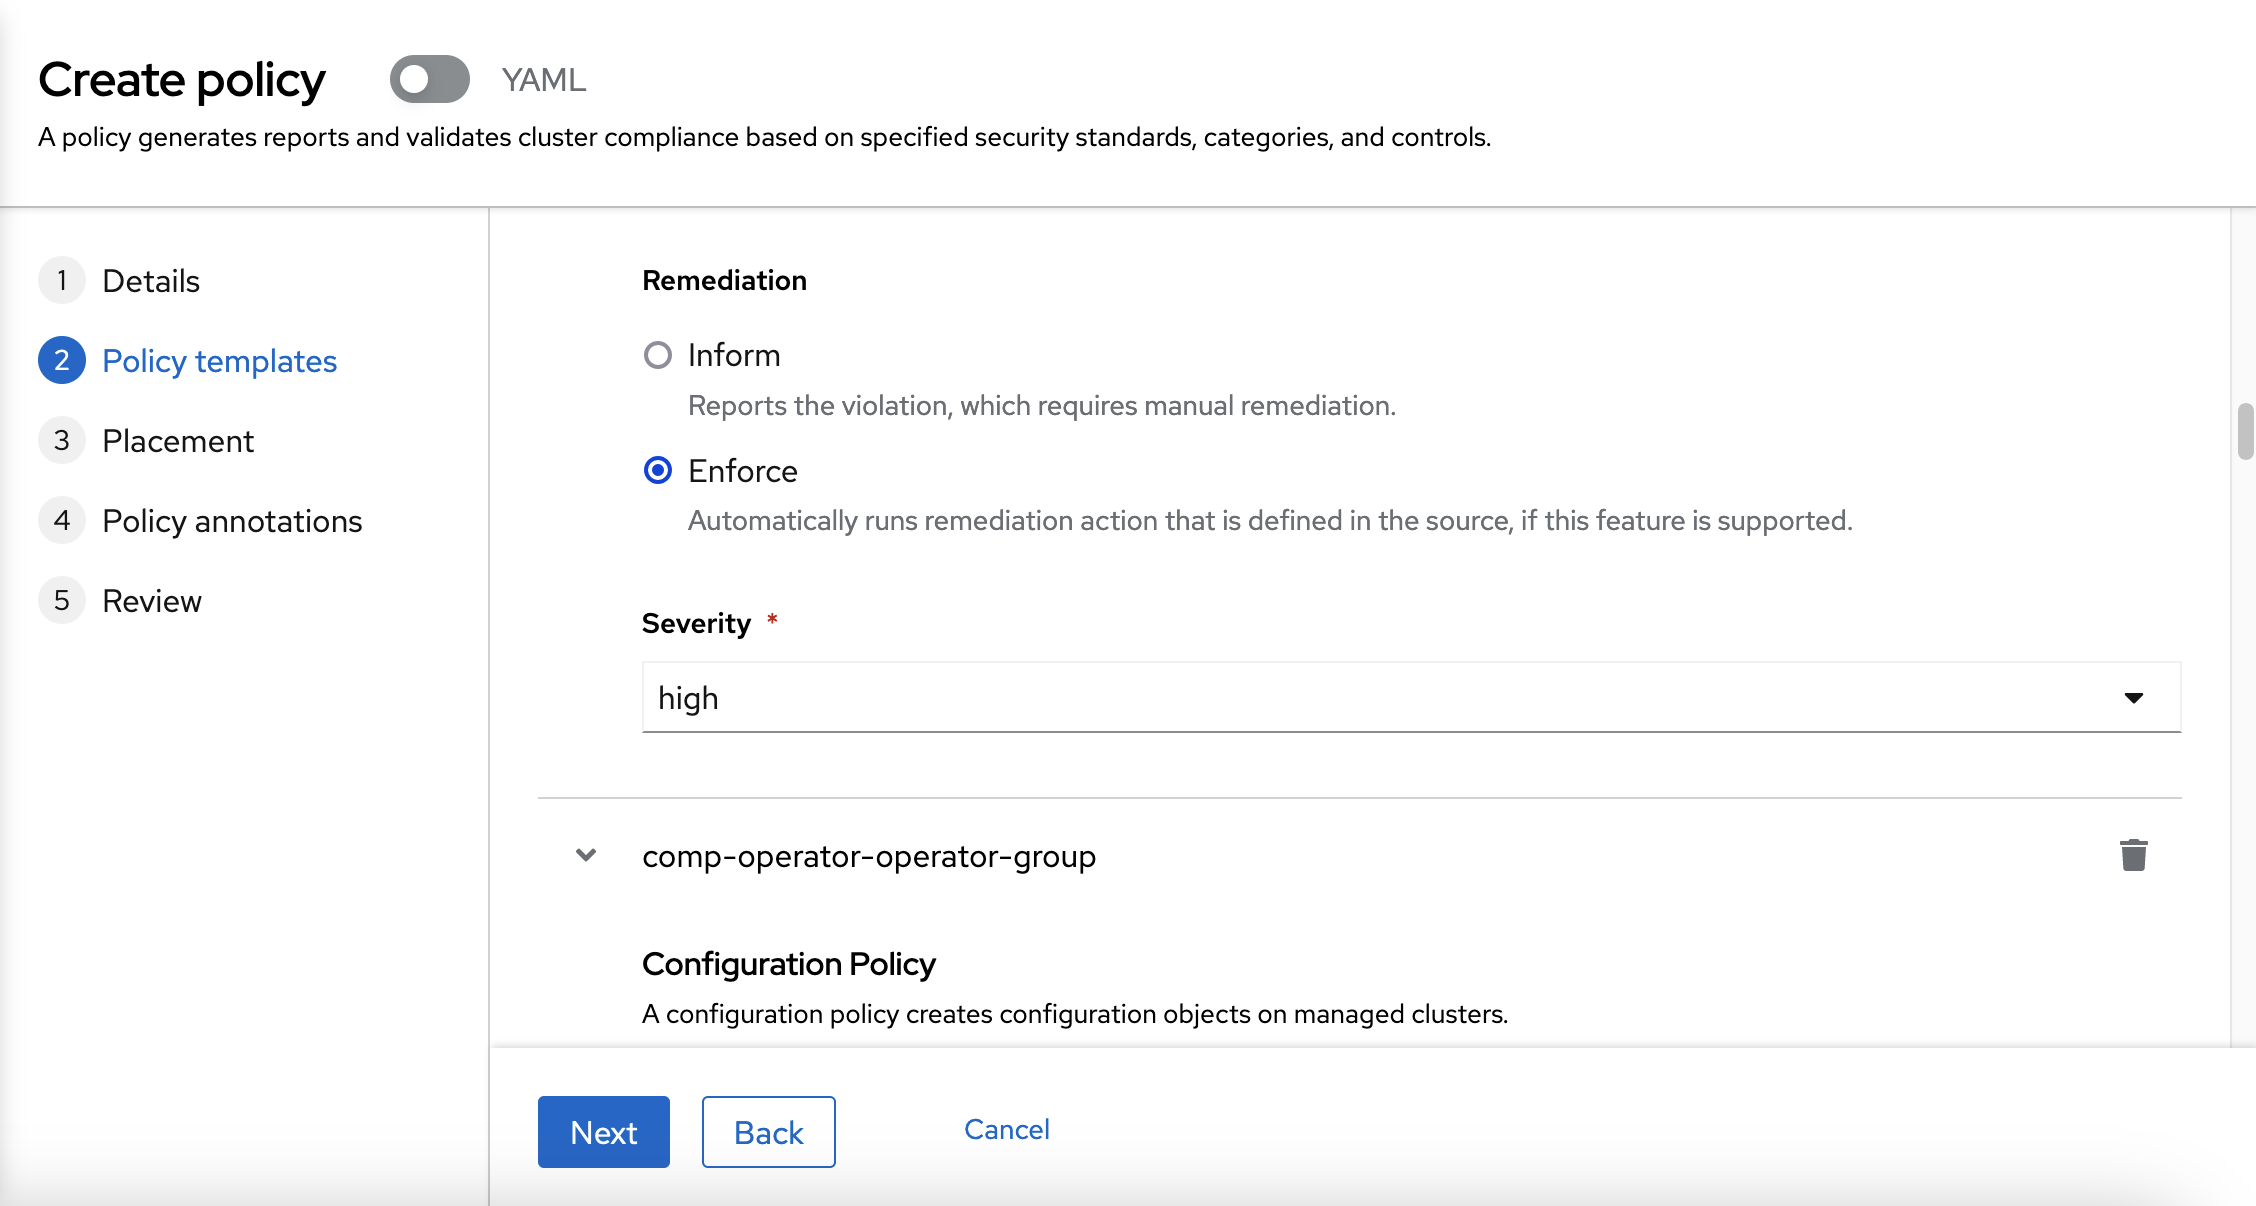
You need to chose "Enforce" as a Remediation also.
As a placement, you are going to use the same placement as the previous rule: Choose vendor: OpenShift.
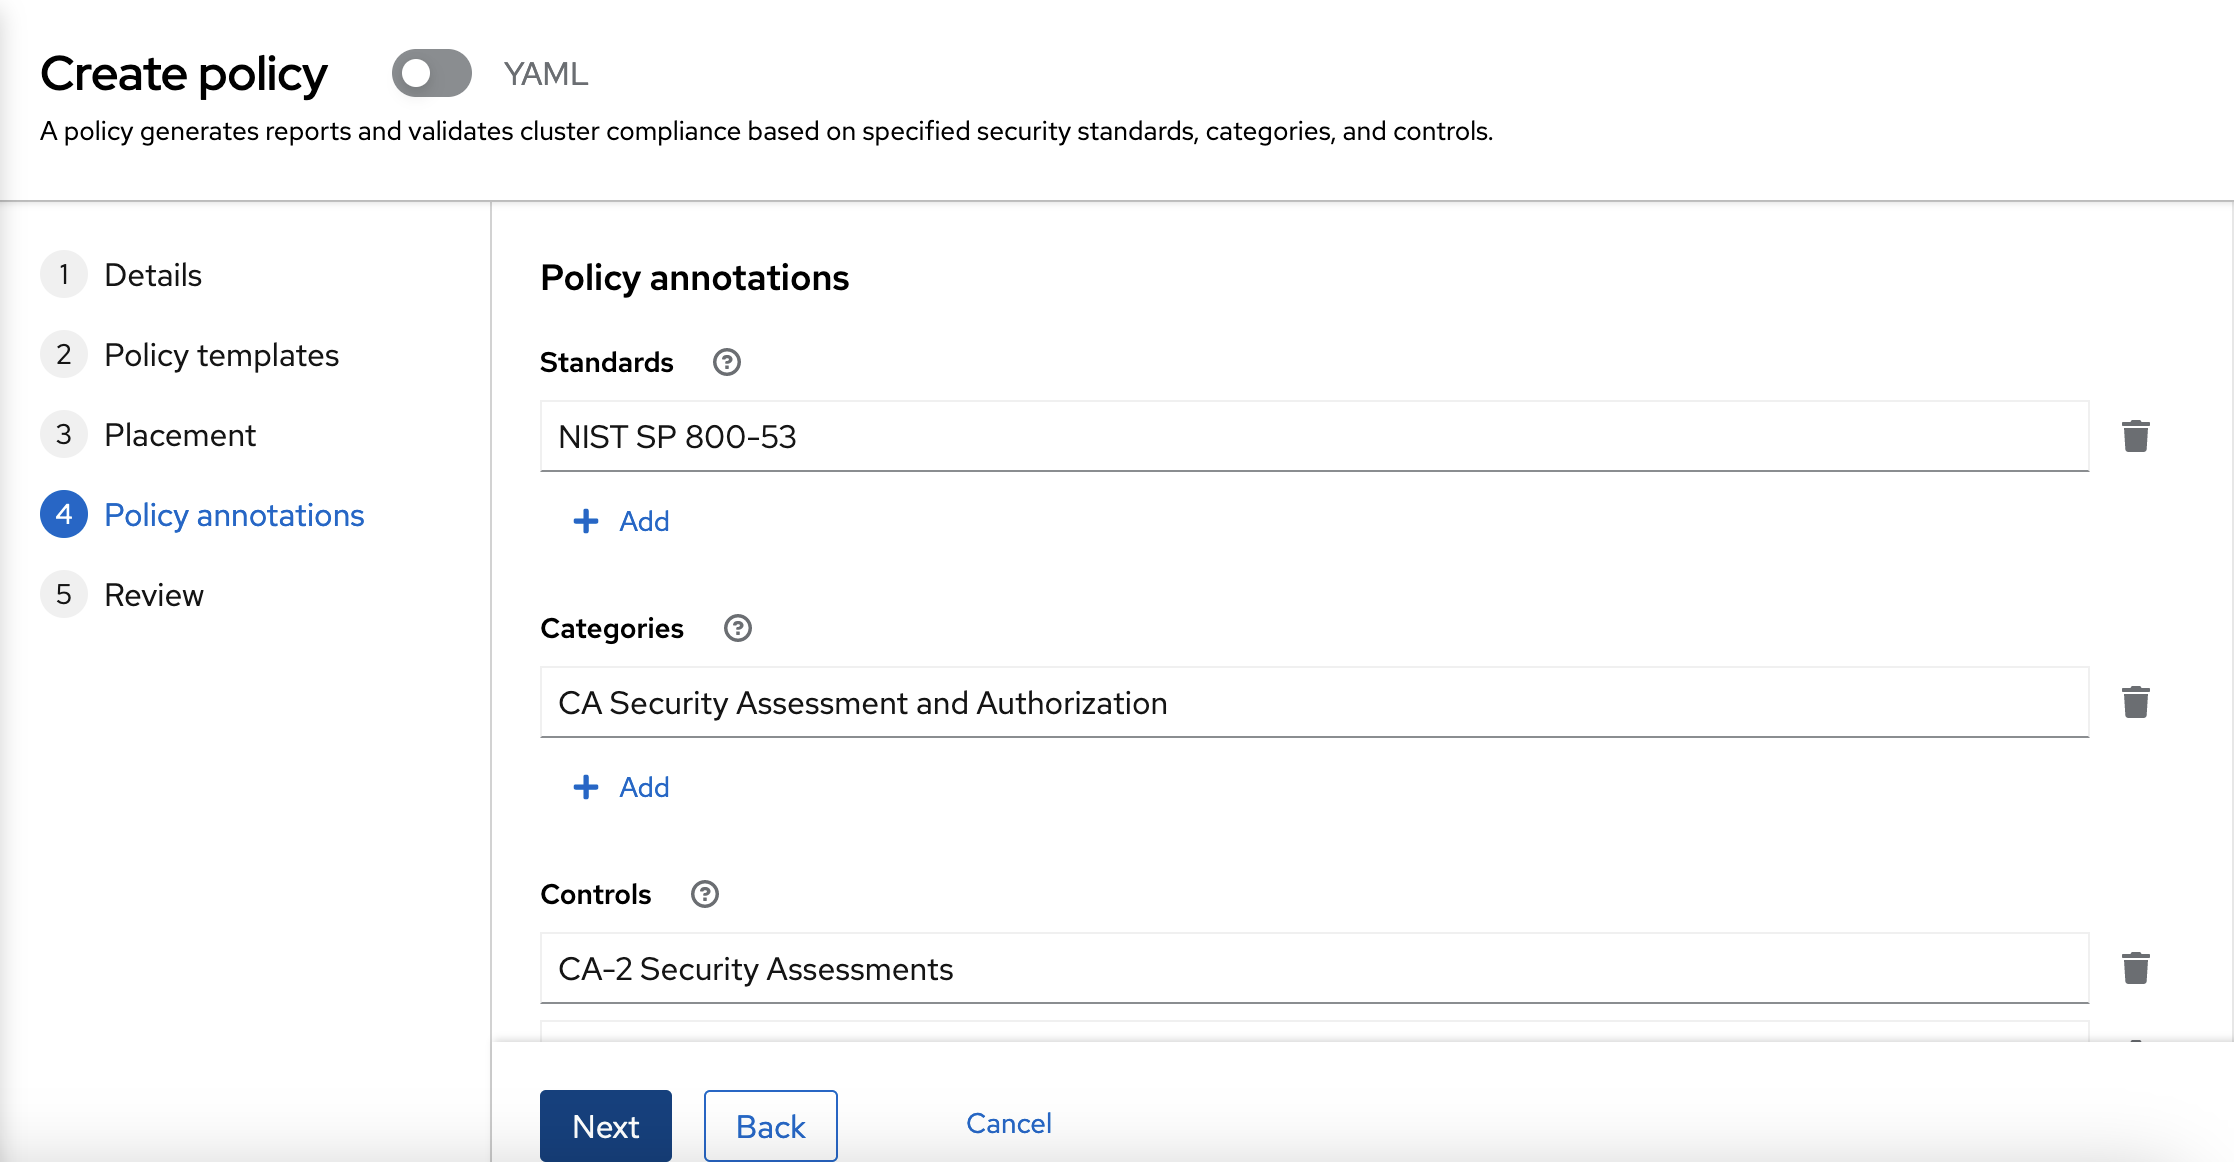
On Policy annotations, you can review the default values. You don’t need to change anything in this form.
Finally, you can review the policy.
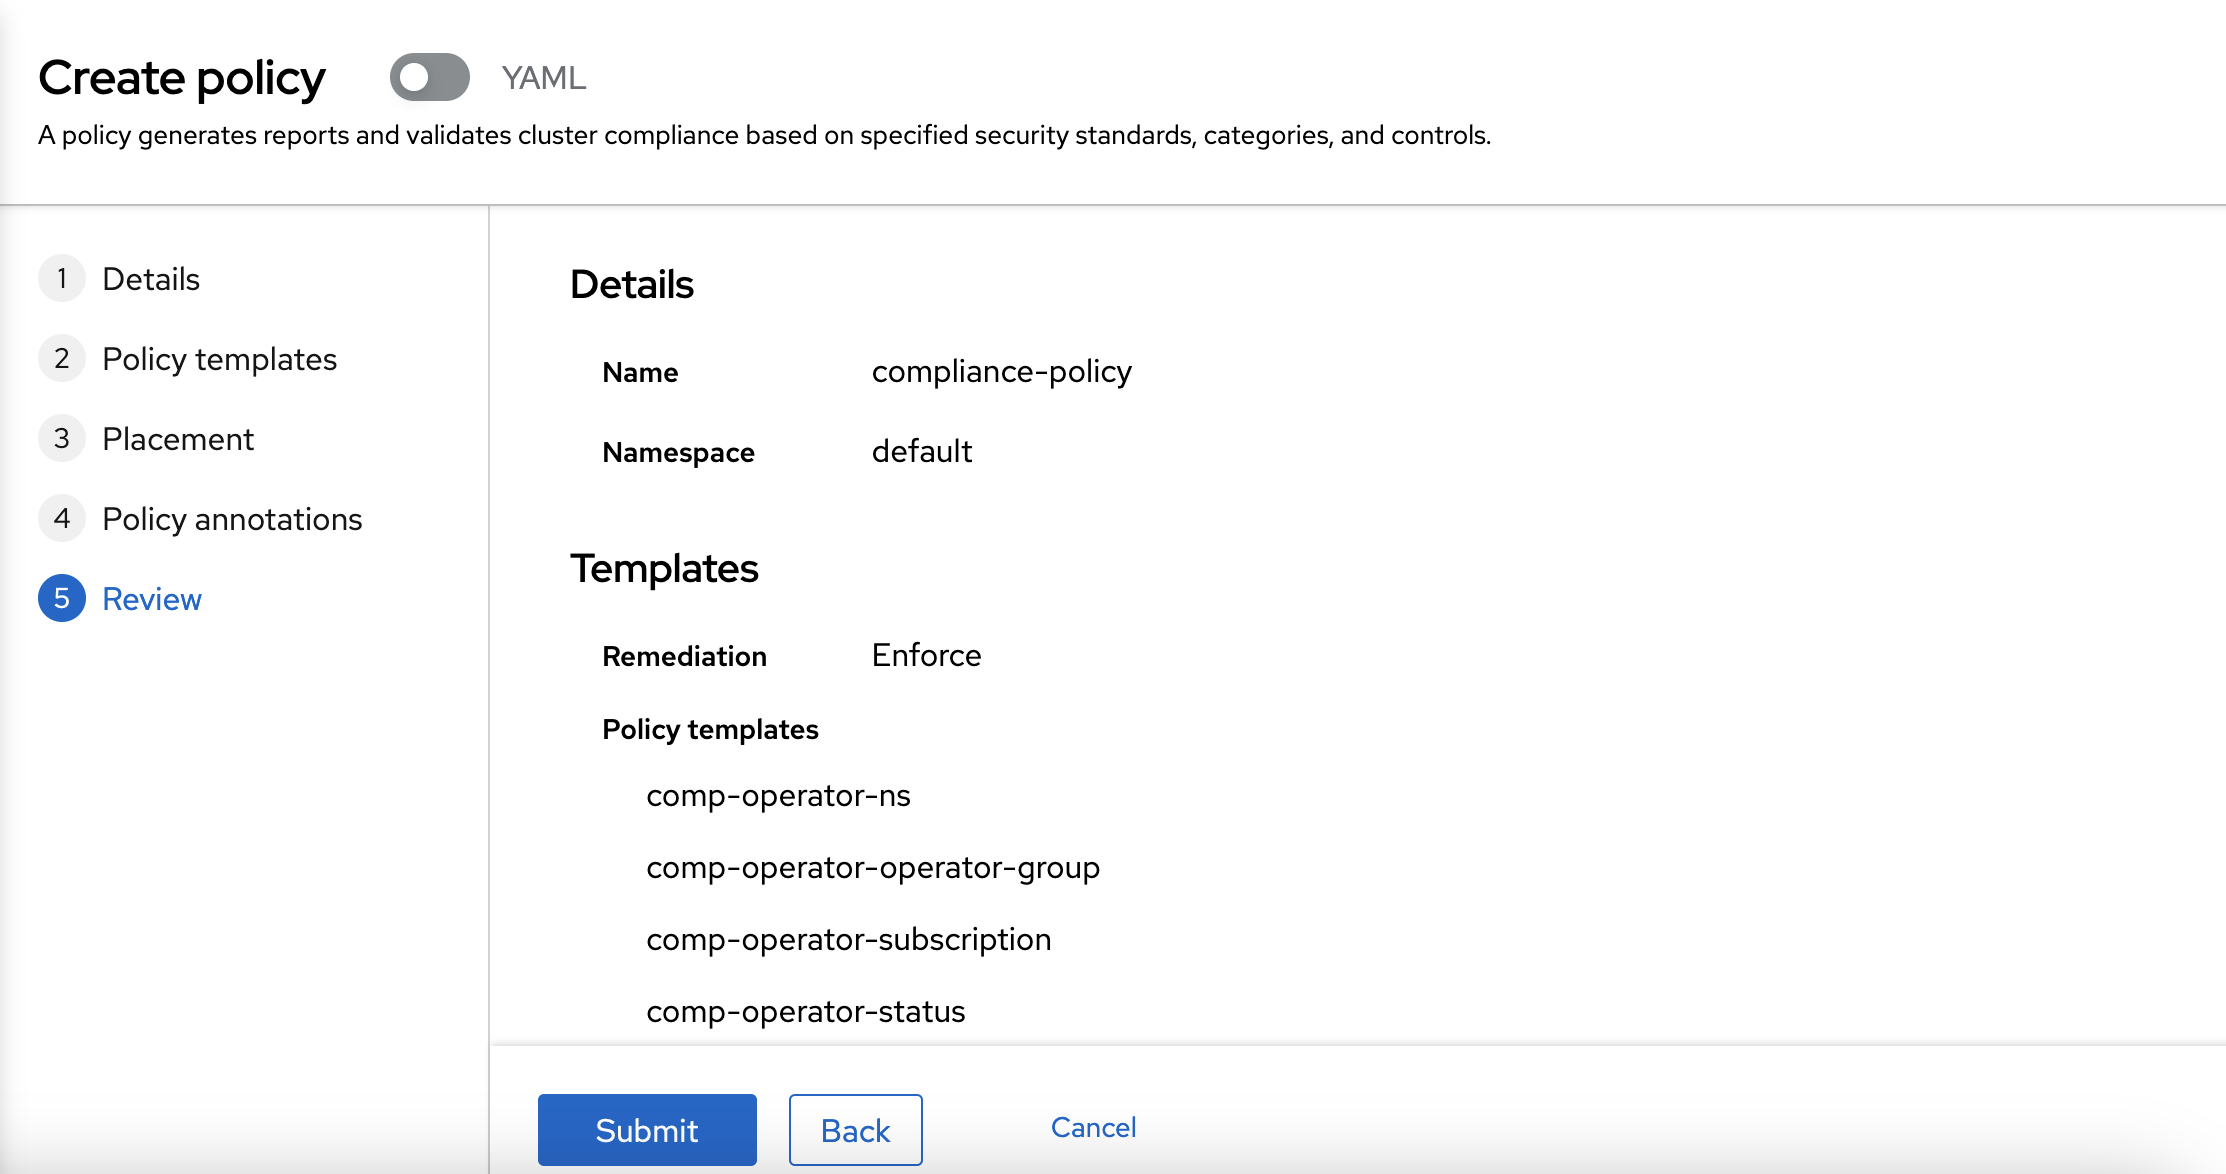
Once the policy is created, you can view that the policy is not compliant, and you can see that the Compliance Operator will be automatically installed. After the operator is installed, the policy will be compliant.
Setup the first policy via CLI
You can follow this example to create the first policy via CLI. You can create a namespace-policy.yaml file:
apiVersion: policy.open-cluster-management.io/v1
kind: Policy
metadata:
  name: namespace-policy
  namespace: default
  annotations:
    policy.open-cluster-management.io/categories: CM Configuration Management
    policy.open-cluster-management.io/controls: CM-2 Baseline Configuration
    policy.open-cluster-management.io/standards: NIST SP 800-53
spec:
  disabled: false
  policy-templates:
    - objectDefinition:
        apiVersion: policy.open-cluster-management.io/v1
        kind: ConfigurationPolicy
        metadata:
          name: policy-namespace
        spec:
          namespaceSelector:
            exclude:
              - kube-*
            include:
              - default
          object-templates:
            - complianceType: musthave
              objectDefinition:
                apiVersion: v1
                kind: Namespace
                metadata:
                  name: rhte
          pruneObjectBehavior: None
          remediationAction: inform
          severity: low
  remediationAction: inform
---
apiVersion: apps.open-cluster-management.io/v1
kind: PlacementRule
metadata:
  name: namespace-policy-placement
  namespace: default
spec:
  clusterConditions: []
  clusterSelector:
    matchExpressions:
      - key: vendor
        operator: In
        values:
          - OpenShift
---
apiVersion: policy.open-cluster-management.io/v1
kind: PlacementBinding
metadata:
  name: namespace-policy-placement
  namespace: default
placementRef:
  name: namespace-policy-placement
  apiGroup: apps.open-cluster-management.io
  kind: PlacementRule
subjects:
  - name: namespace-policy
    apiGroup: policy.open-cluster-management.io
    kind: Policy
This example, will create the Policy to check if the "rhte" namespace exists. Also, this example is going to create a PlacementRule to apply the policie on all clusters with "vendor: OpenShift" label. Finally, this example will create a binding between the policy and the PlacementRule.
Finally, you can create the policy with the following command:
oc create -f namespace-policy.yamlAfter the policy is created, you can check if the policy is compliant or not. As the namespace does not exist, the policy should not be compliant. You can create the "rhte" project on one or two OpenShift clusters and check if the policy is now compliant.
Setup the second policy via CLI
To create the second policy via CLI, you can create a compliance-policy.yaml file with the following content:
apiVersion: policy.open-cluster-management.io/v1
kind: Policy
metadata:
  name: compliance-policy
  namespace: default
  annotations:
    policy.open-cluster-management.io/categories: CA Security Assessment and Authorization
    policy.open-cluster-management.io/controls: CA-2 Security Assessments, CA-7 Continuous Monitoring
    policy.open-cluster-management.io/standards: NIST SP 800-53
spec:
  disabled: false
  policy-templates:
    - objectDefinition:
        apiVersion: policy.open-cluster-management.io/v1
        kind: ConfigurationPolicy
        metadata:
          name: comp-operator-ns
        spec:
          object-templates:
            - complianceType: musthave
              objectDefinition:
                apiVersion: v1
                kind: Namespace
                metadata:
                  name: openshift-compliance
          pruneObjectBehavior: None
          remediationAction: enforce
          severity: high
    - objectDefinition:
        apiVersion: policy.open-cluster-management.io/v1
        kind: ConfigurationPolicy
        metadata:
          name: comp-operator-operator-group
        spec:
          object-templates:
            - complianceType: musthave
              objectDefinition:
                apiVersion: operators.coreos.com/v1
                kind: OperatorGroup
                metadata:
                  name: compliance-operator
                  namespace: openshift-compliance
                spec:
                  targetNamespaces:
                    - openshift-compliance
          pruneObjectBehavior: None
          remediationAction: enforce
          severity: high
    - objectDefinition:
        apiVersion: policy.open-cluster-management.io/v1
        kind: ConfigurationPolicy
        metadata:
          name: comp-operator-subscription
        spec:
          object-templates:
            - complianceType: musthave
              objectDefinition:
                apiVersion: operators.coreos.com/v1alpha1
                kind: Subscription
                metadata:
                  name: compliance-operator
                  namespace: openshift-compliance
                spec:
                  name: compliance-operator
                  installPlanApproval: Automatic
                  source: redhat-operators
                  sourceNamespace: openshift-marketplace
          pruneObjectBehavior: None
          remediationAction: enforce
          severity: high
    - objectDefinition:
        apiVersion: policy.open-cluster-management.io/v1
        kind: ConfigurationPolicy
        metadata:
          name: comp-operator-status
        spec:
          object-templates:
            - complianceType: musthave
              objectDefinition:
                apiVersion: operators.coreos.com/v1alpha1
                kind: ClusterServiceVersion
                metadata:
                  namespace: openshift-compliance
                spec:
                  displayName: Compliance Operator
                status:
                  phase: Succeeded
          pruneObjectBehavior: None
          remediationAction: enforce
          severity: high
  remediationAction: enforce
---
apiVersion: apps.open-cluster-management.io/v1
kind: PlacementRule
metadata:
  name: compliance-policy-placement
  namespace: default
spec:
  clusterConditions: []
  clusterSelector:
    matchExpressions:
      - key: vendor
        operator: In
        values:
          - OpenShift
---
apiVersion: policy.open-cluster-management.io/v1
kind: PlacementBinding
metadata:
  name: compliance-policy-placement
  namespace: default
placementRef:
  name: compliance-policy-placement
  apiGroup: apps.open-cluster-management.io
  kind: PlacementRule
subjects:
  - name: compliance-policy
    apiGroup: policy.open-cluster-management.io
    kind: Policy
To create the policy, apply the following command:
oc create -f compliance-policy.yamlOnce the policy is created, you can view that the policy is not compliant, and you can see that the Compliance Operator will be automatically installed. After the operator is installed, the policy will be compliant.
Setup Policies via GitOps
Now, you know how to create Policies. So, you can learn how to create the Policies using GitOps. If you want to deploy the policies using a GitOps model, you can create the same namespace and the same Compliance Operator policies using GitOps.
Setup the first policy via GitOps
First, you need to enter into the Red Hat Advanced Management web interface, and select "Applications".
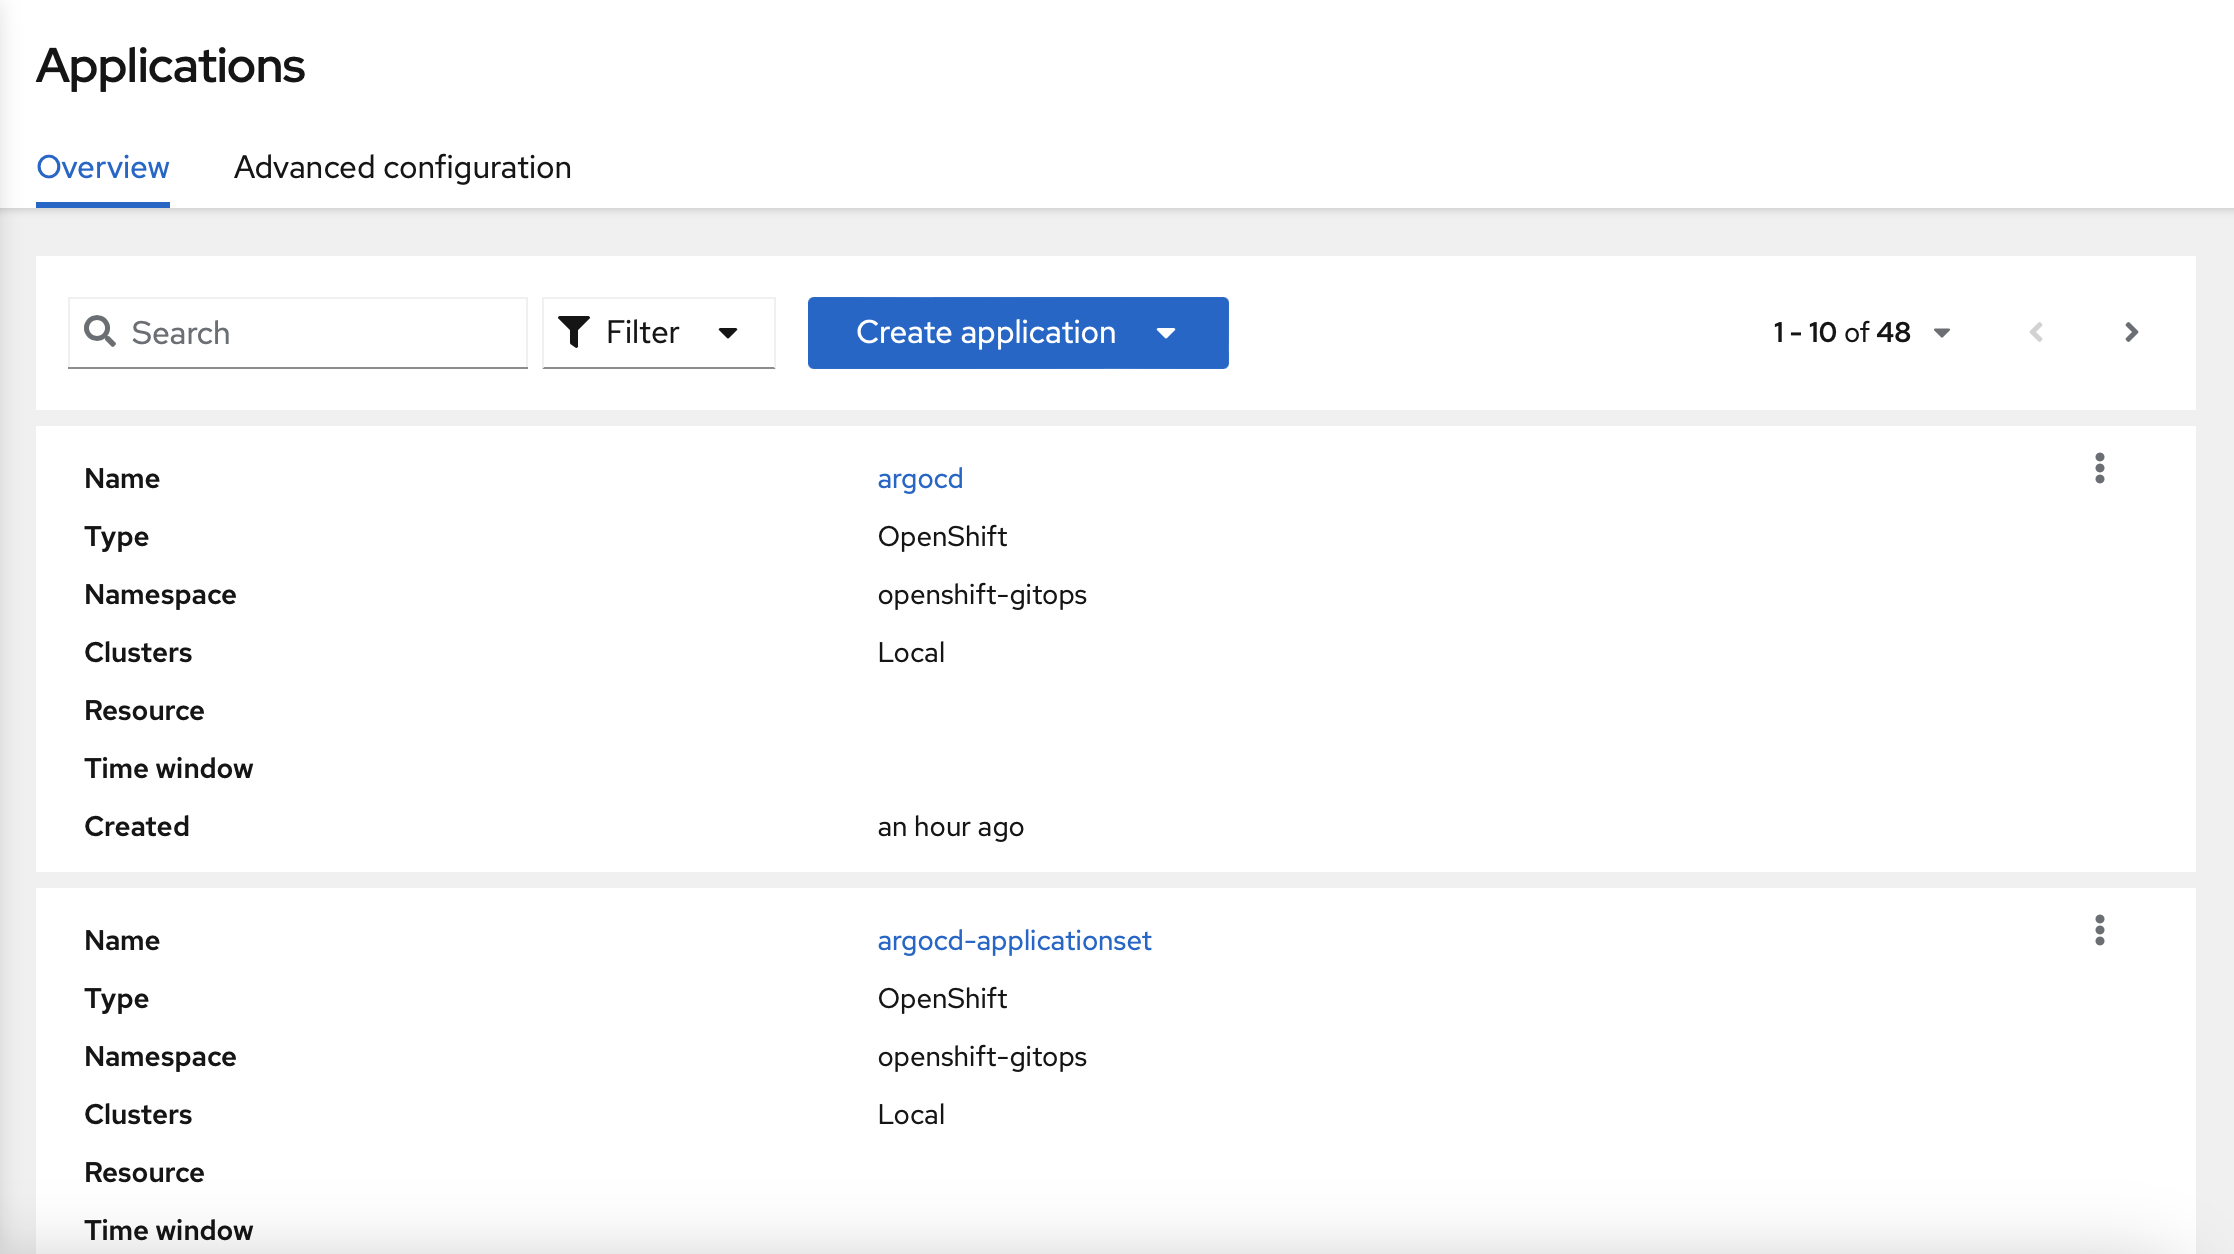
You should go to "Create application".
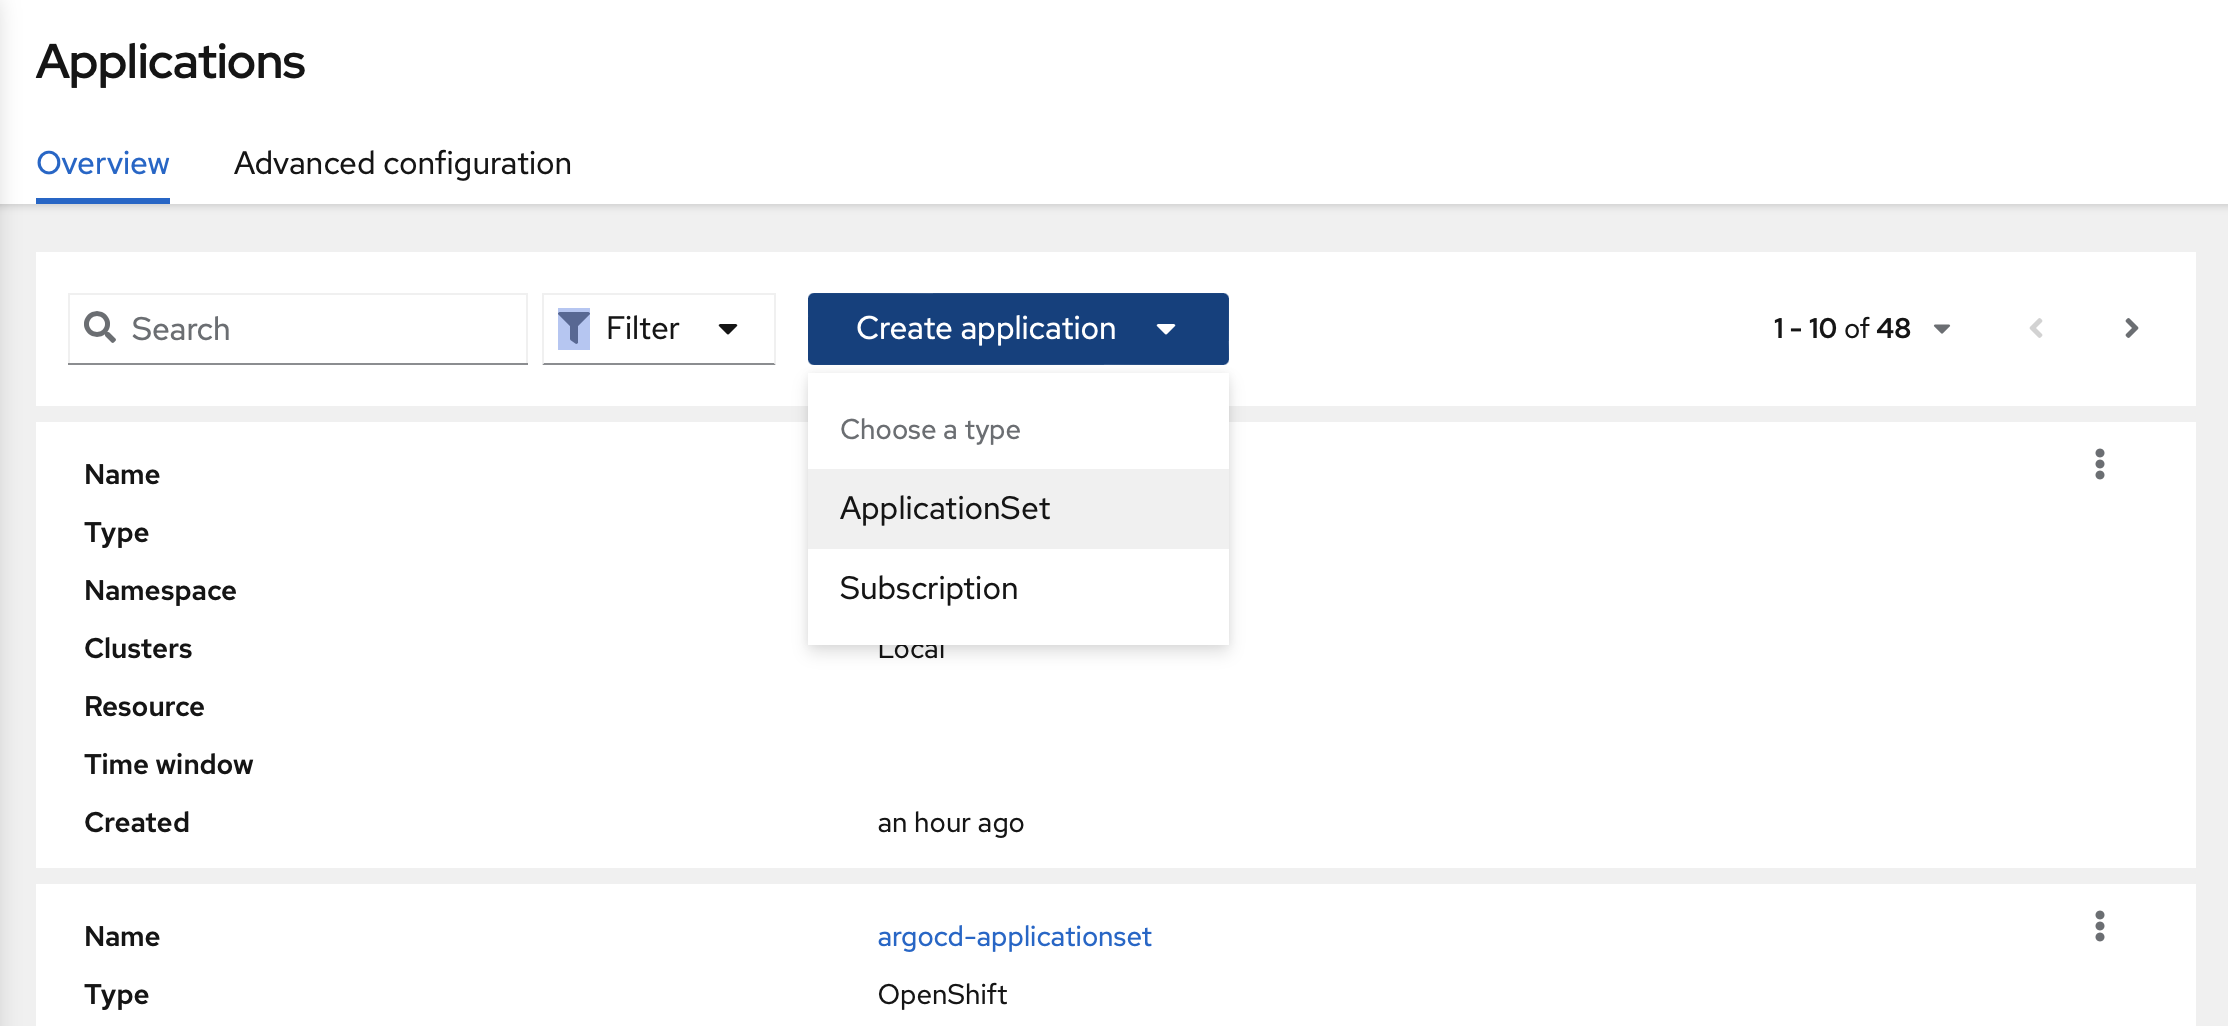
You should select "ApplicationSet".
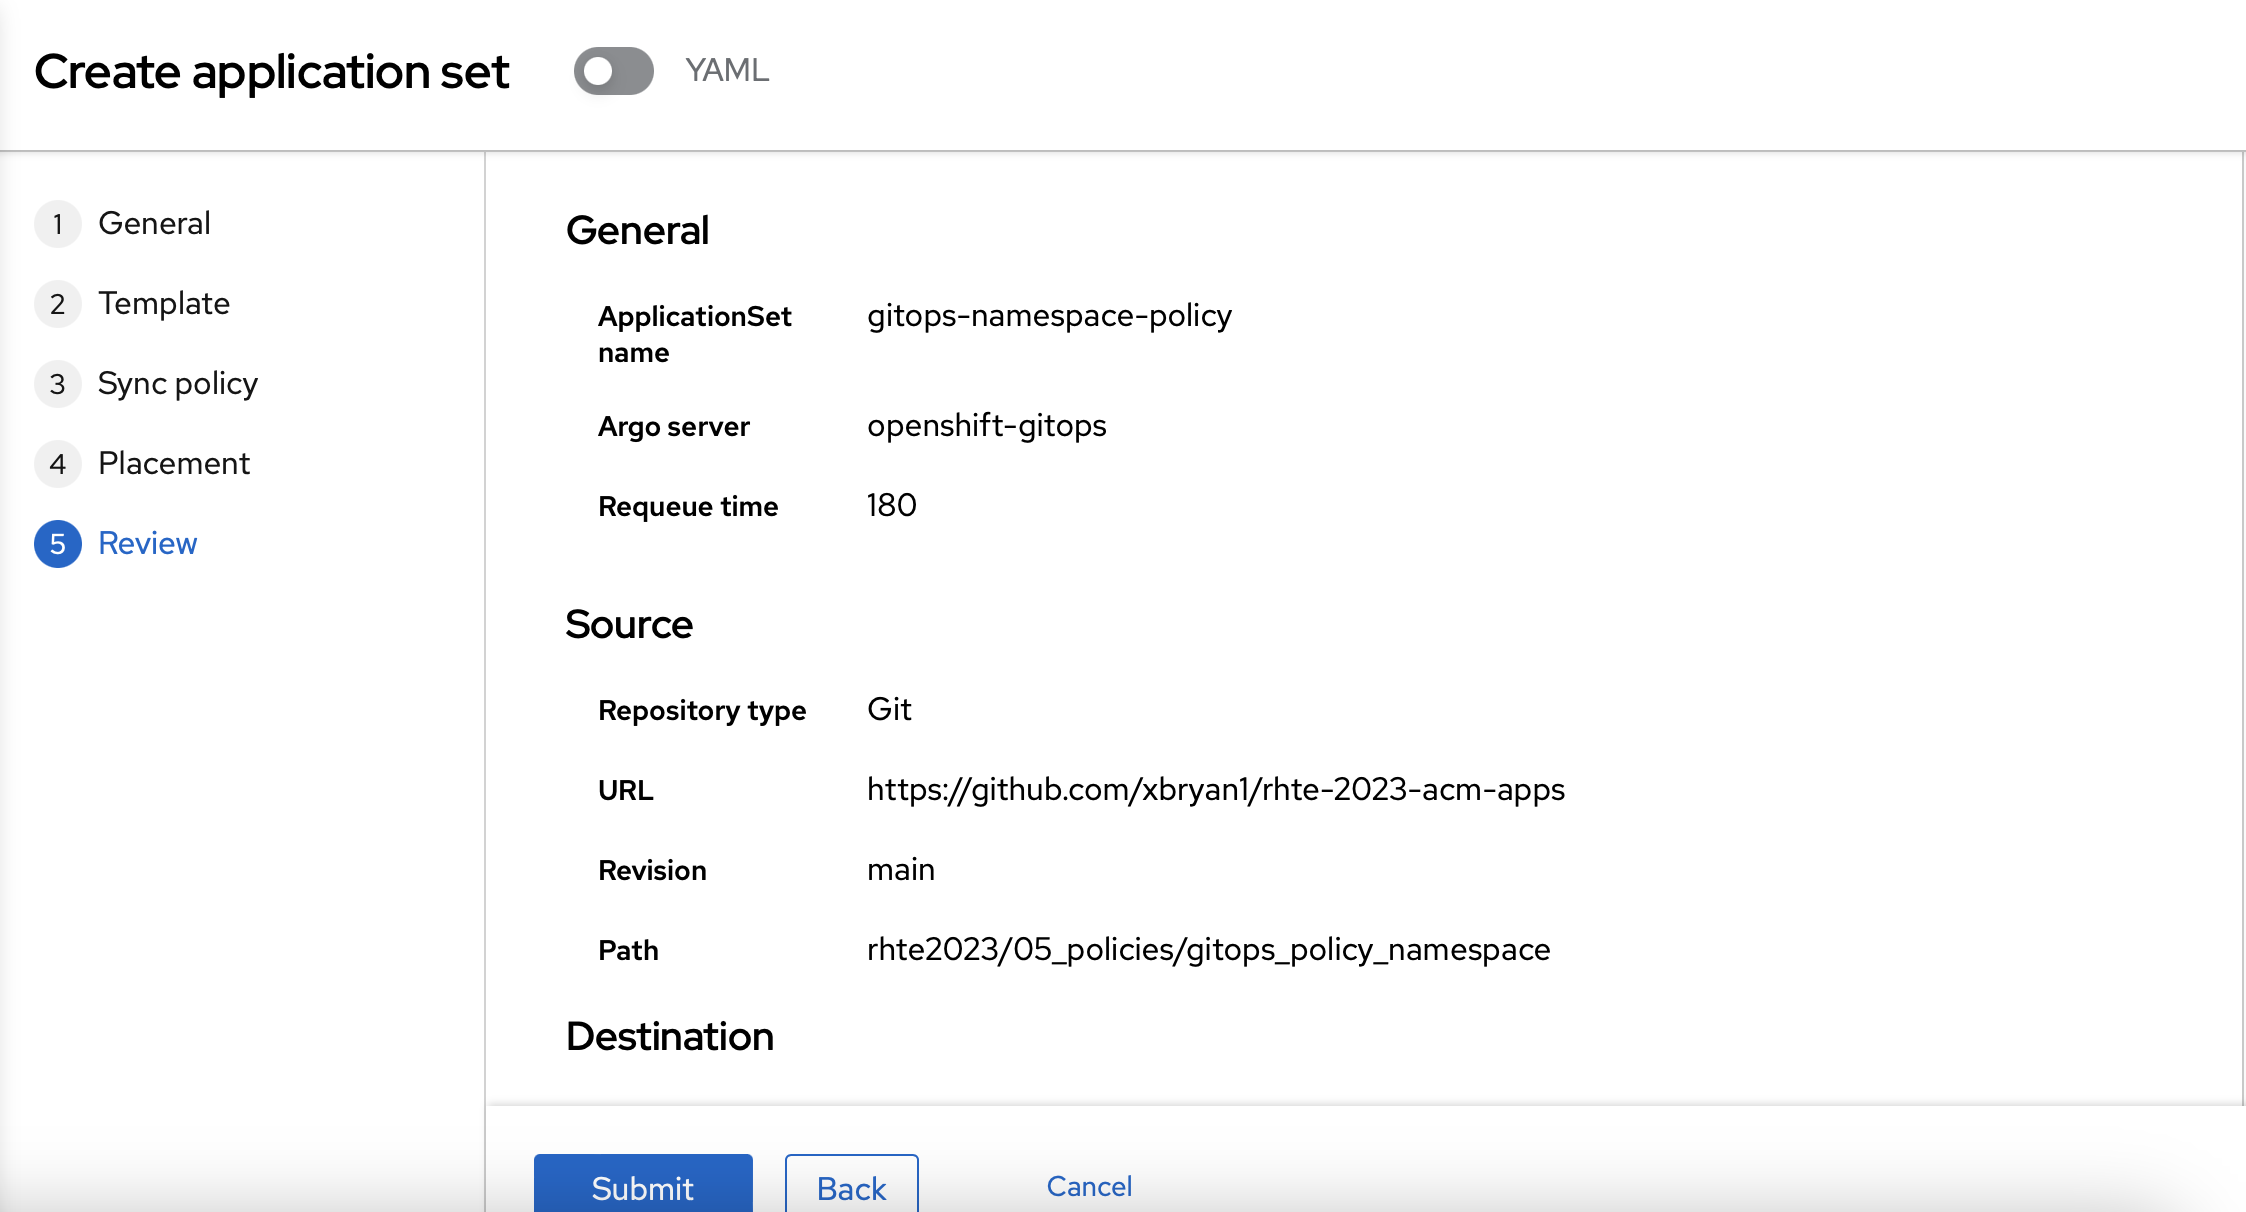
On the next page, you can use "gitops-namespace-policy" as the name and "openshift-gitops" as the Argo server".
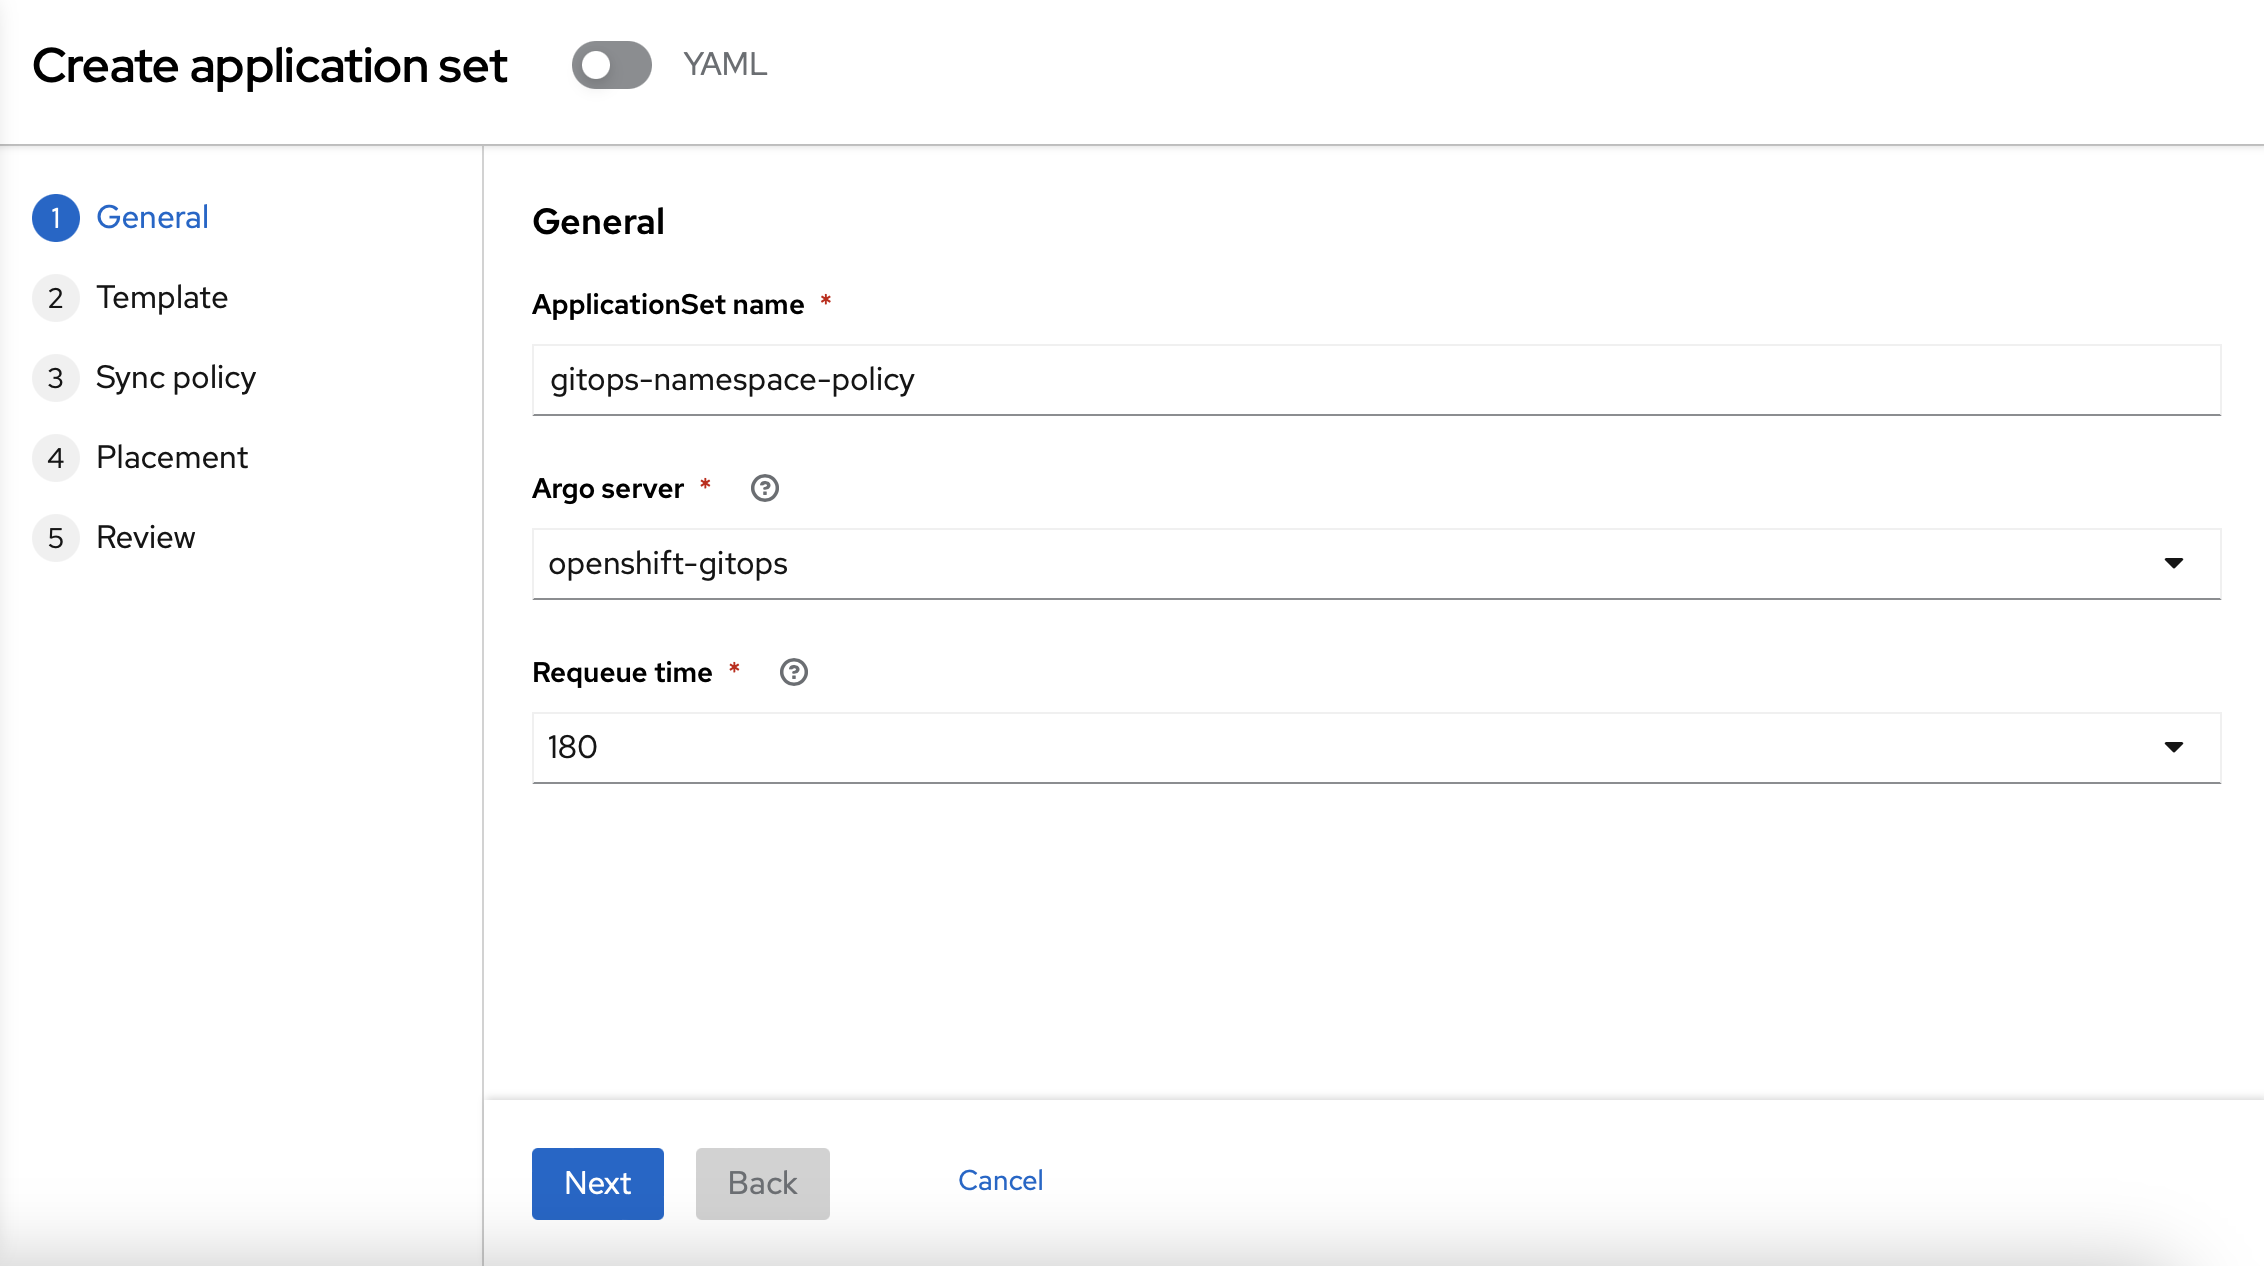
On the "Template" page, you should use the following information:
-
Repository type: Git
-
Revision: main
-
Path: rhte2023/05_policies/gitops_policy_namespace
-
Remote namespace: gitops-policies
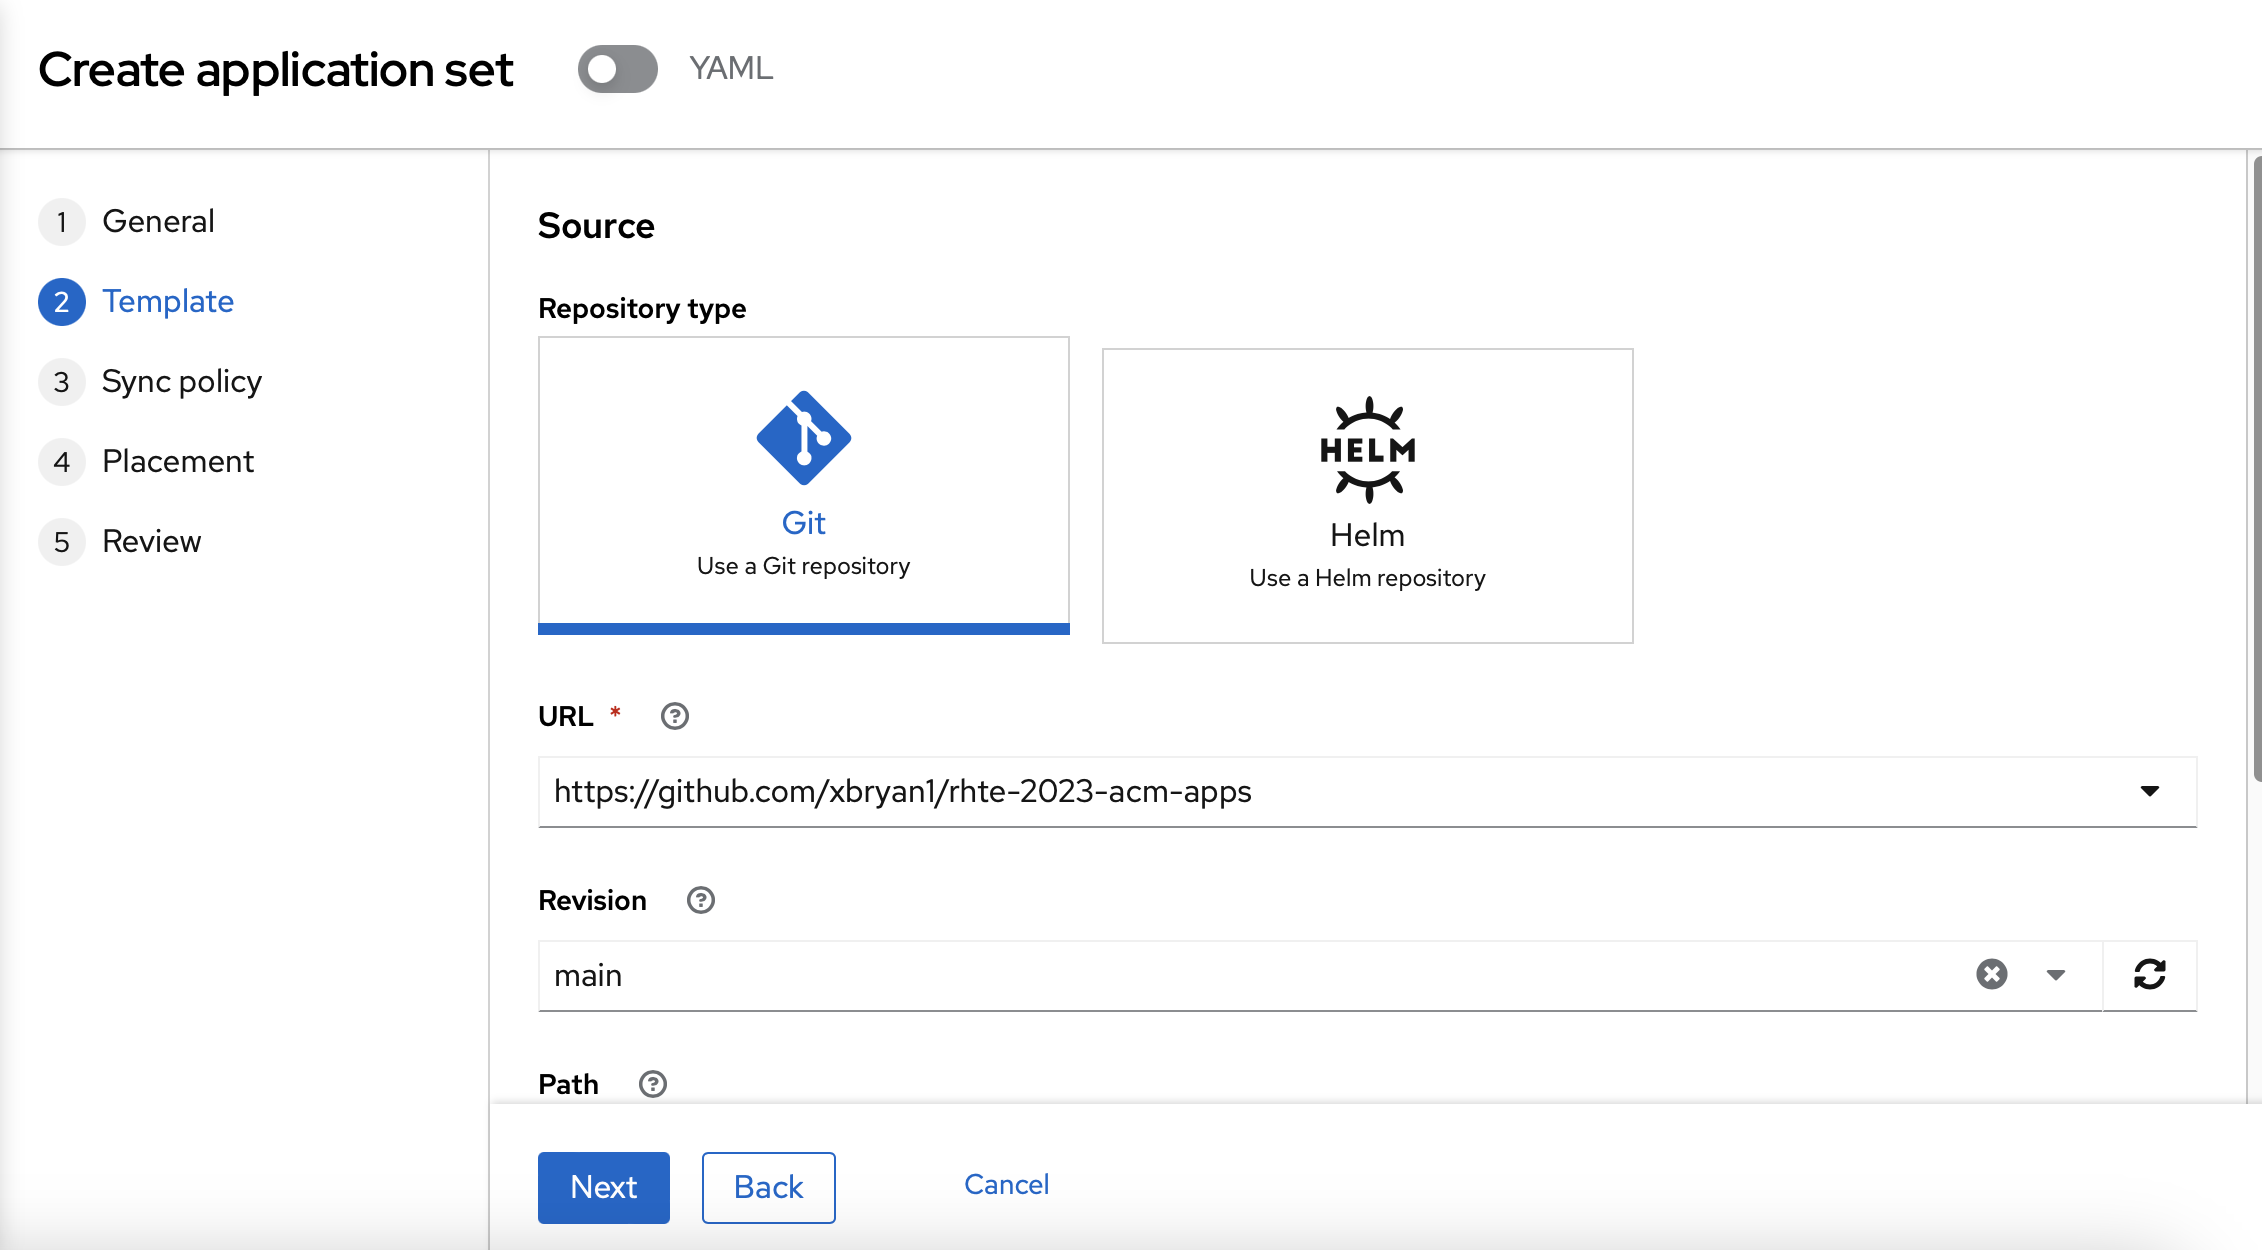
You can use the default values on the "Sync policy" page.
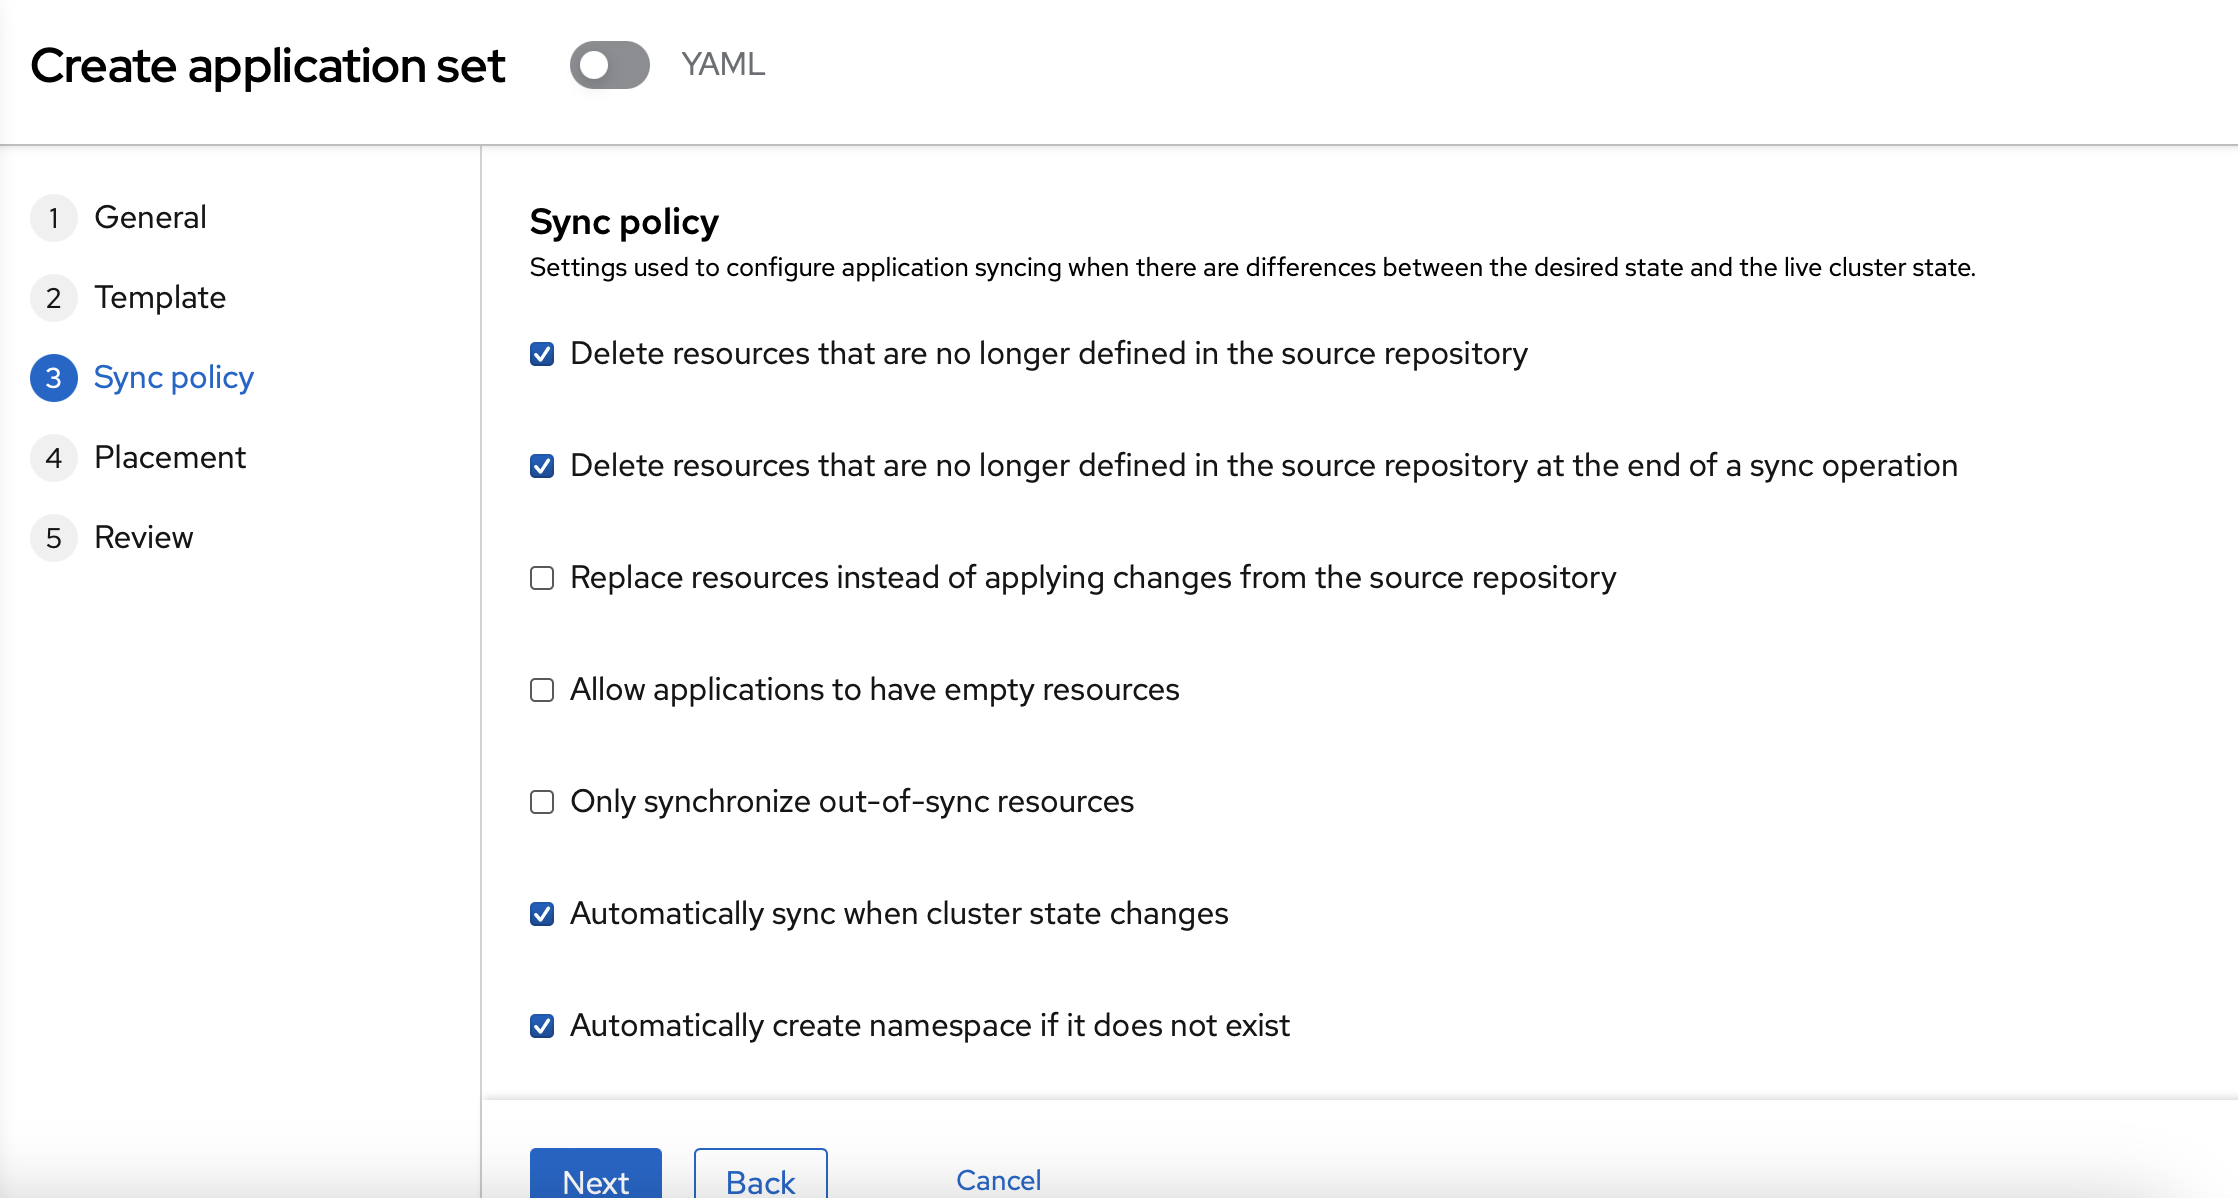
You should use "rhte2023-gitops-clusters as the "Existing placement" policy.
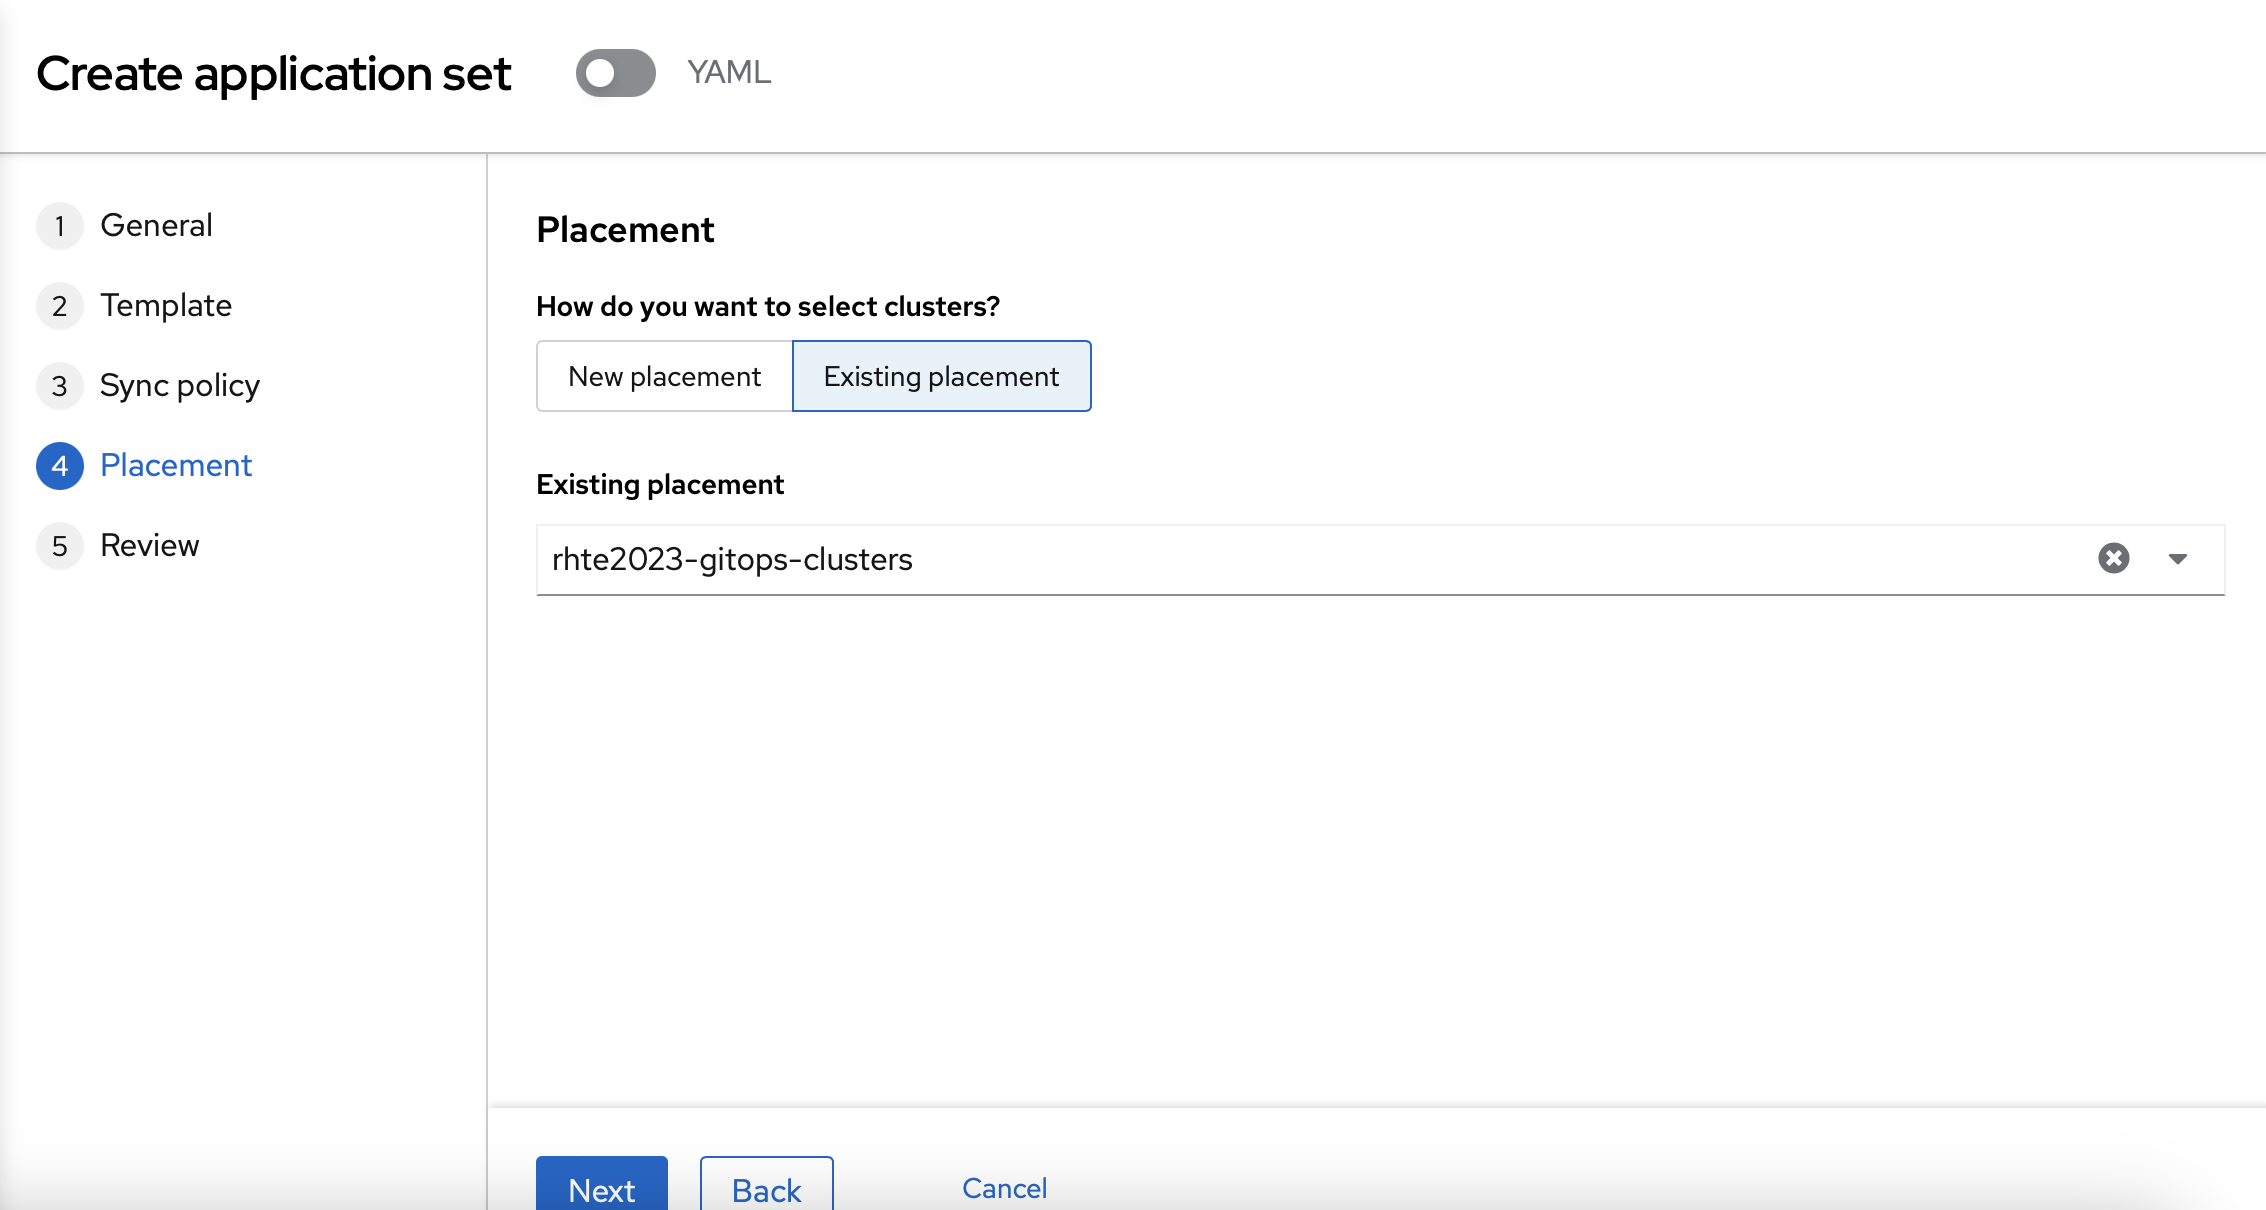
Now, you can review your policy and create it.
Setup the second policy via GitOps
Before deploying the second policy using GitOps, you need to delete the policy created previously to avoid conflicts.
First, you need to access into the Red Hat Advanced Management web interface and select "Governance".
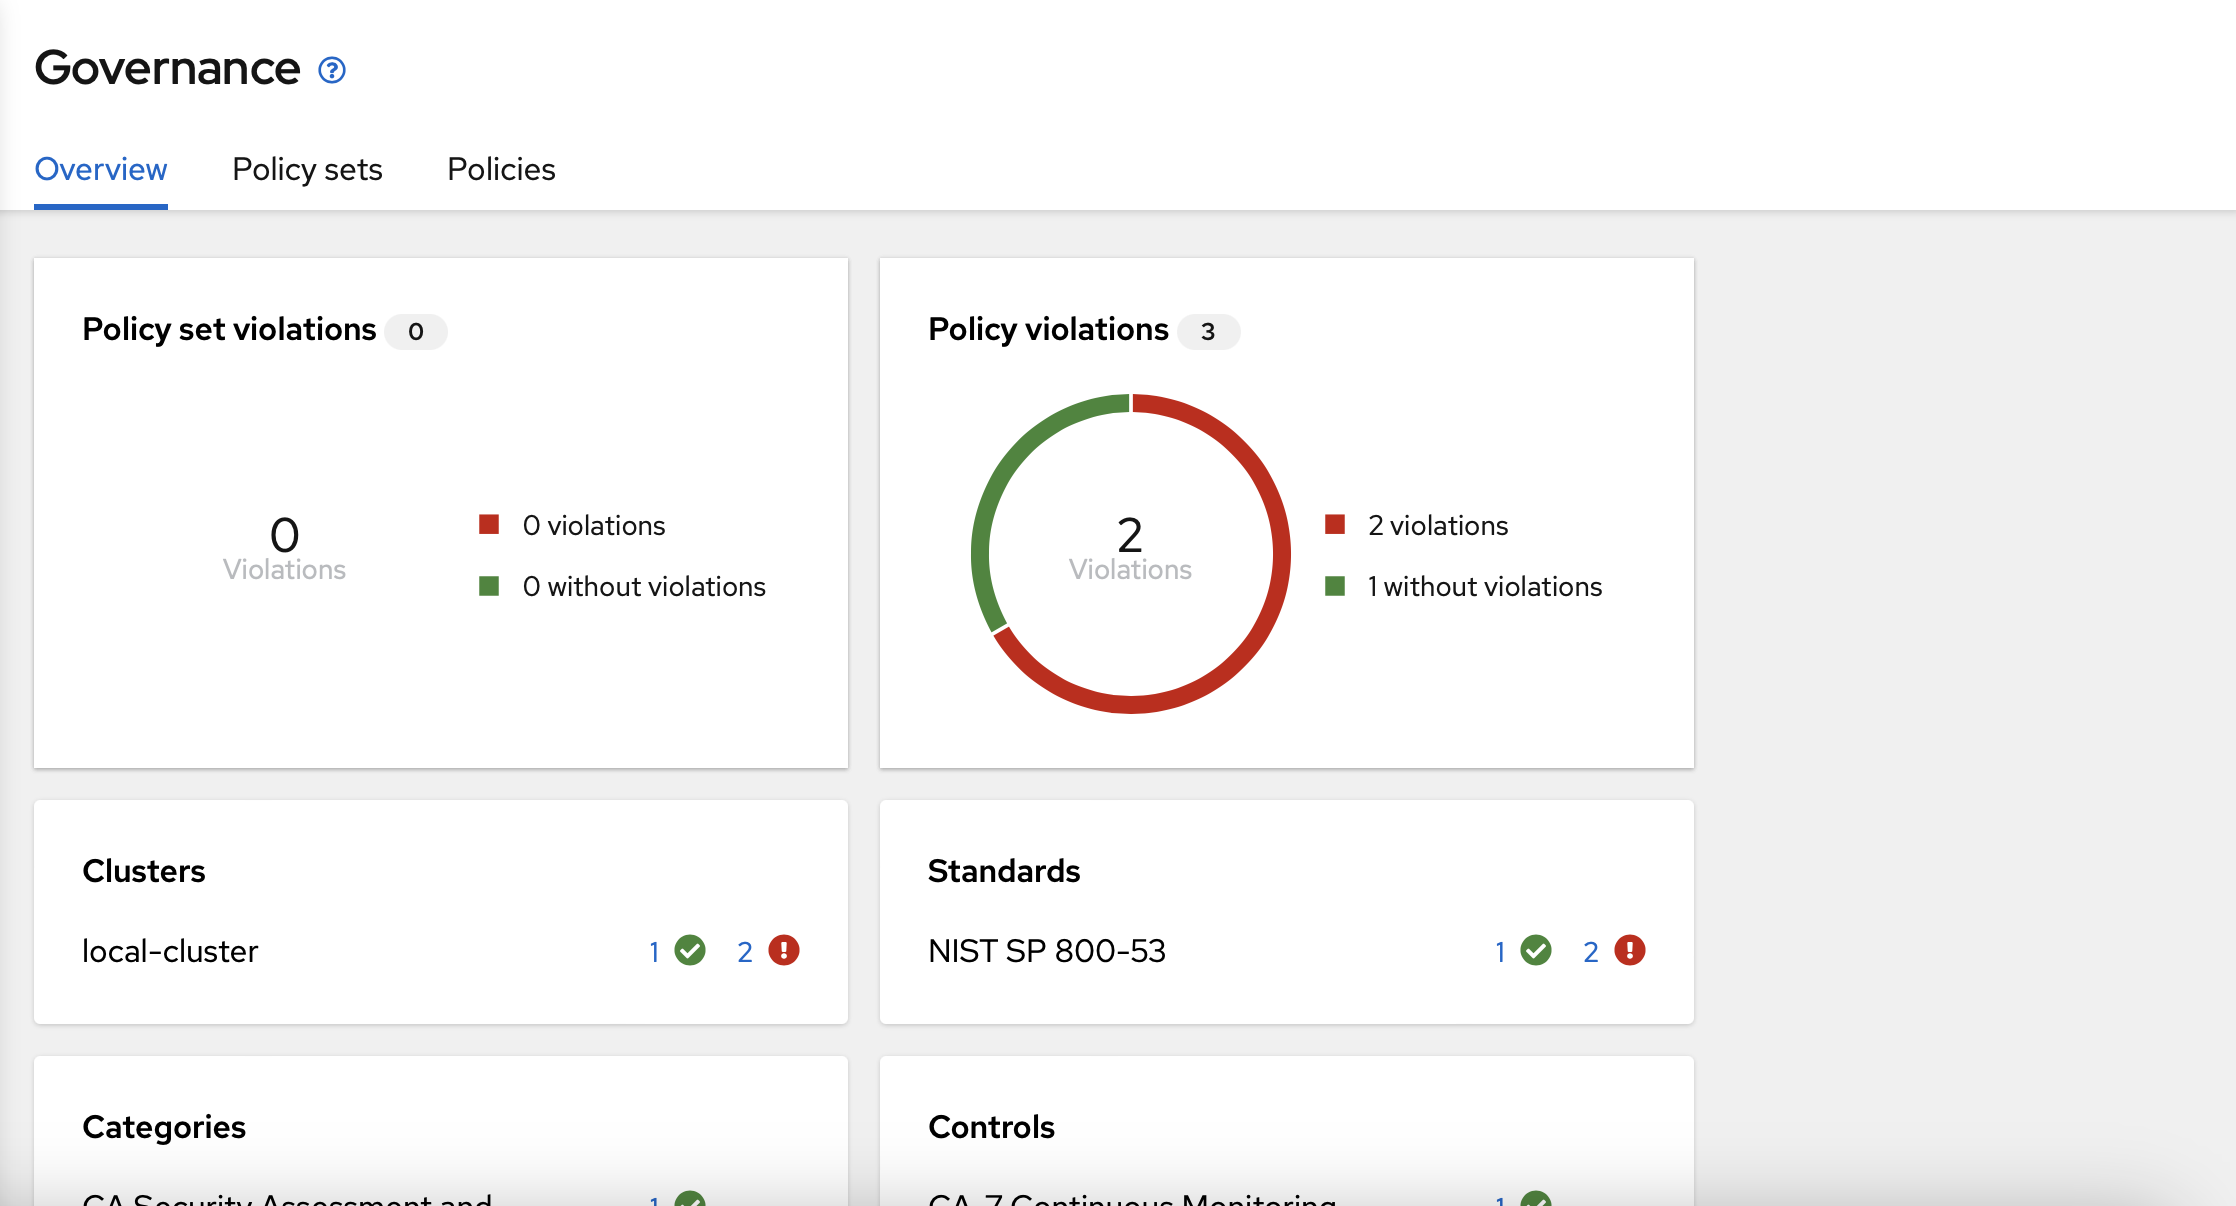
Now, you need to choose "Policies" on the top center menu.
You need to choose the "compliance-policy" created previosly, and click into the three dot button on the right bottom side.
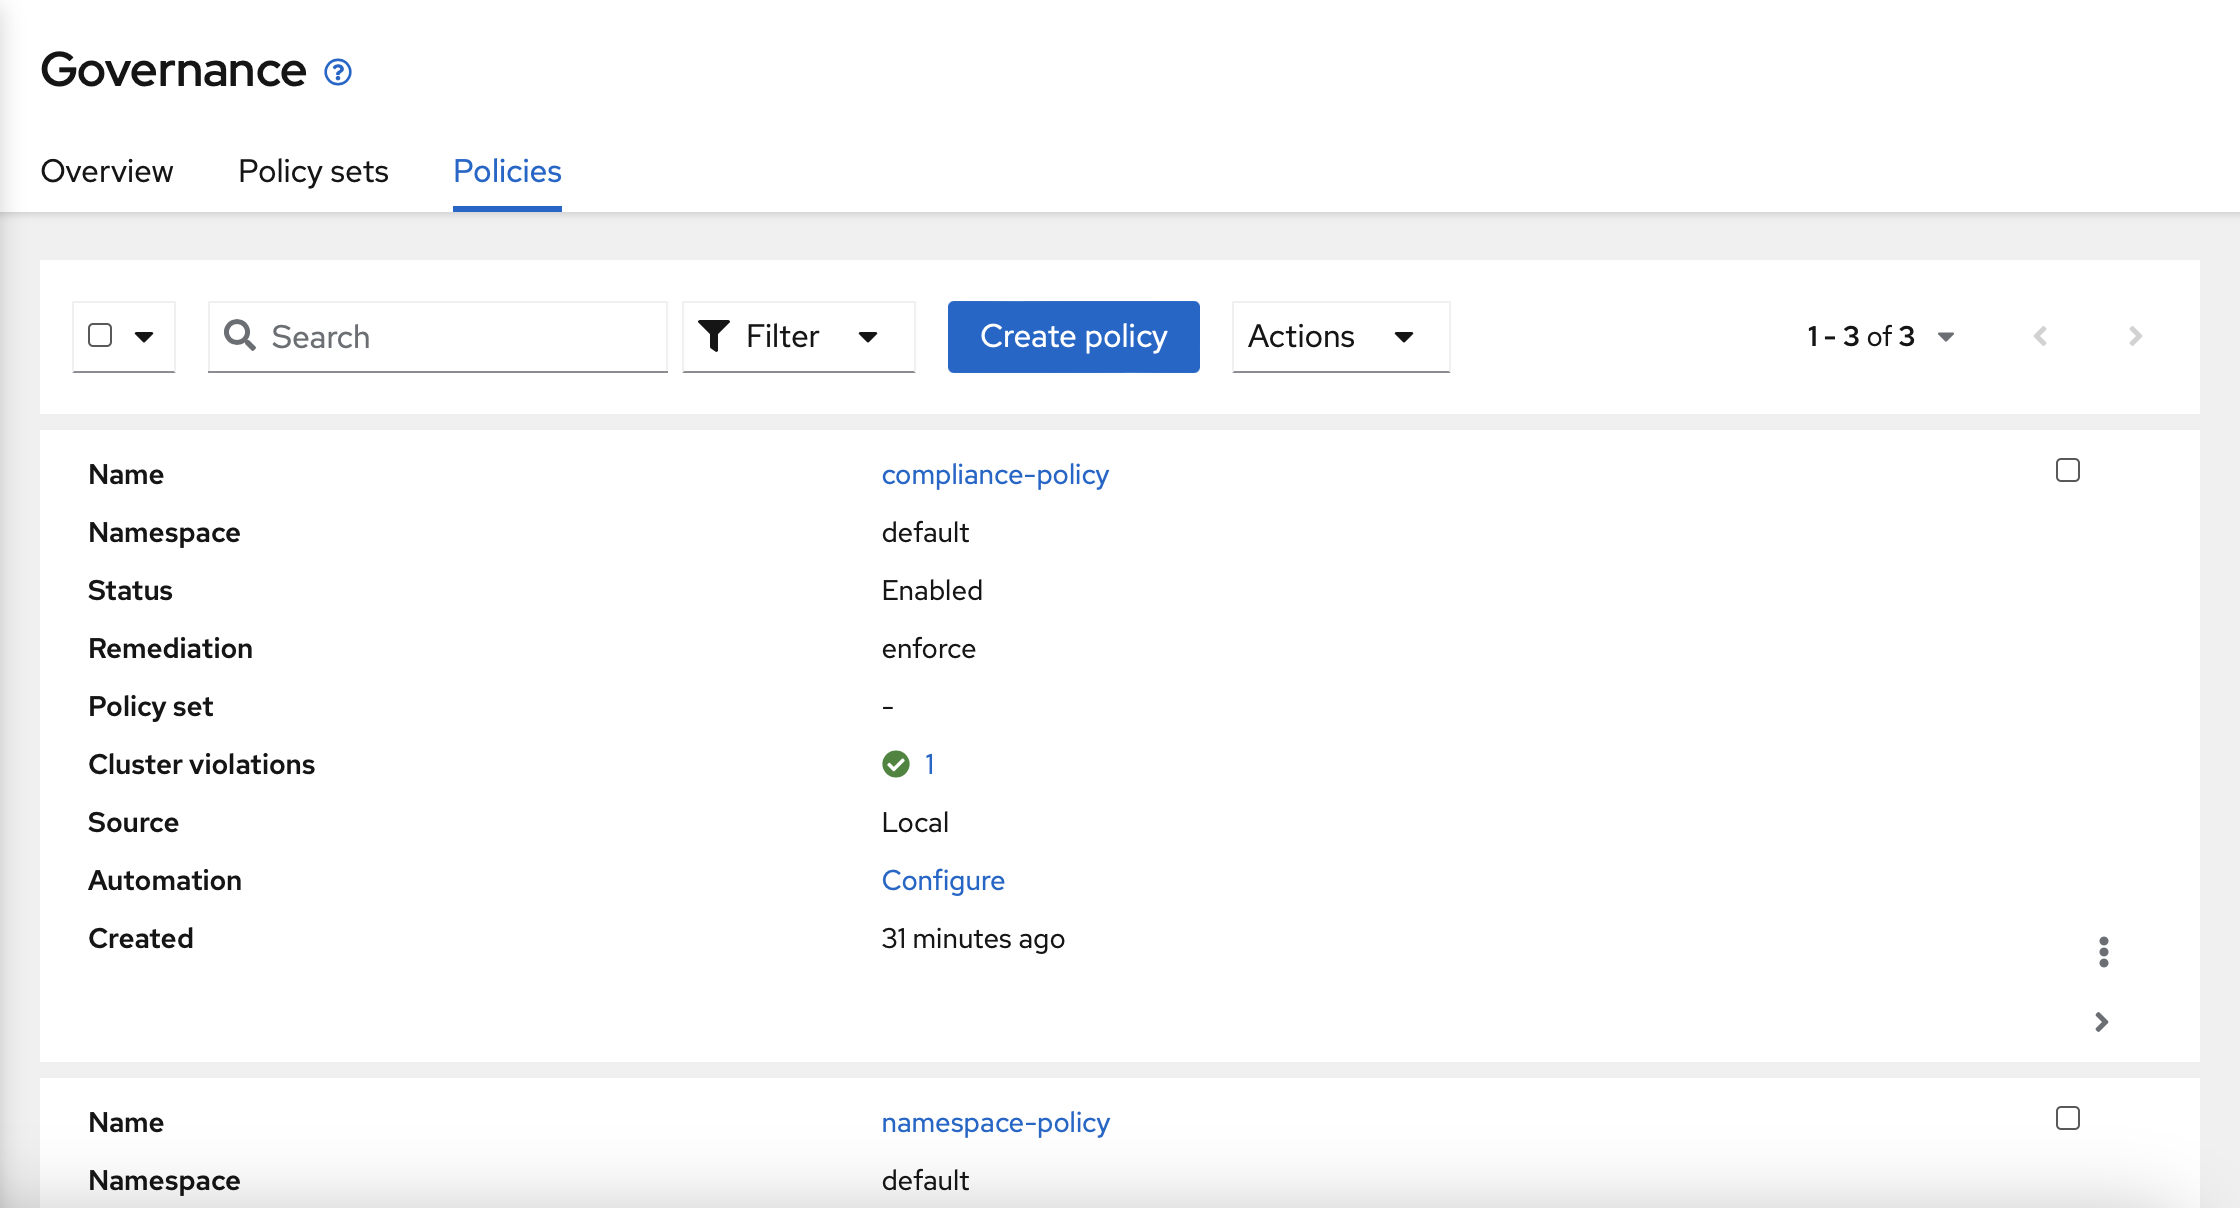
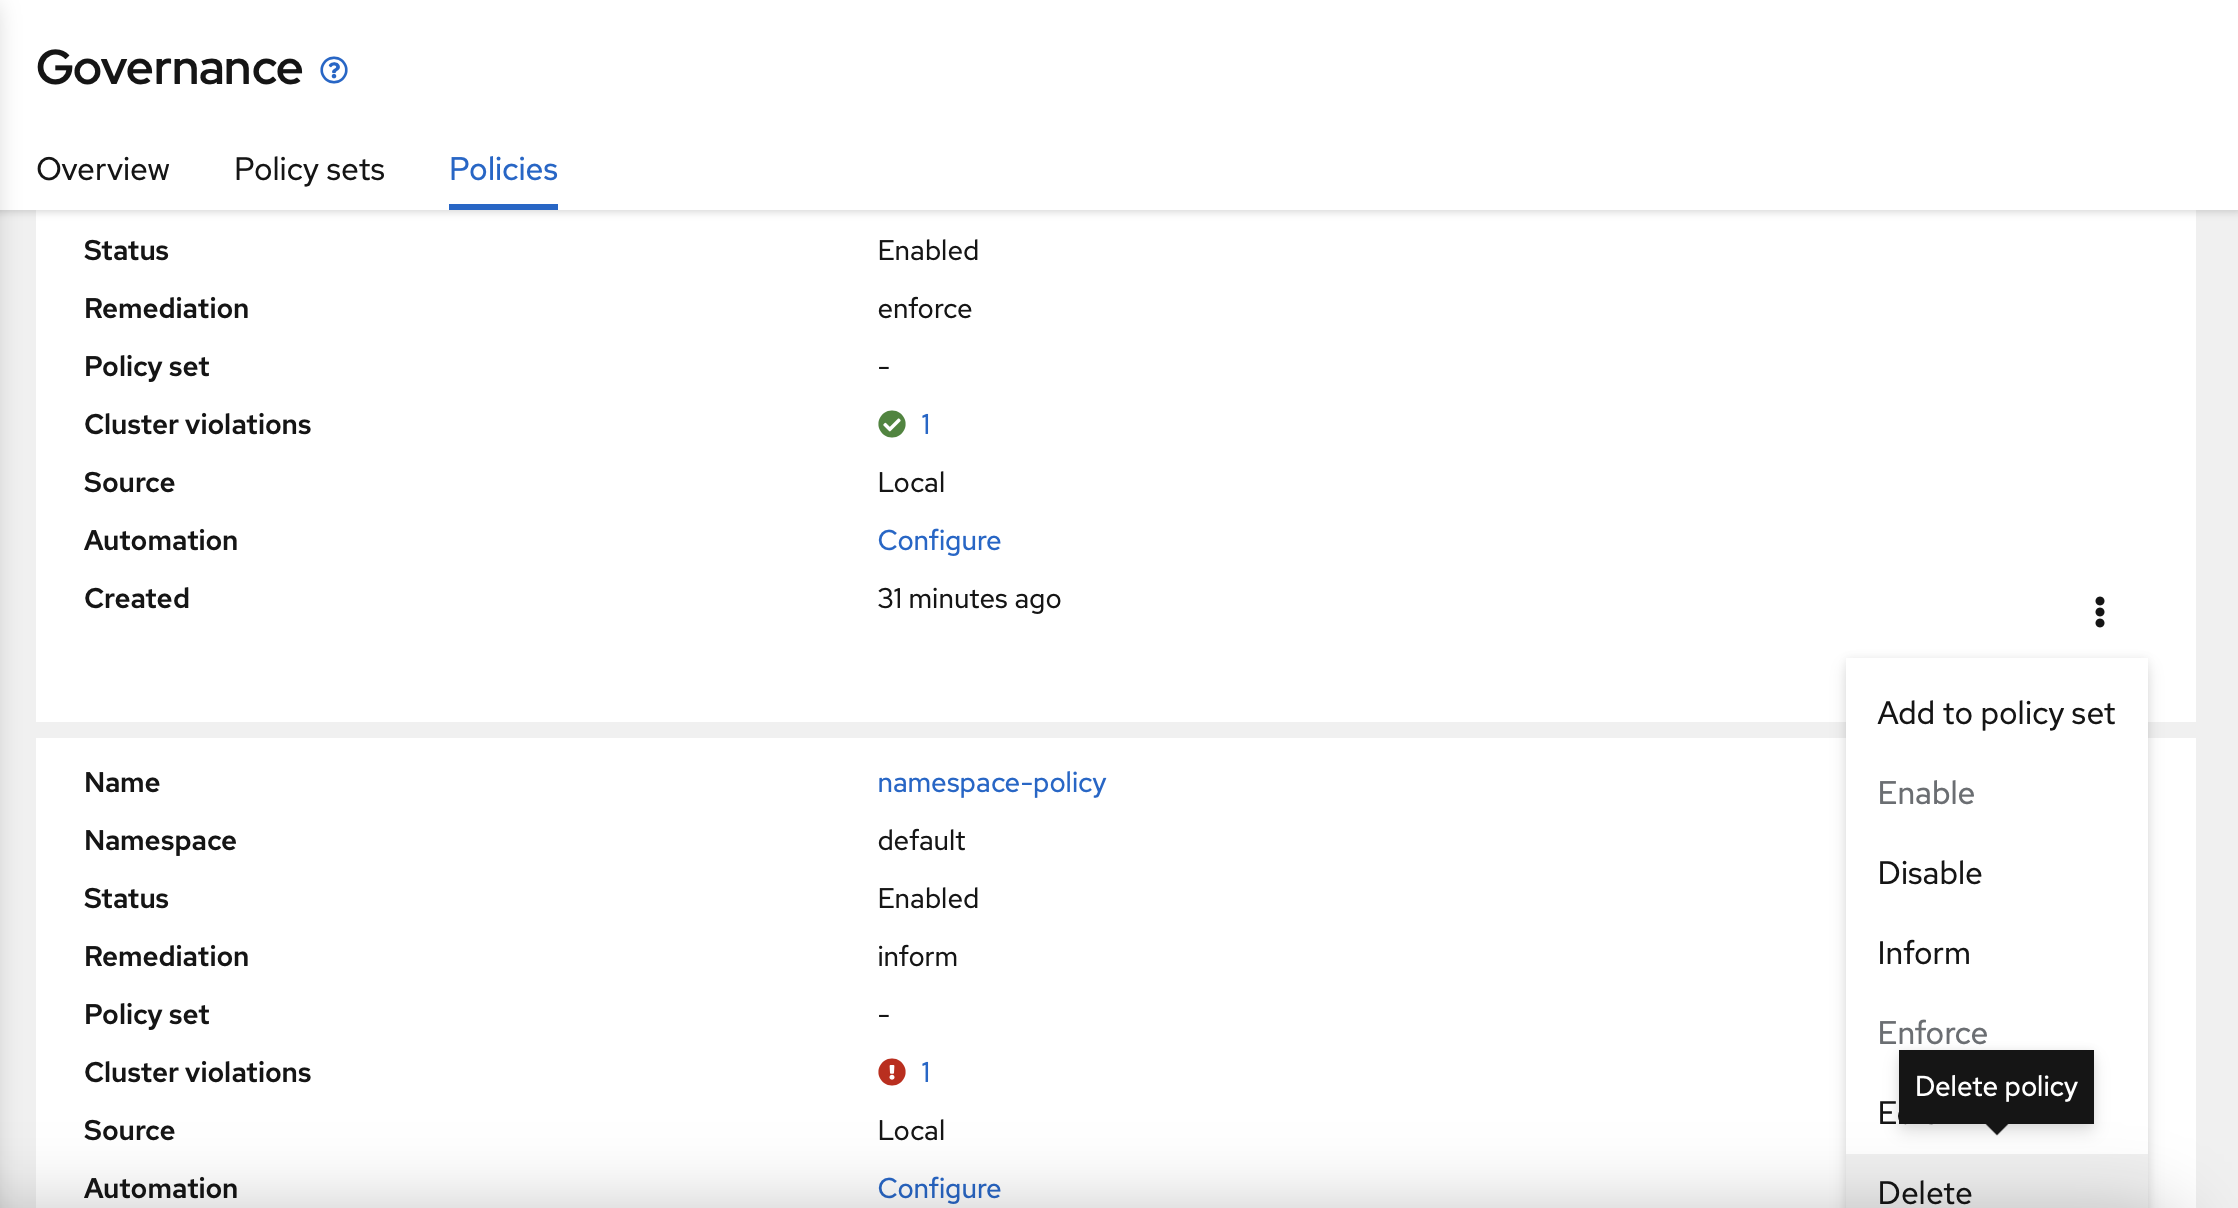
Select "Delete" on the menu.
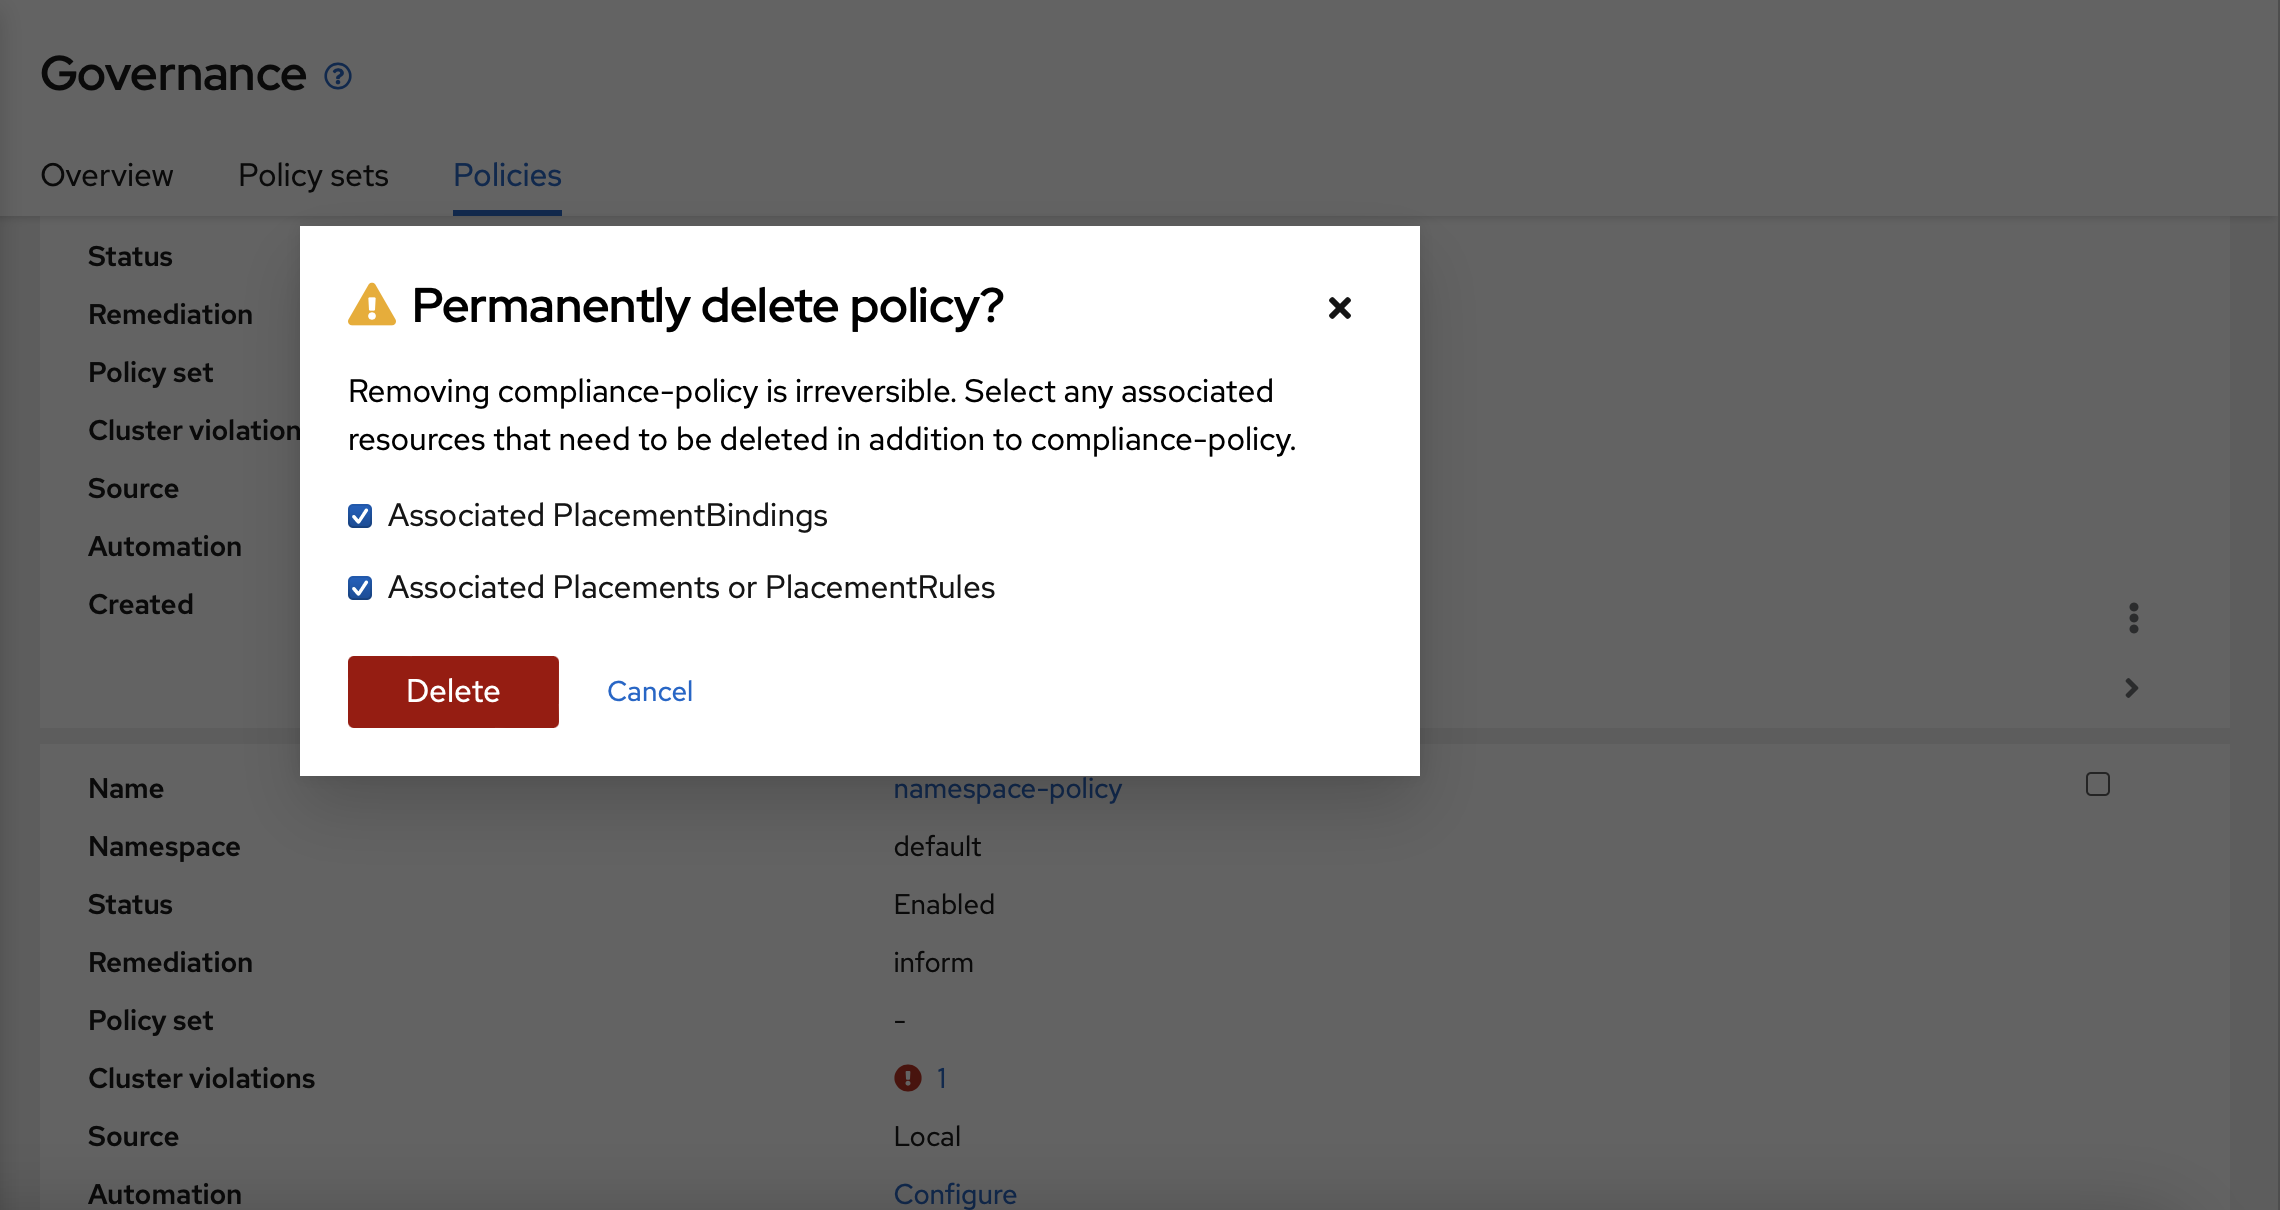
Ensure that the two options are marked and delete the policy.
Now, you can to access into the Red Hat Advanced Management web interface, and select "Applications".

You should go to "Create application".

You should select "ApplicationSet".
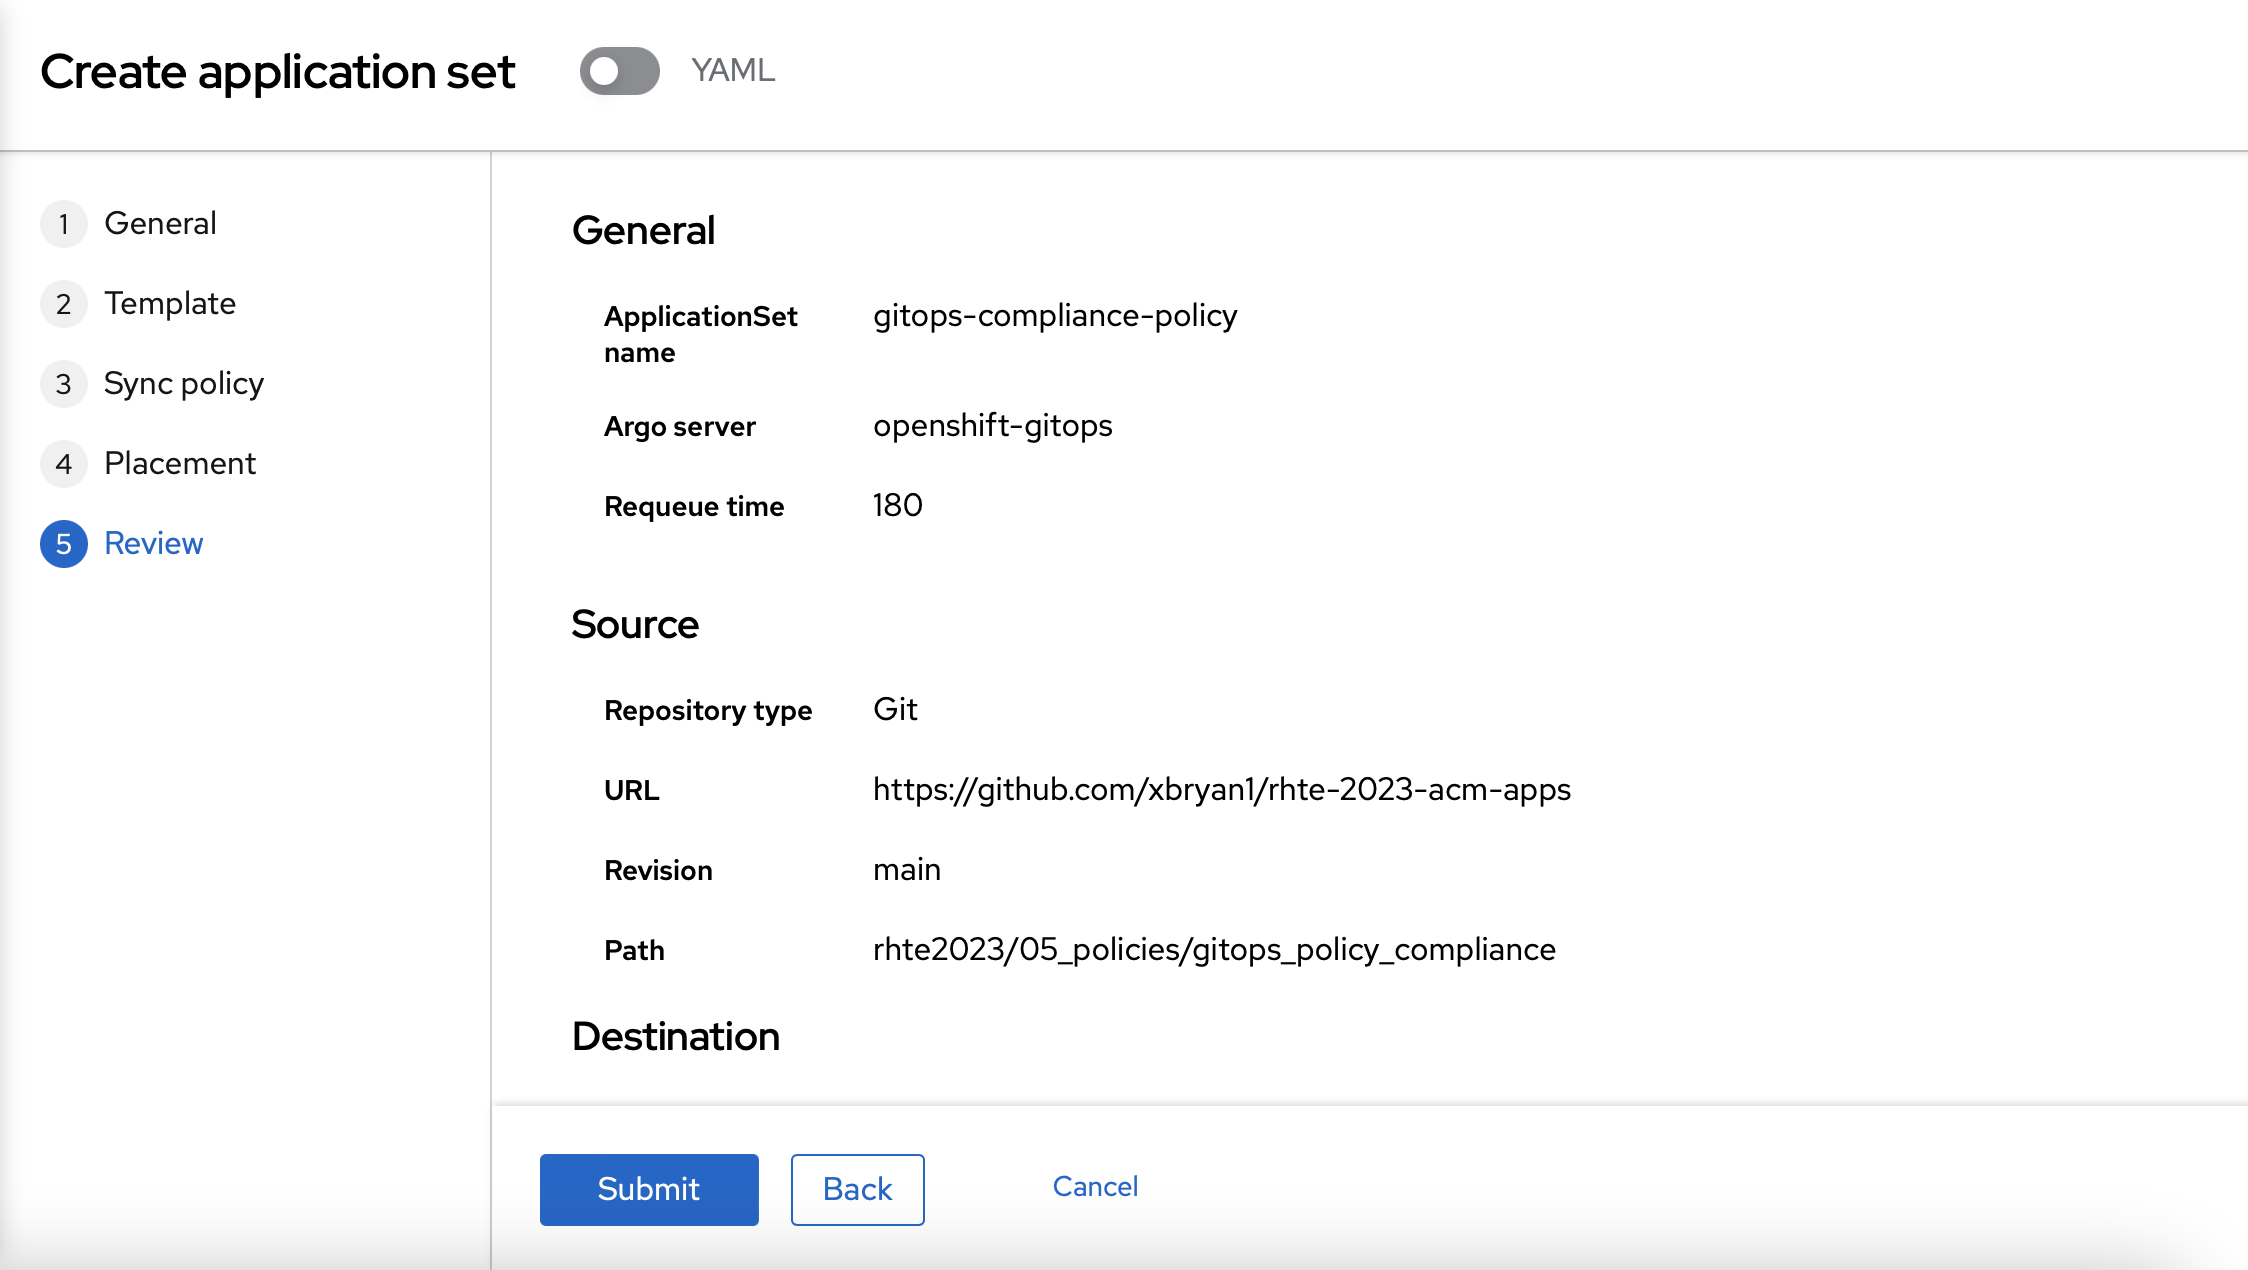
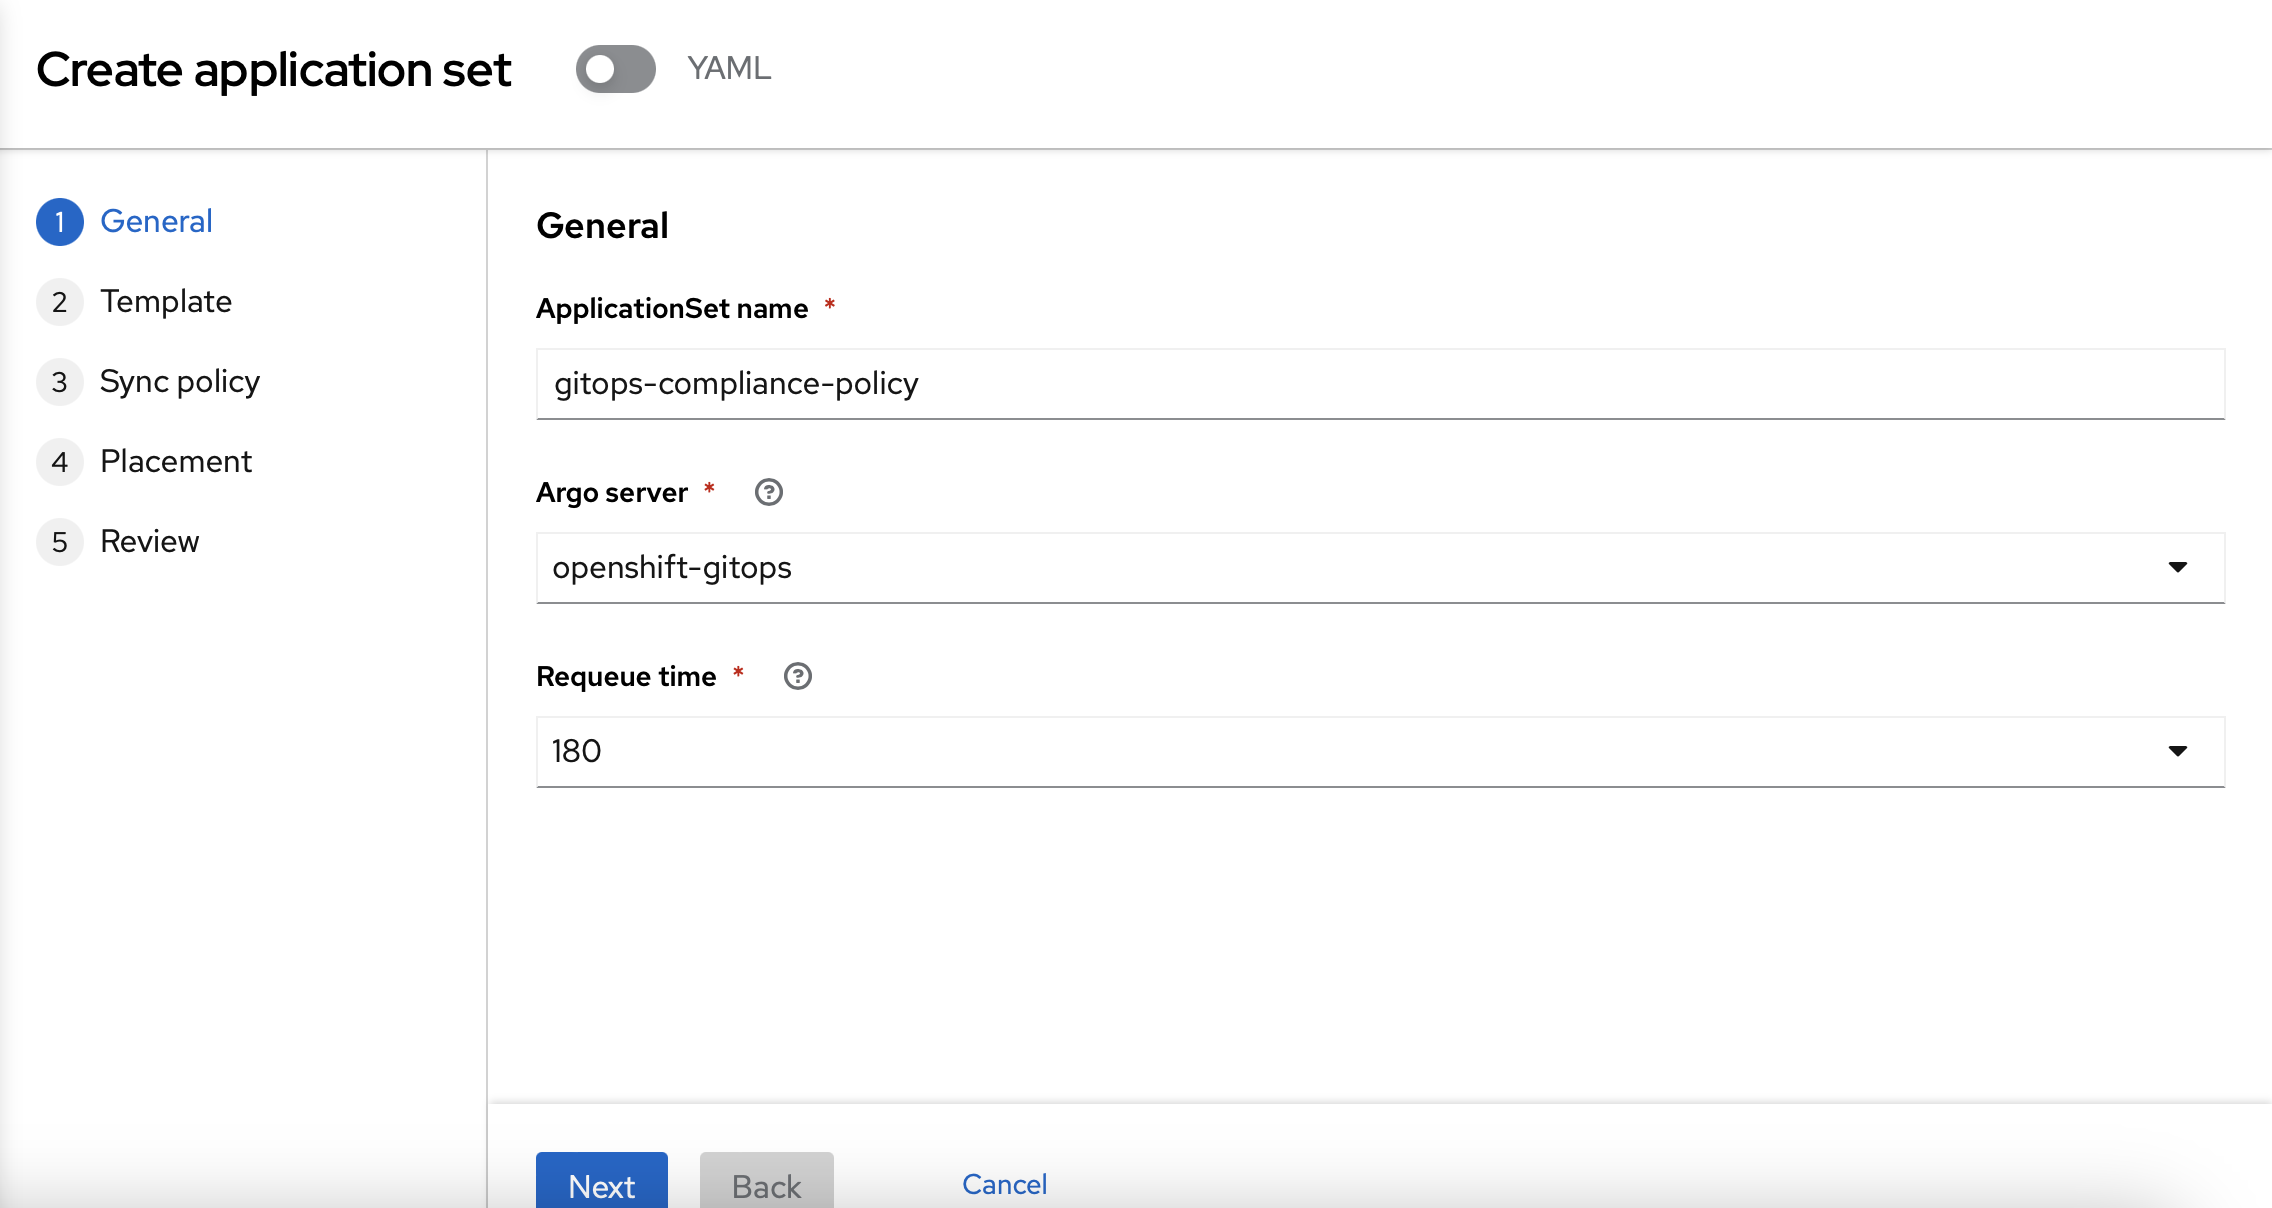
On the next page, you can use "gitops-compliance-policy" as the name and "openshift-gitops" as the Argo server".
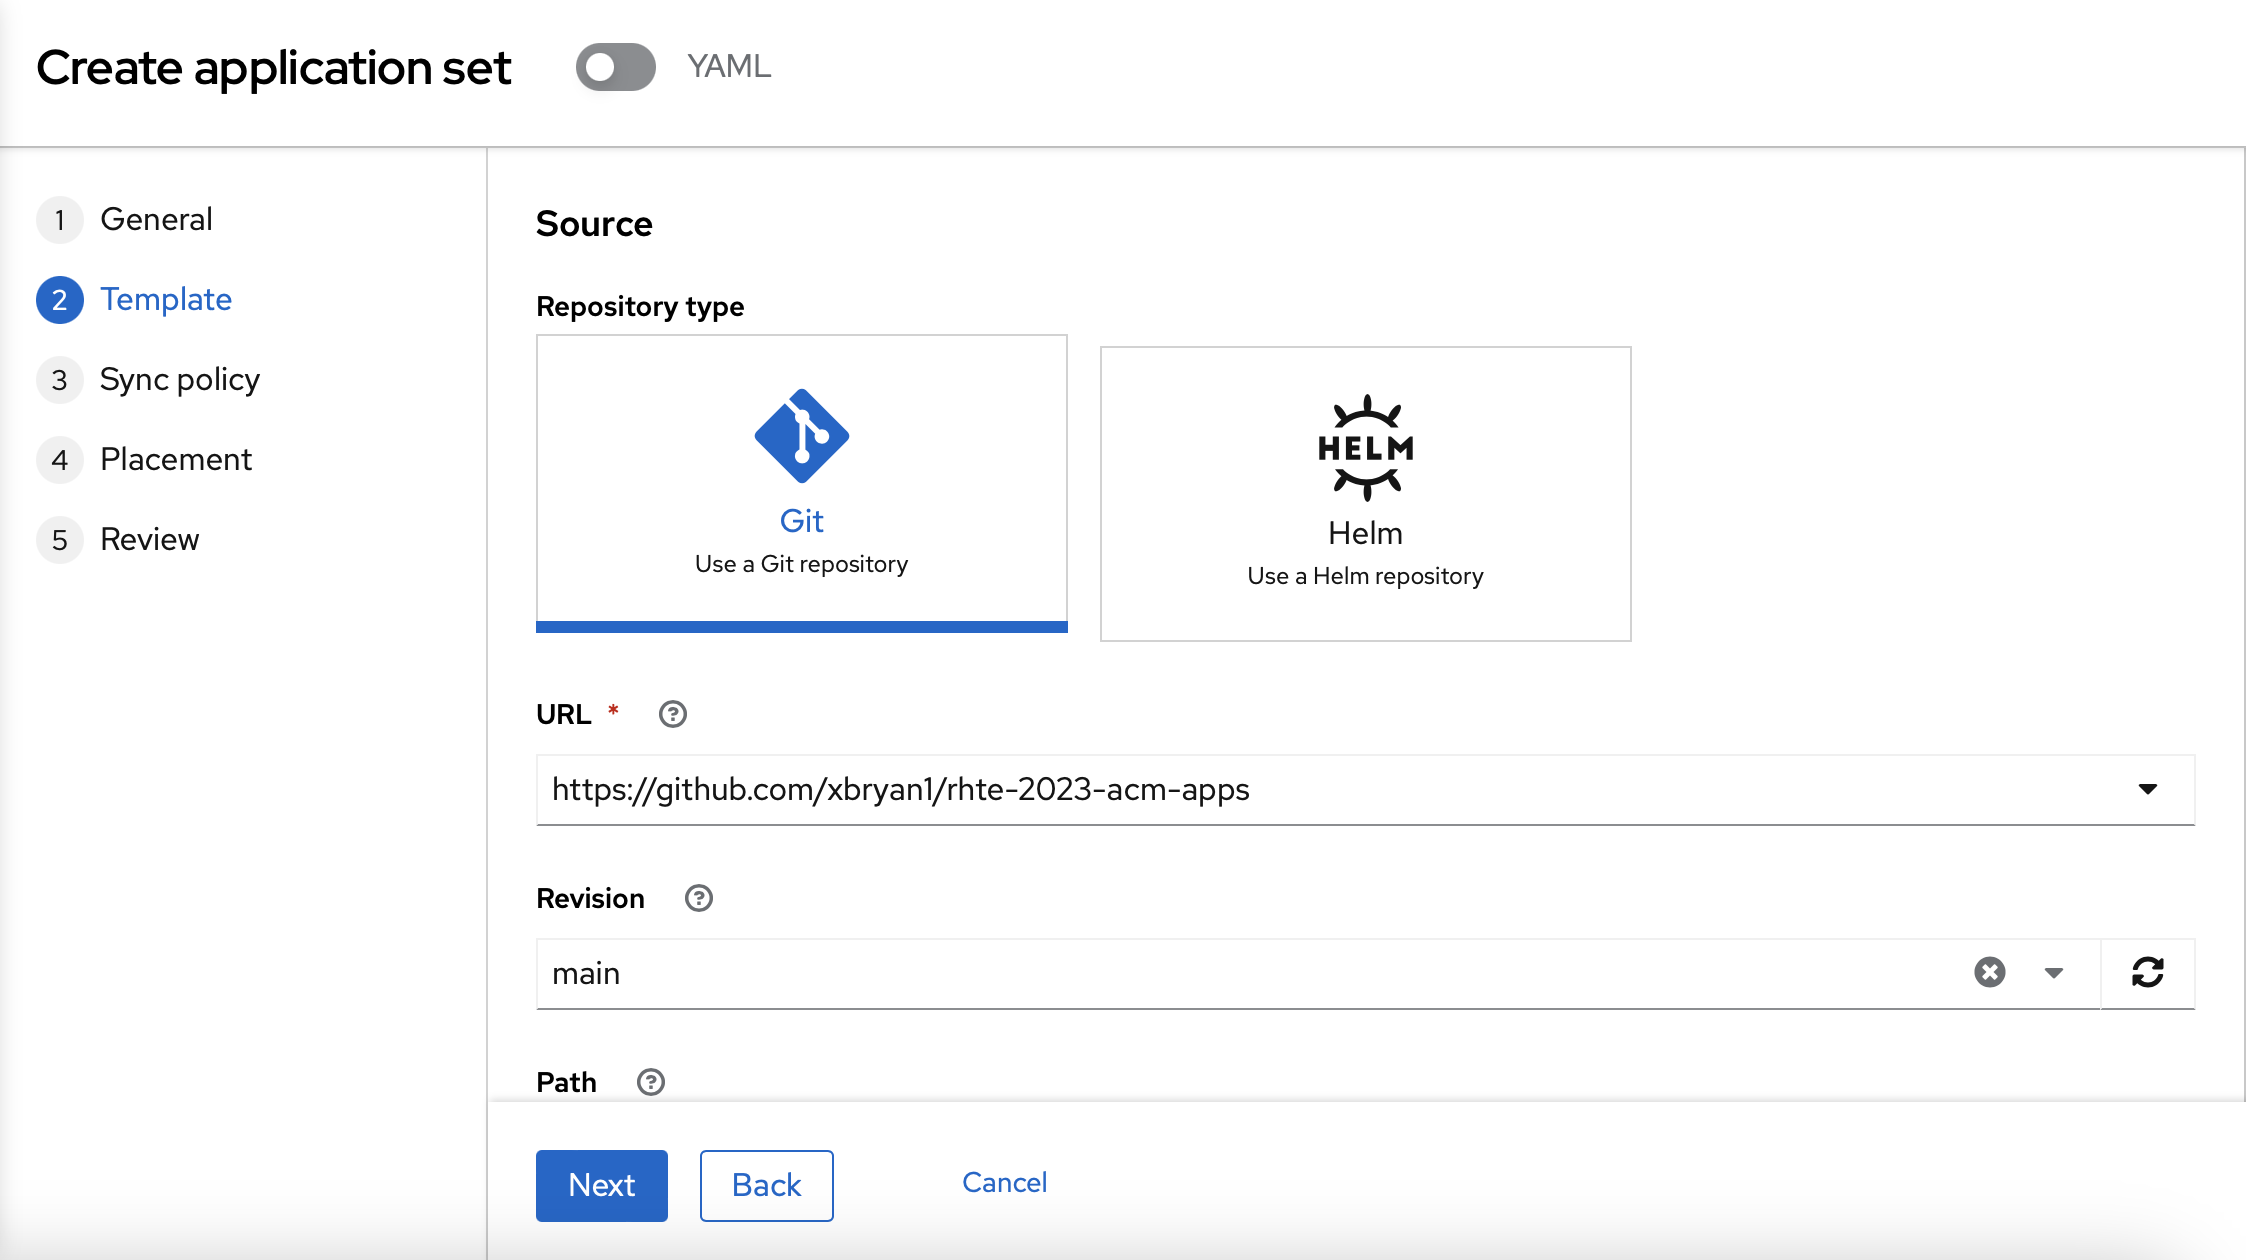
On the "Template" page, you should use the following information:
-
Repository type: Git
-
Revision: main
-
Path: rhte2023/05_policies/gitops_policy_compliance
-
Remote namespace: gitops-policies
You can use the default values on the "Sync policy" page.

You should use "rhte2023-gitops-clusters" as the "Existing placement" policy.

Finally, you can review your policy and create it.
